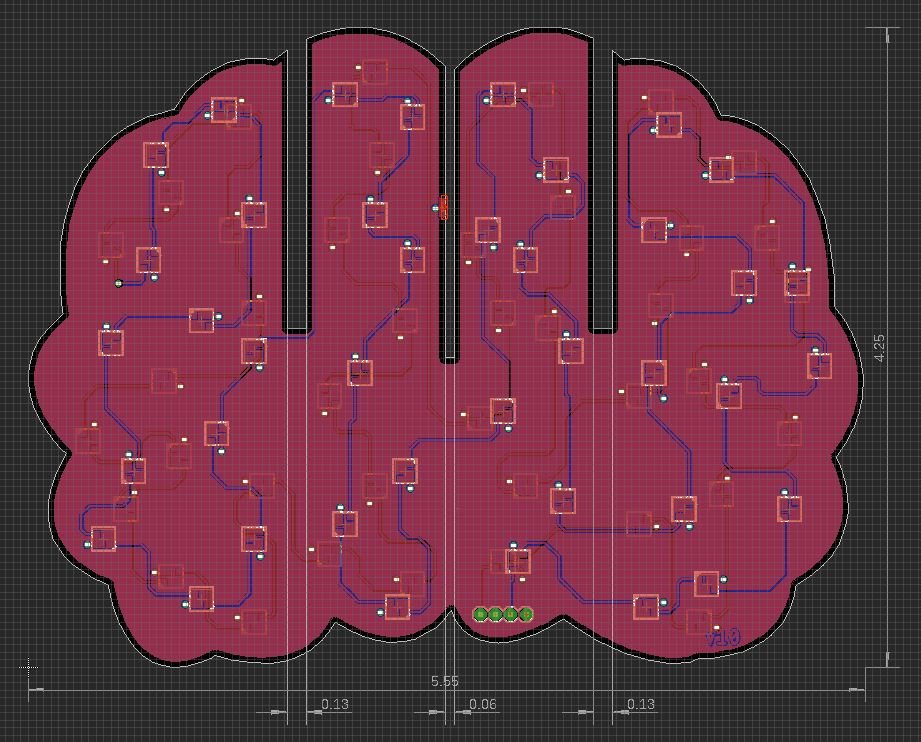
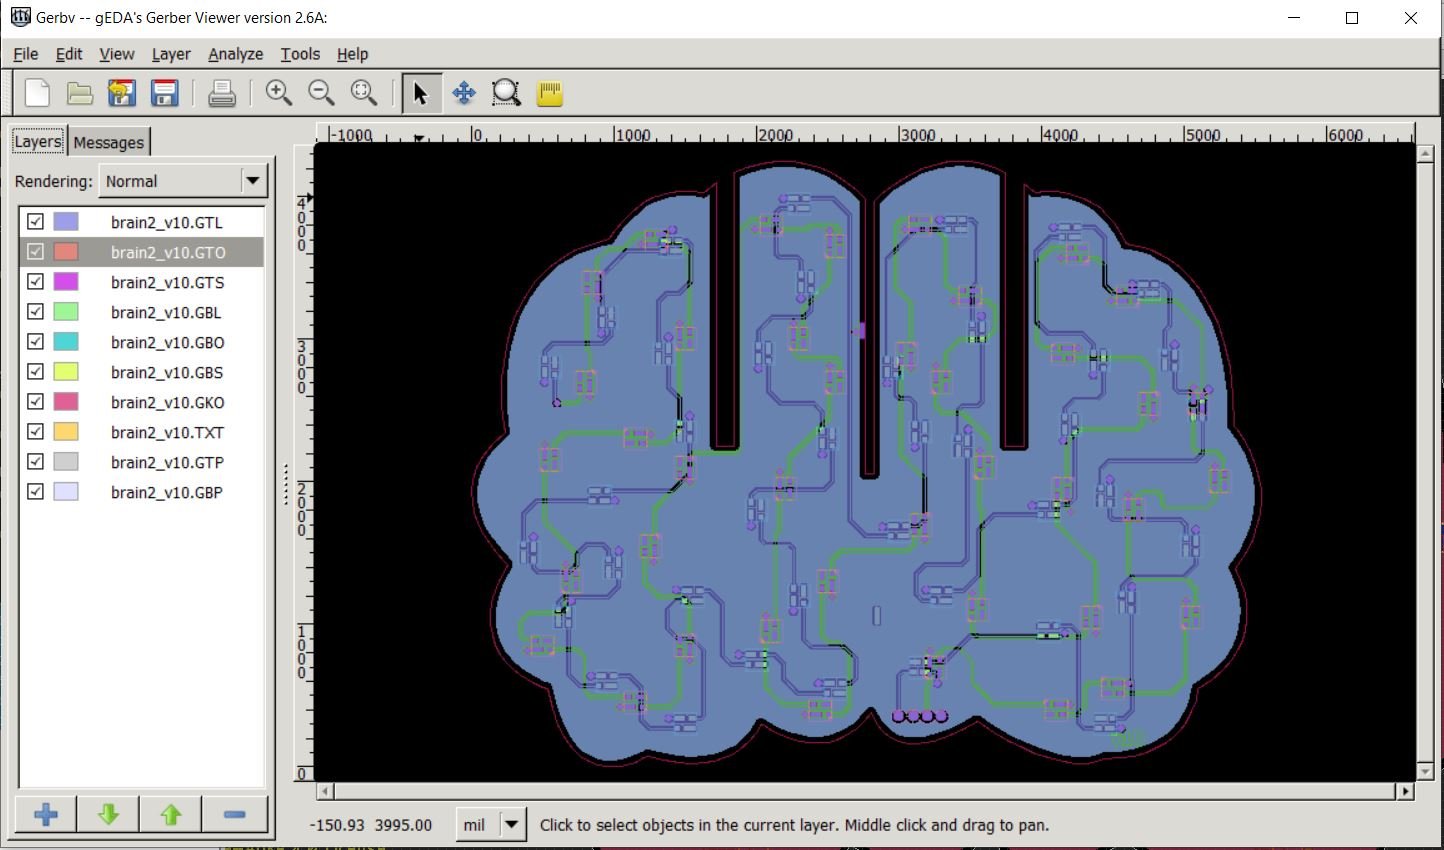
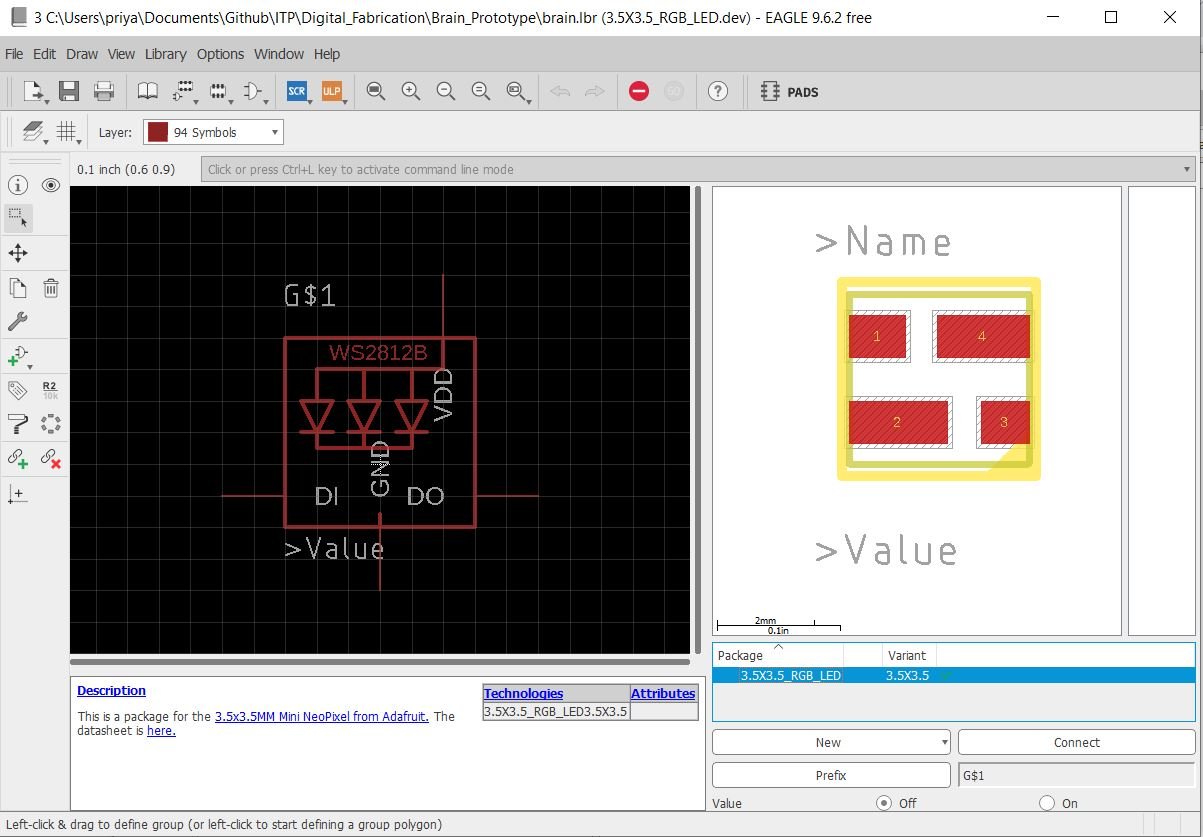
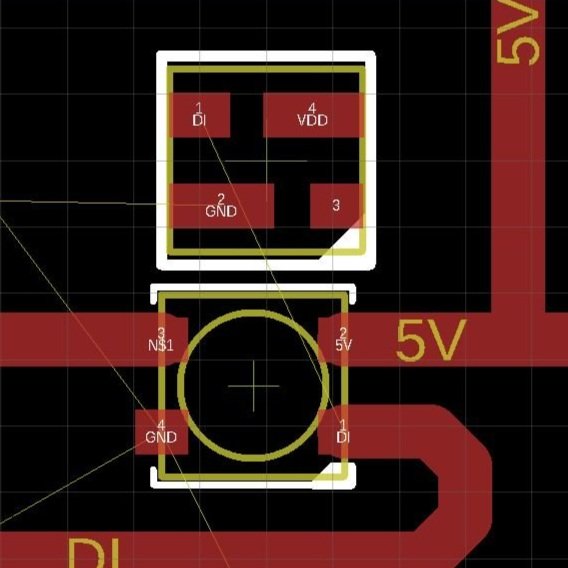
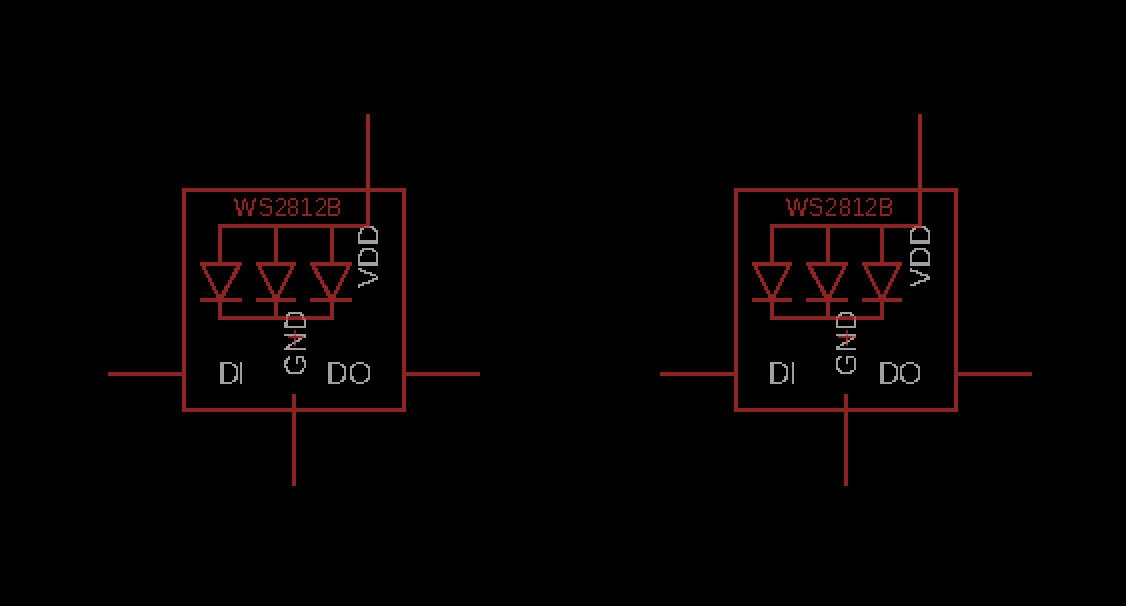
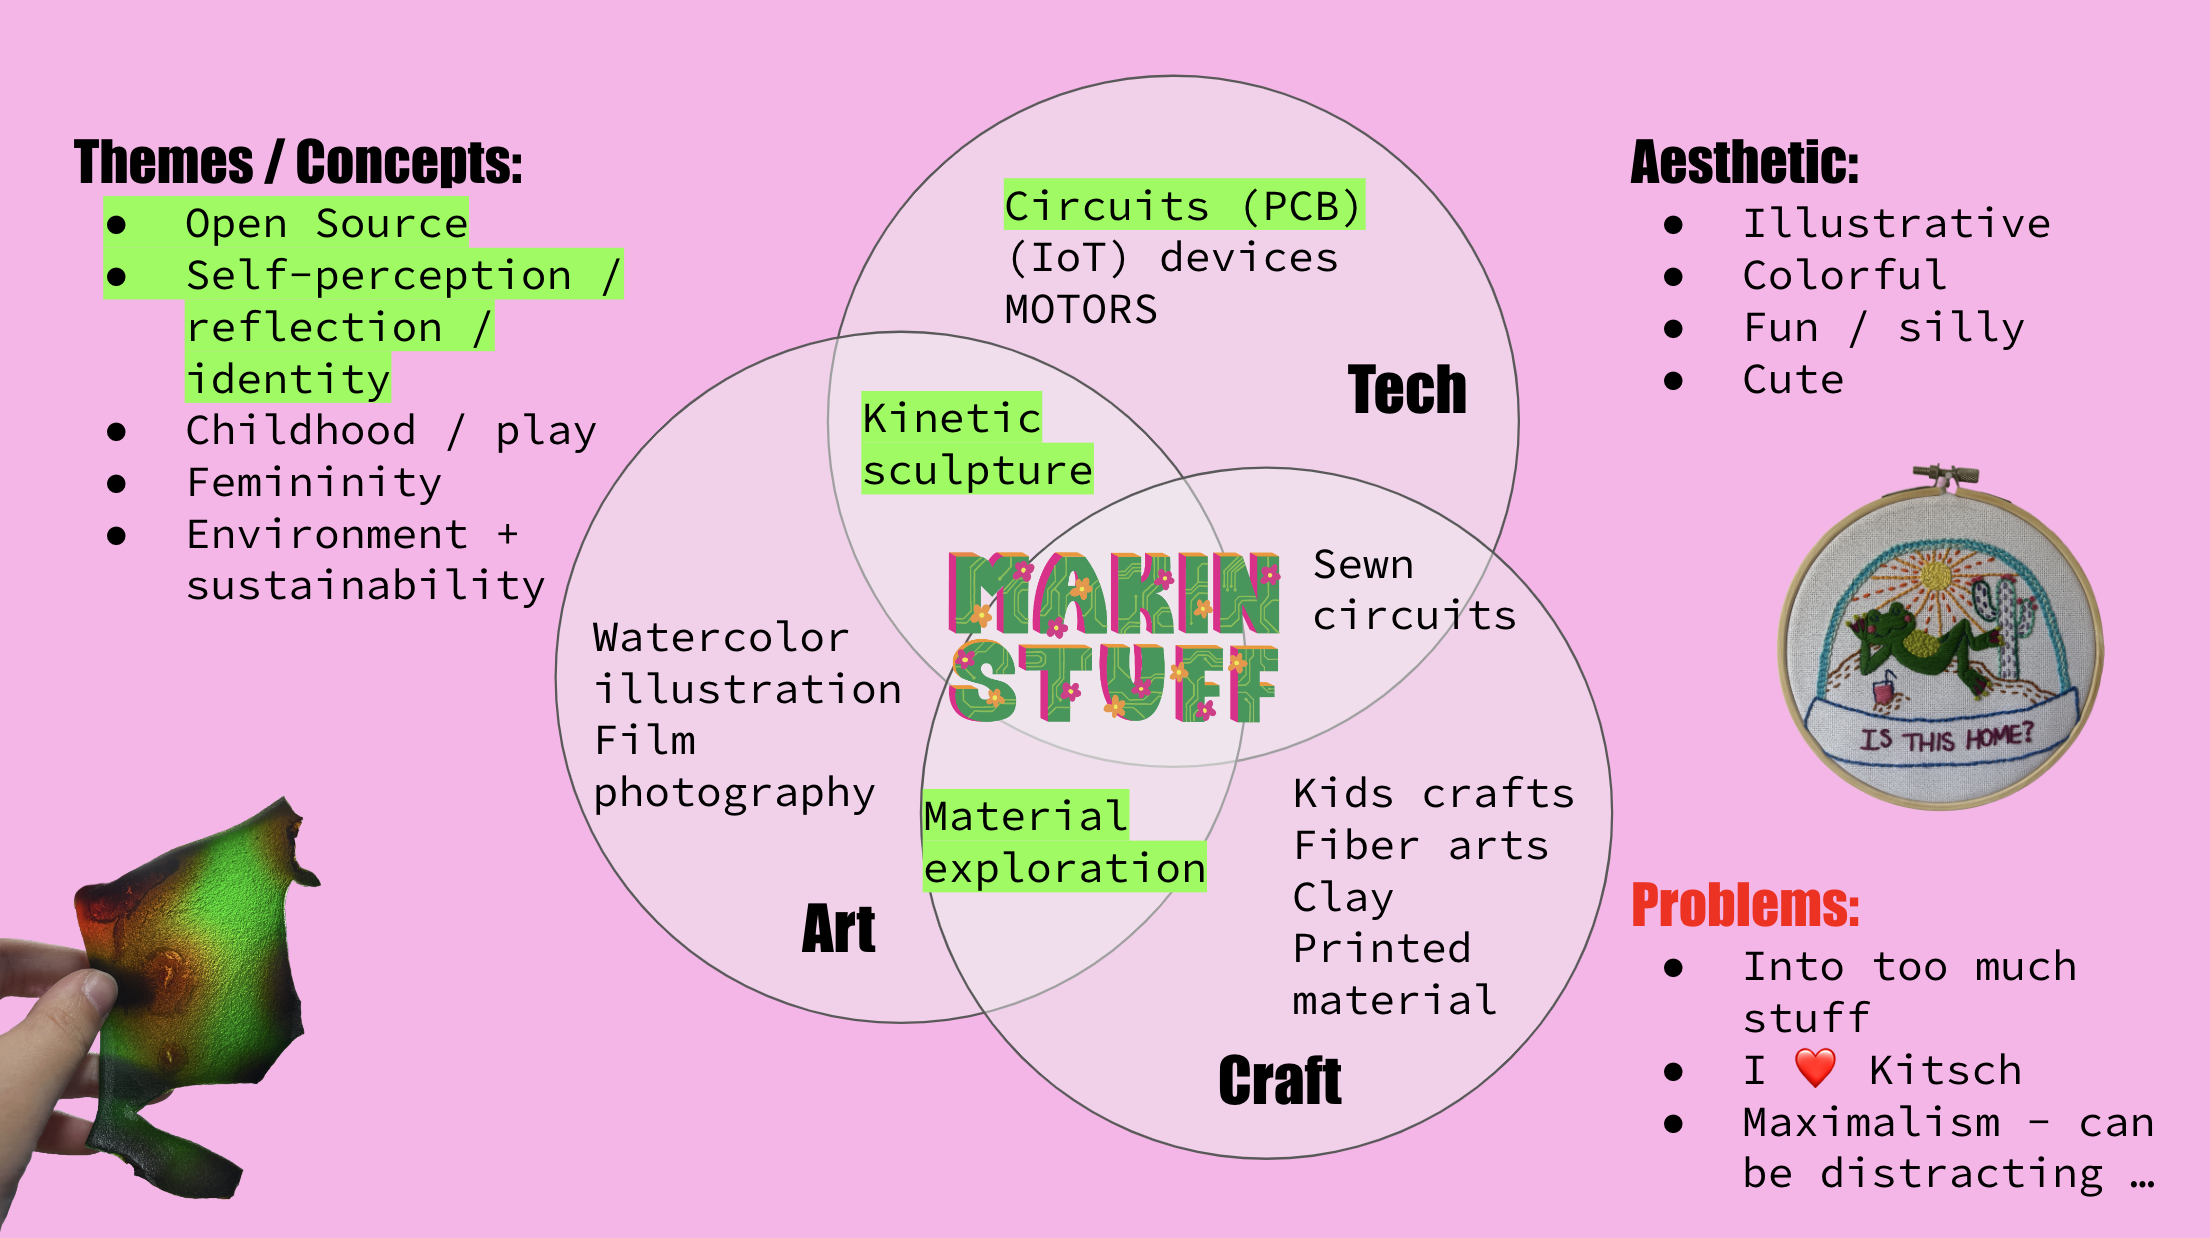
itp: thesis1

[ITP: Thesis I] This system is NERVOUS!

Brain Board

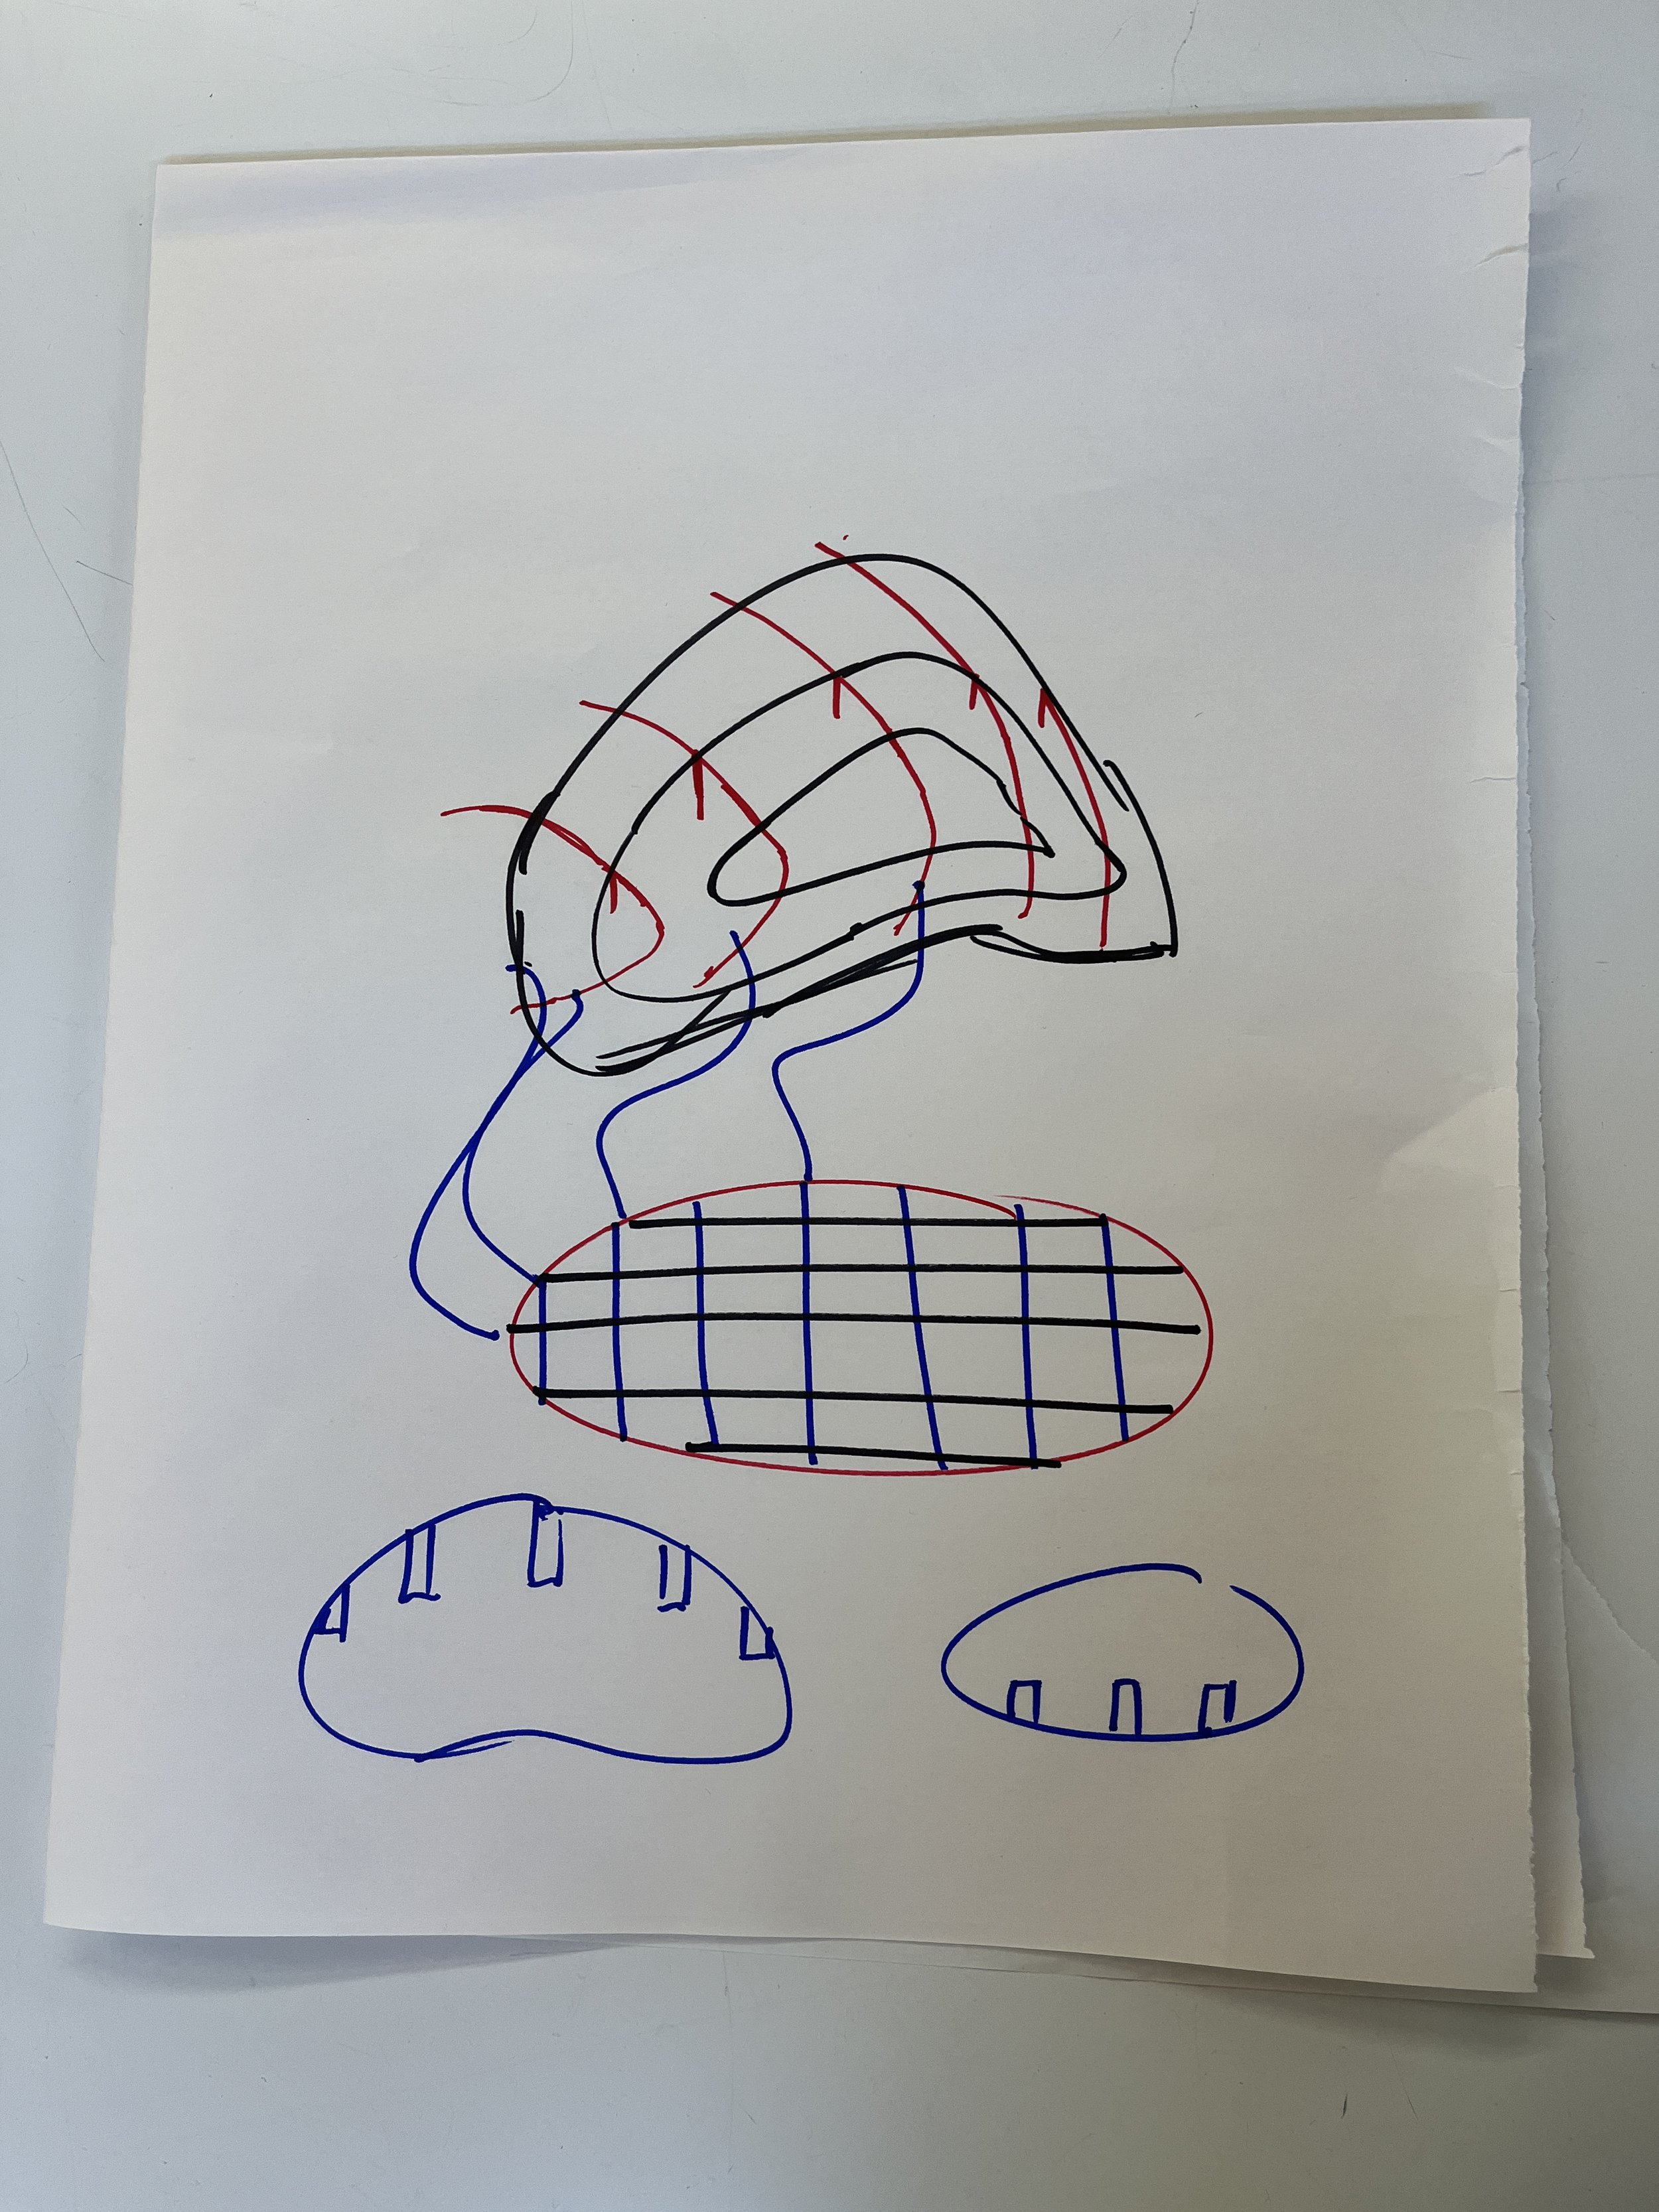
Here’s how I’m feeling about brains this week!

Mojo Jojo from the Power Puff Girls

Third Brain from Spy Kids

Abby Normal brain from Young Frankenstein

It’s crunch time baby

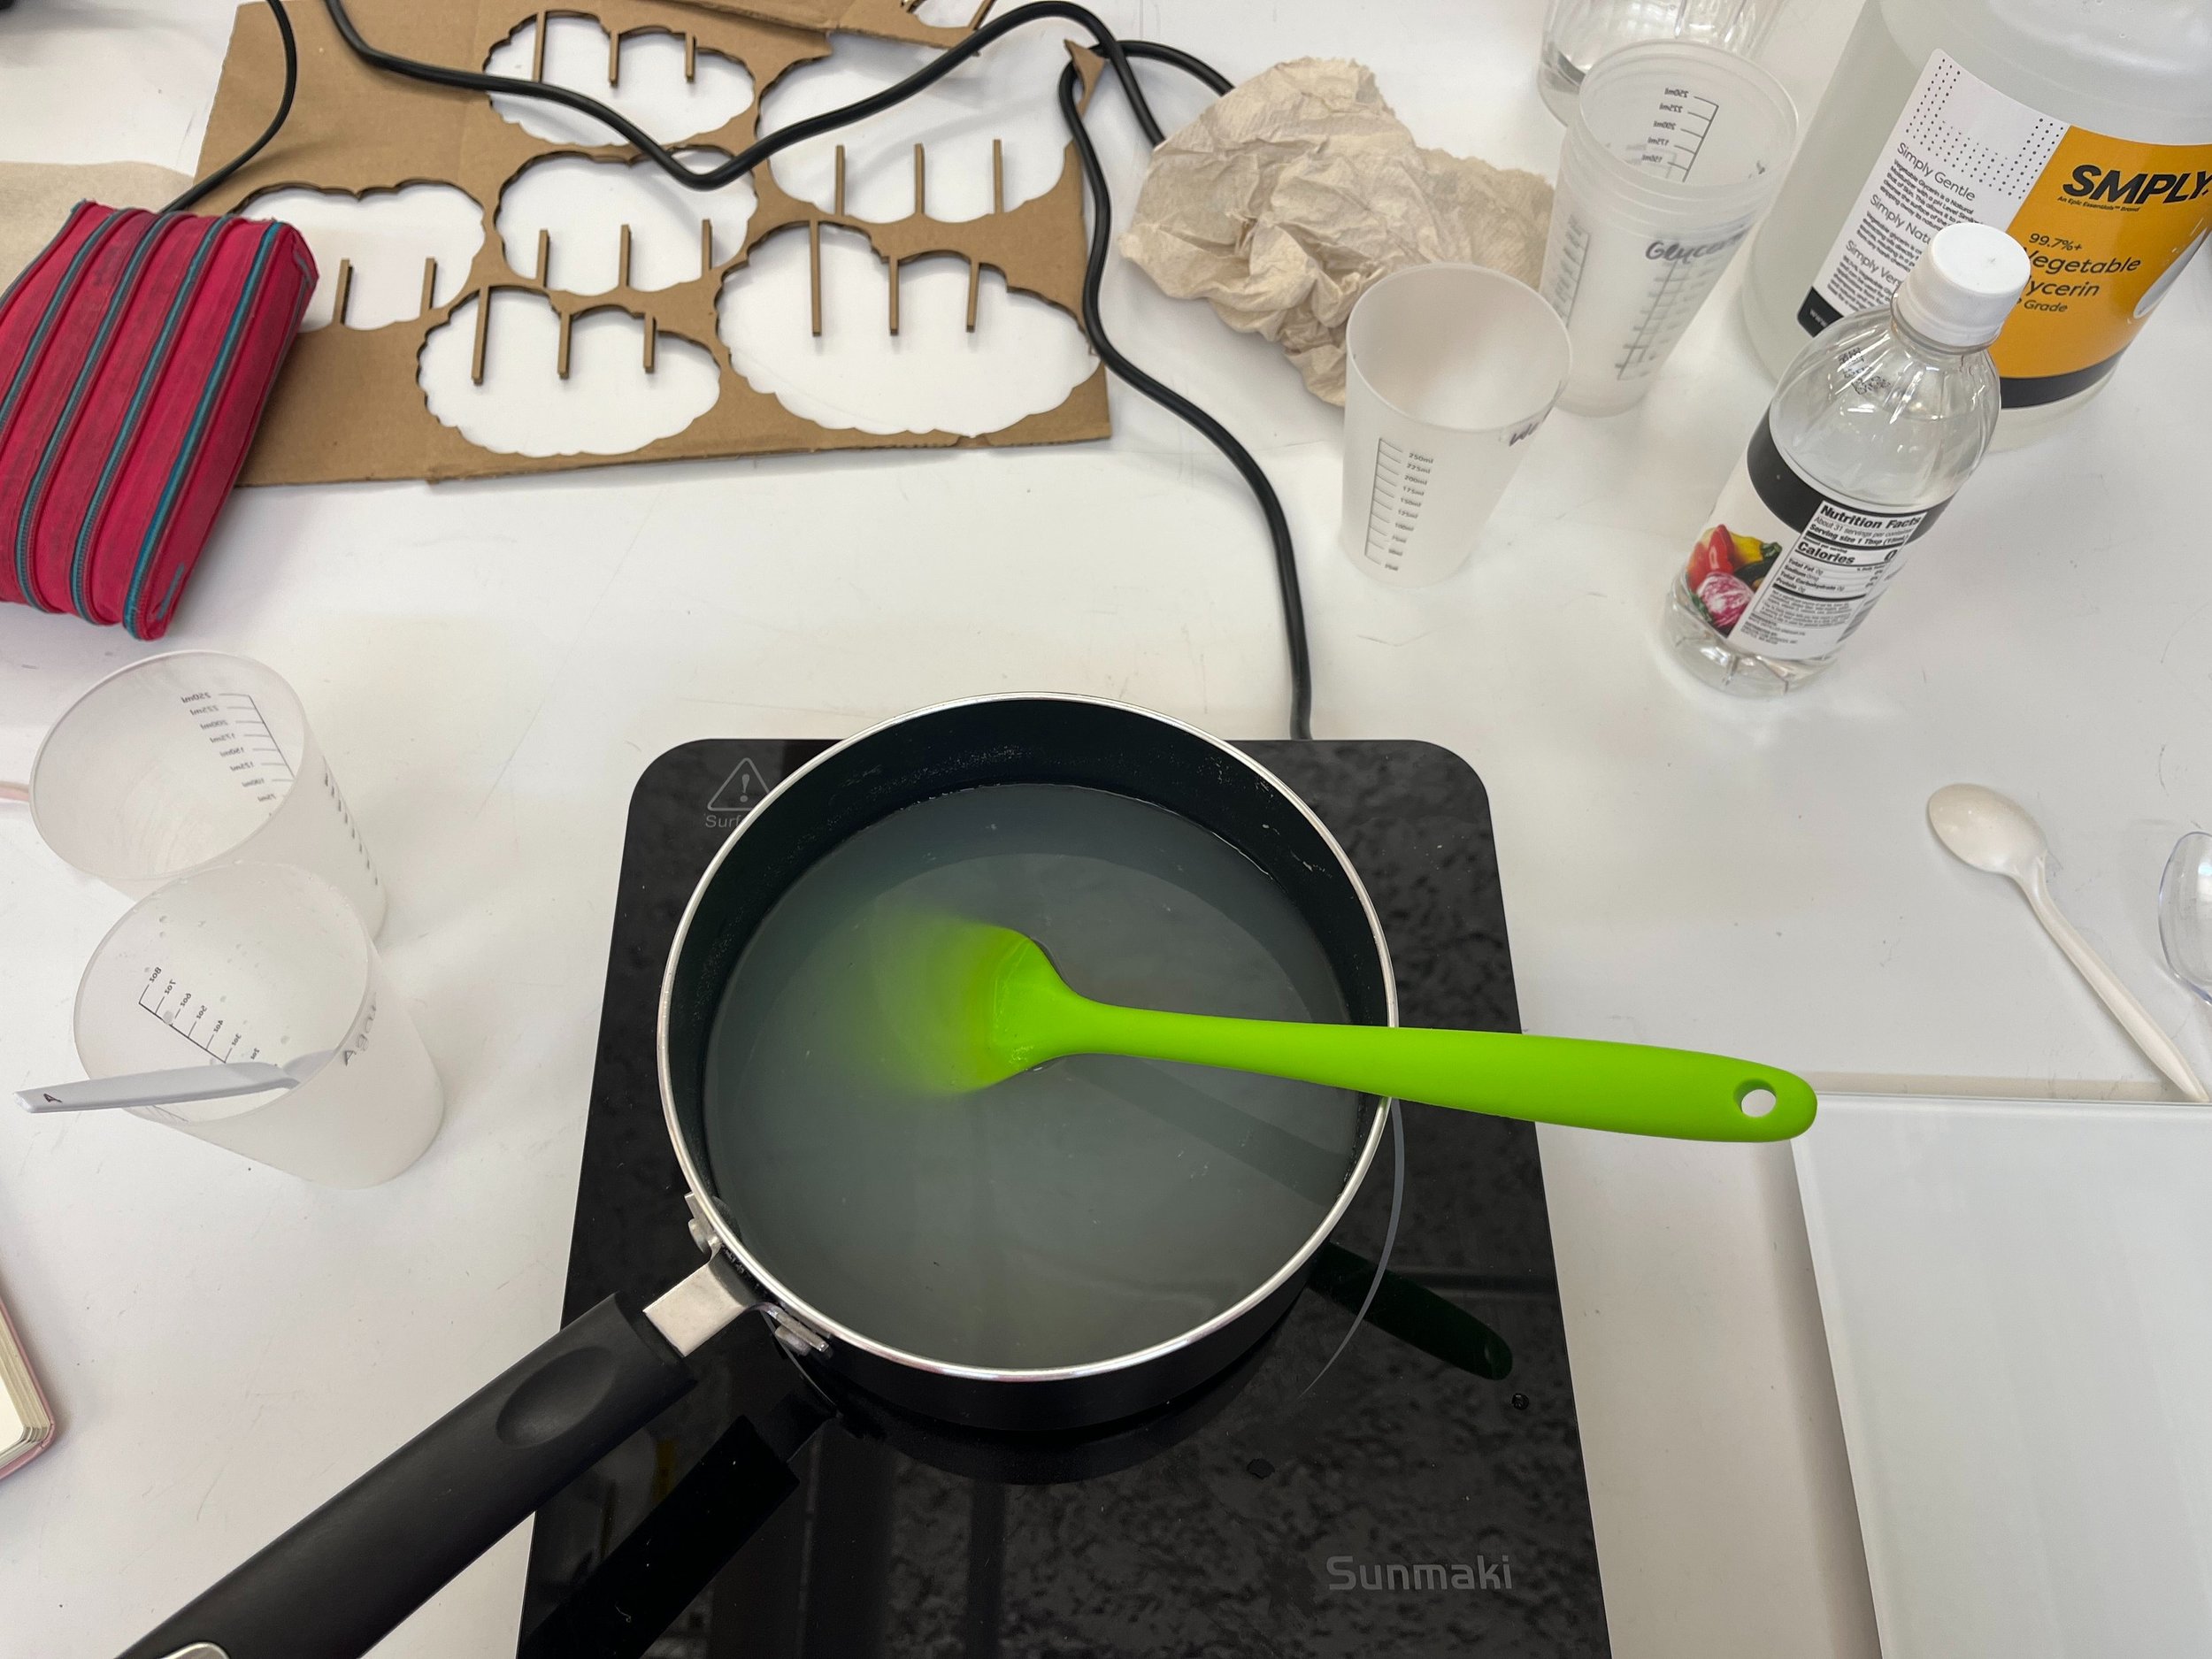
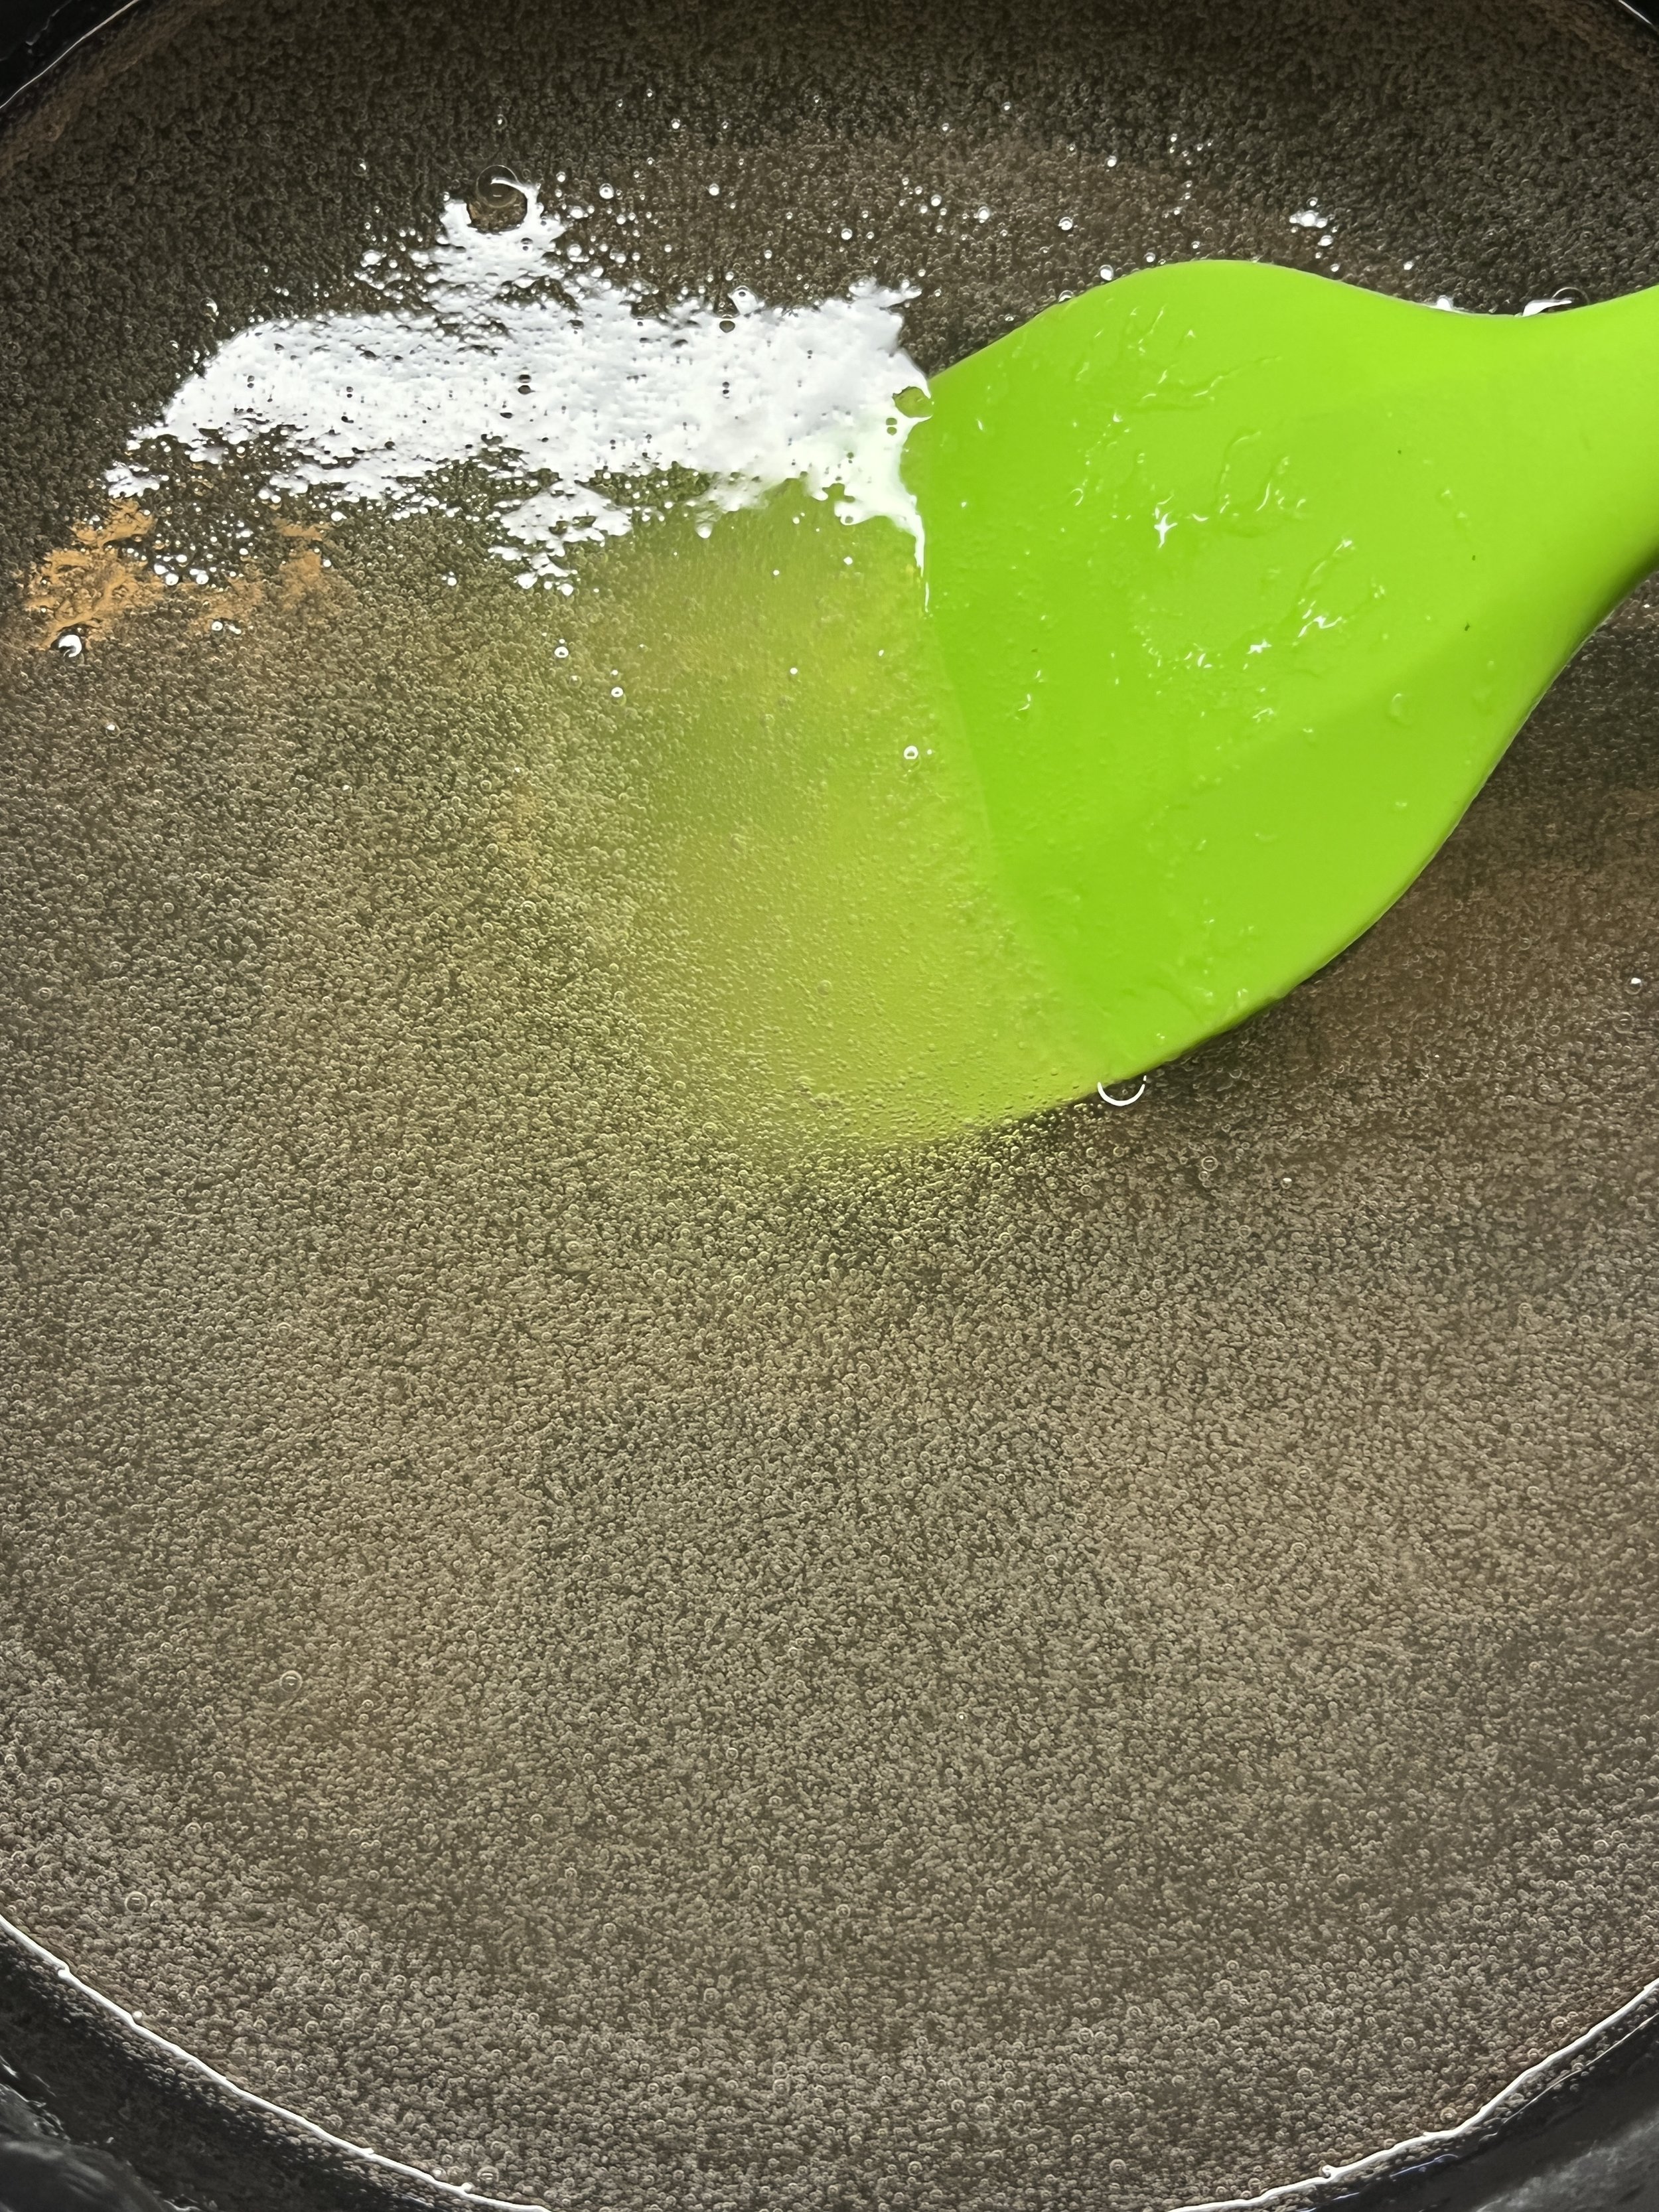
Since I was waiting for my boards to come in from JLC I decided to cook up some more agar. I’m still unsure what exactly I’m going to use this for but I’ve gotten pretty good at cooking it and I know that it needs a long time to dry out, so the sooner it is cooked, the better.

RECIPE

Water = 700mL (less water this time), vegetable glycerin = 60g, agar agar = 30g, 1/2 capful of vinegar, a little bit of conductive metal powder

COOKING SEQUENCE

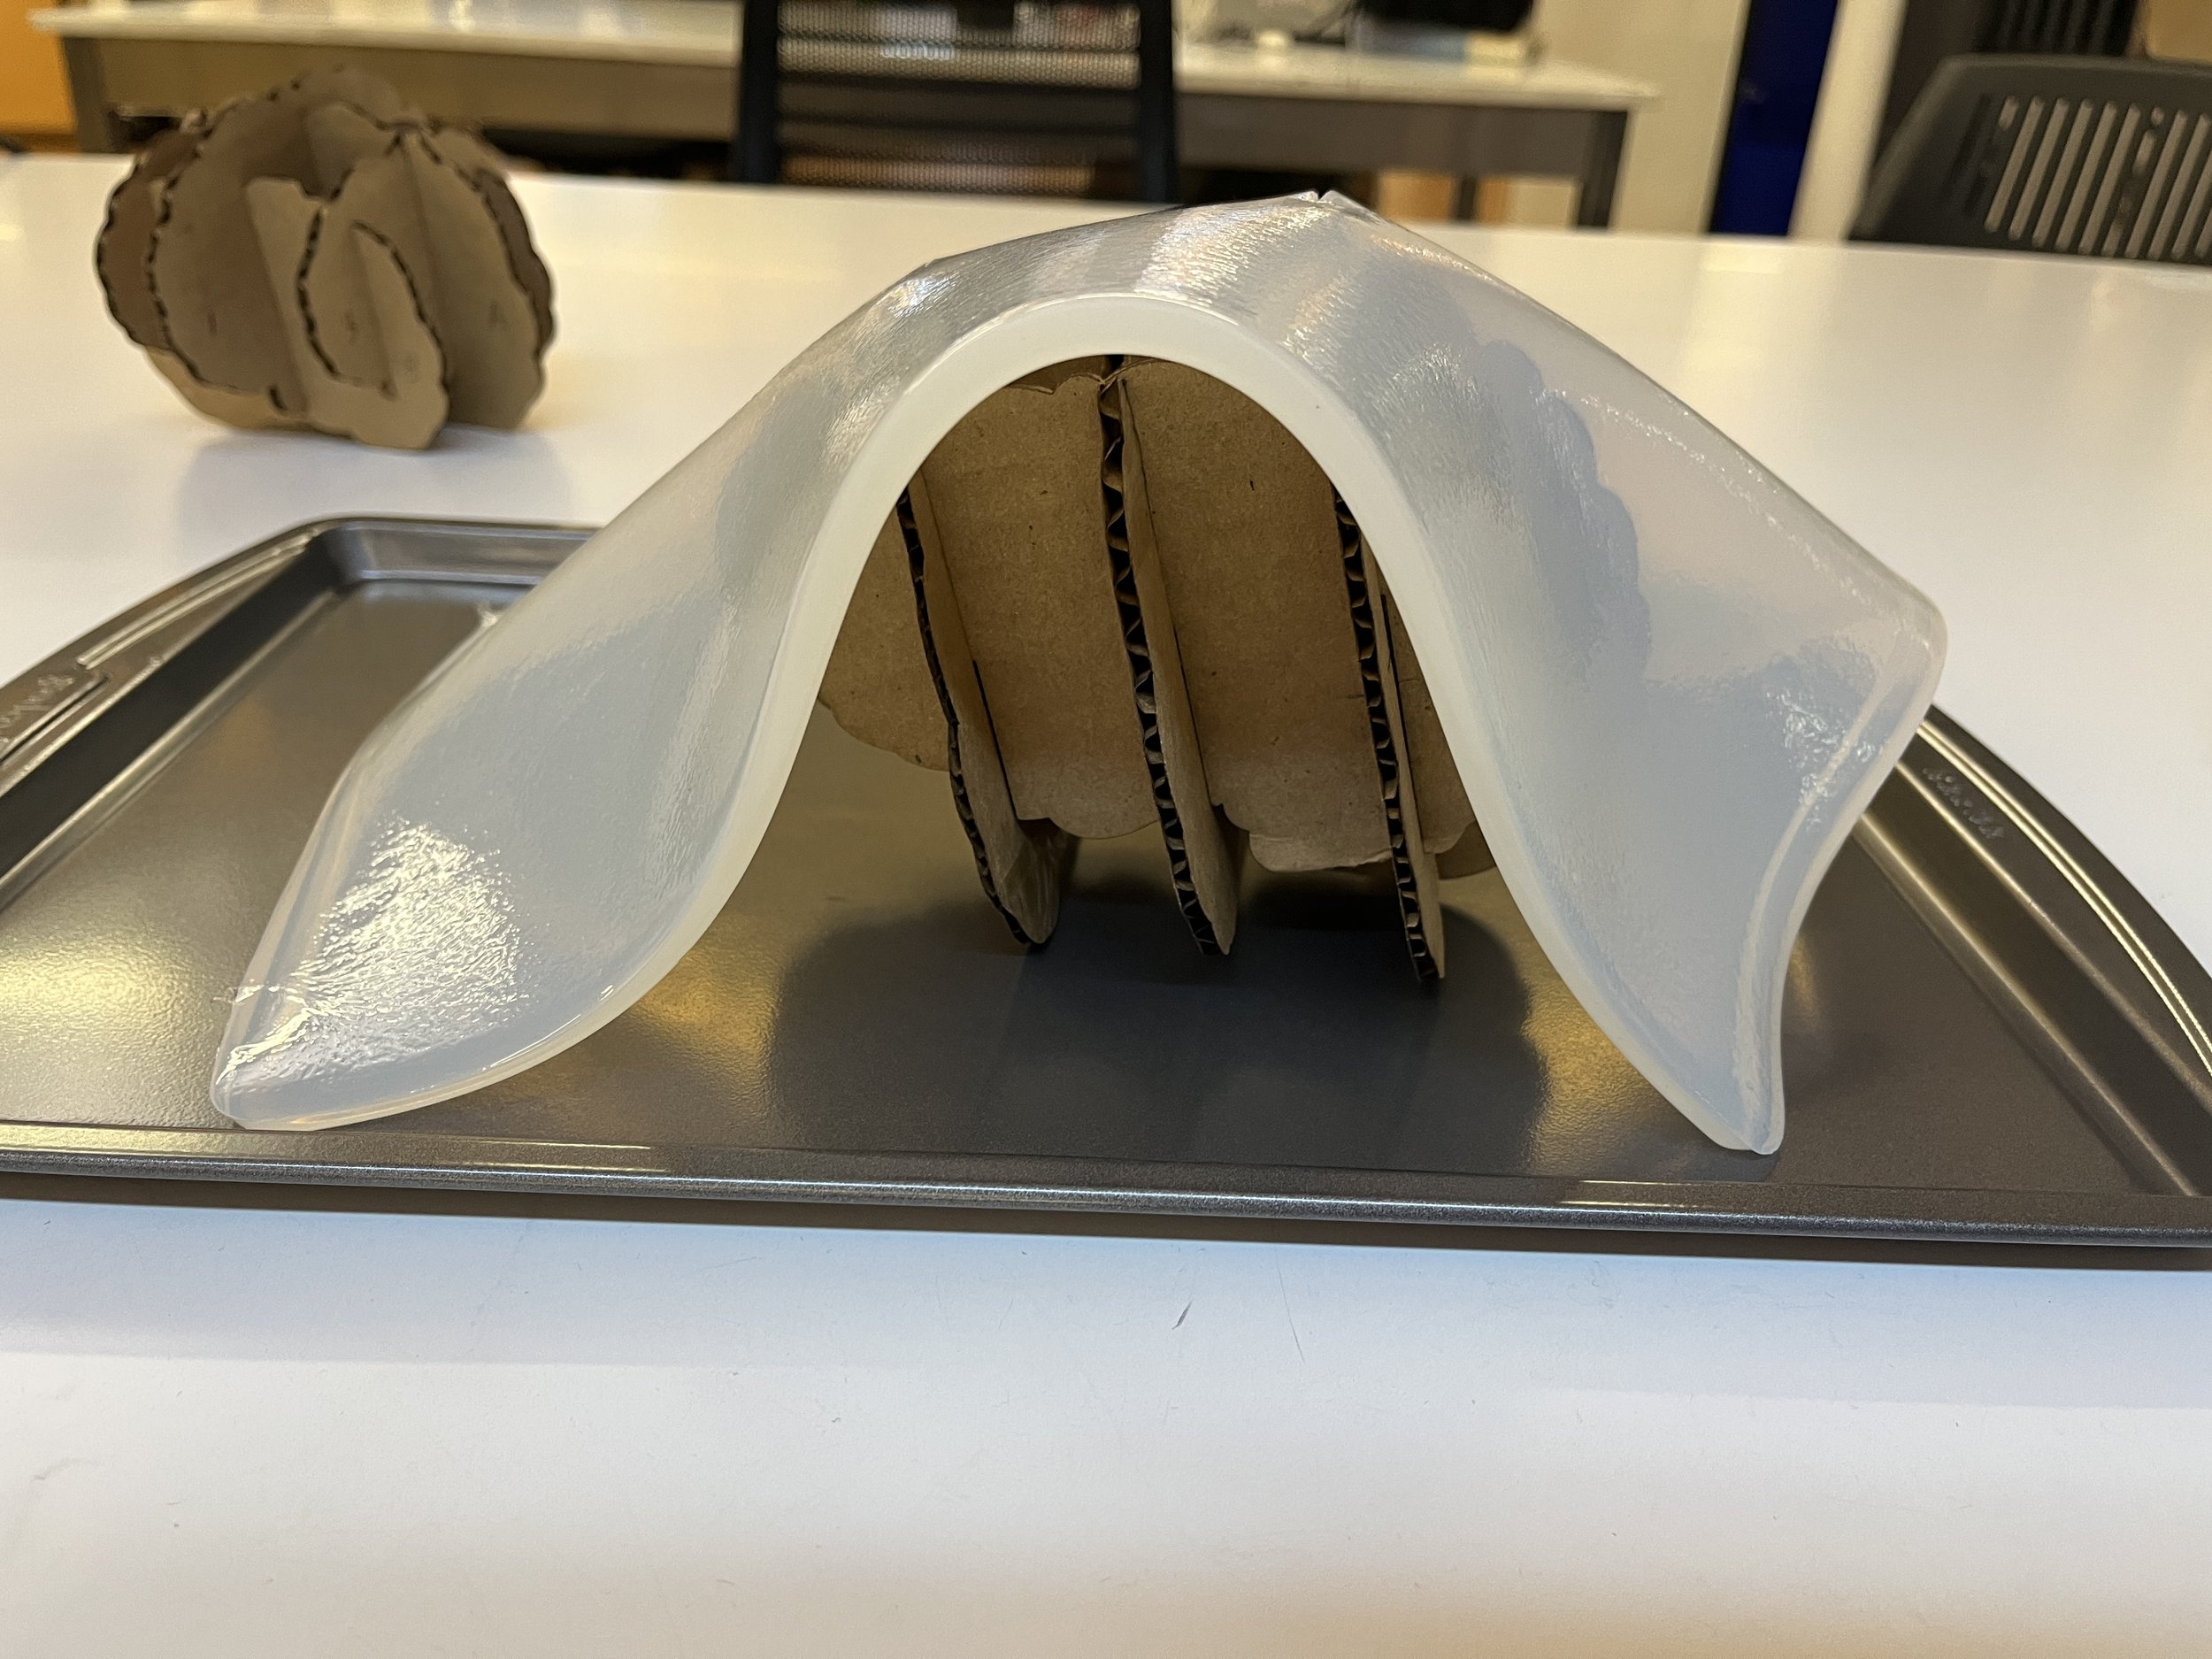
140 degrees for 5 minutes, 176 degrees for 7 minutes, 212 degrees for 7 minutes, 248 degrees for 3 minutes, 212 degrees for 7 minutes. Since I used less water, the mixture boiled more and I was left with many little bubbles in the cooked plastic. When I was done cooking, I poured out half of the plastic into the baking sheet. I added the conductive powder to the plastic remaining in the pot, stirred it in as best and quick I could, and poured that into the other half of the baking sheet. I needed to move quickly because the plastic solidifies really quickly once the heat is turned off. Below is a picture of my yin-yang sheet of plastic.

Spoiler alert: the bioplastic didn’t become conductive…

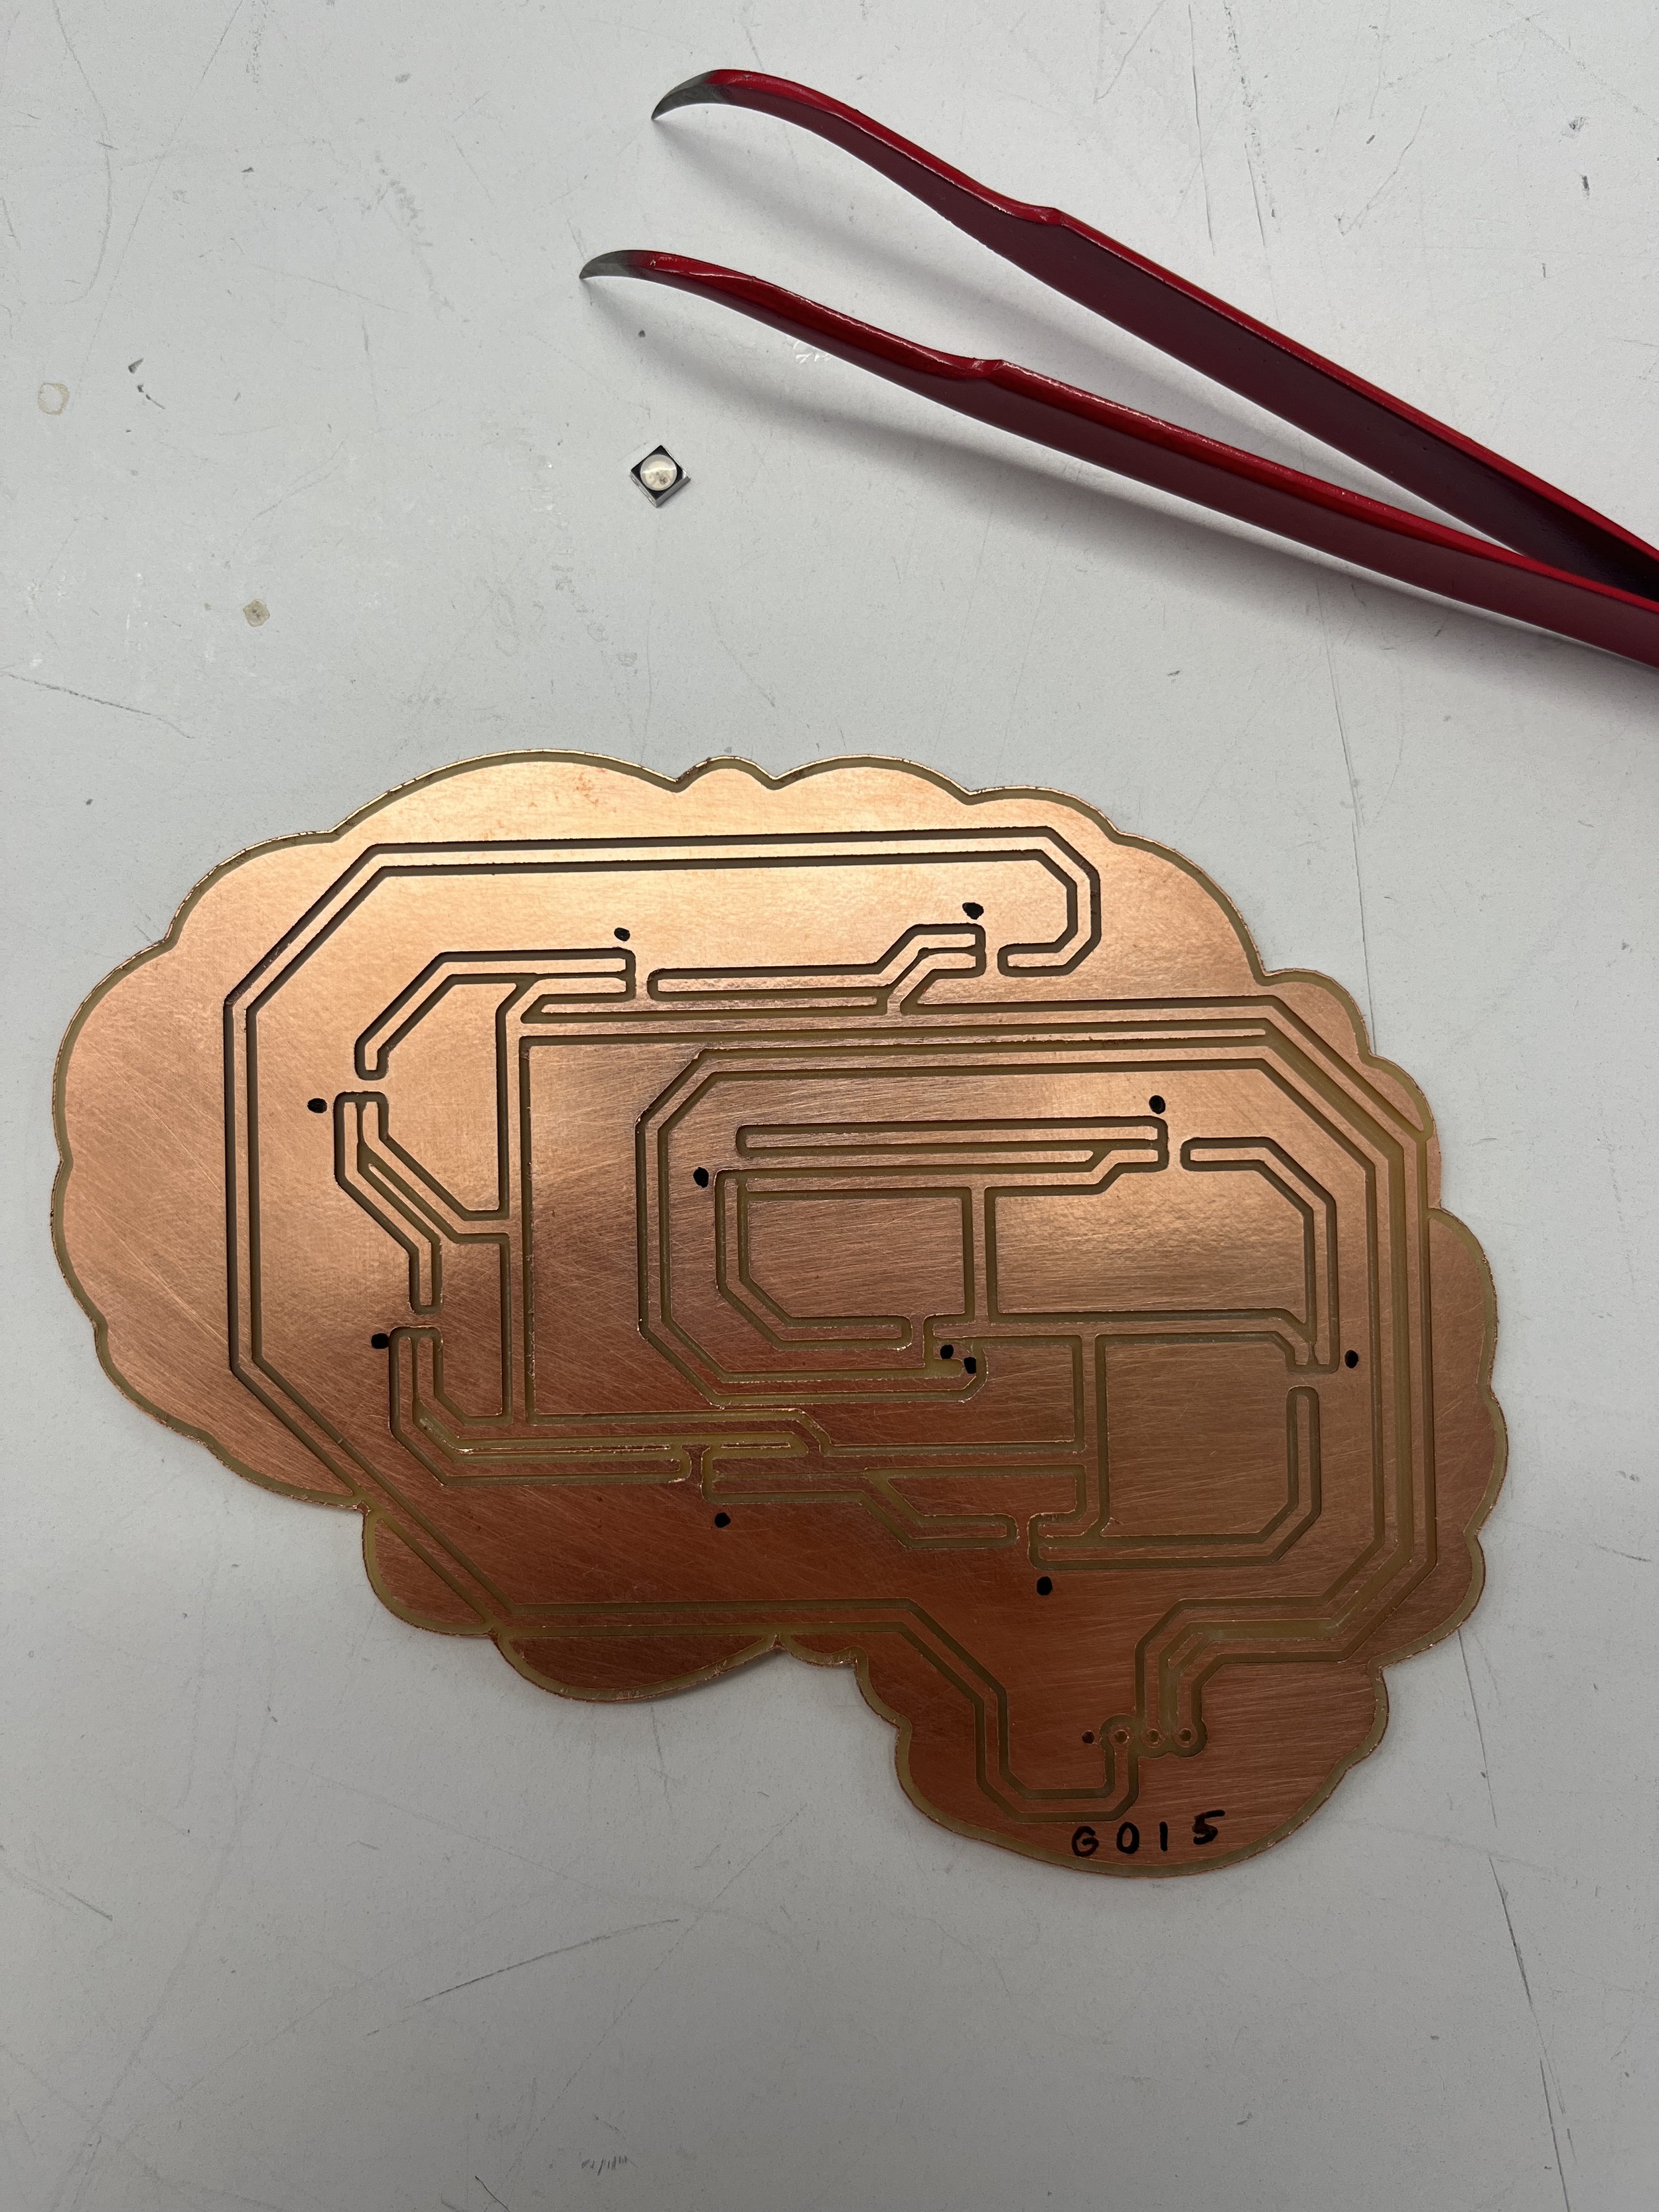
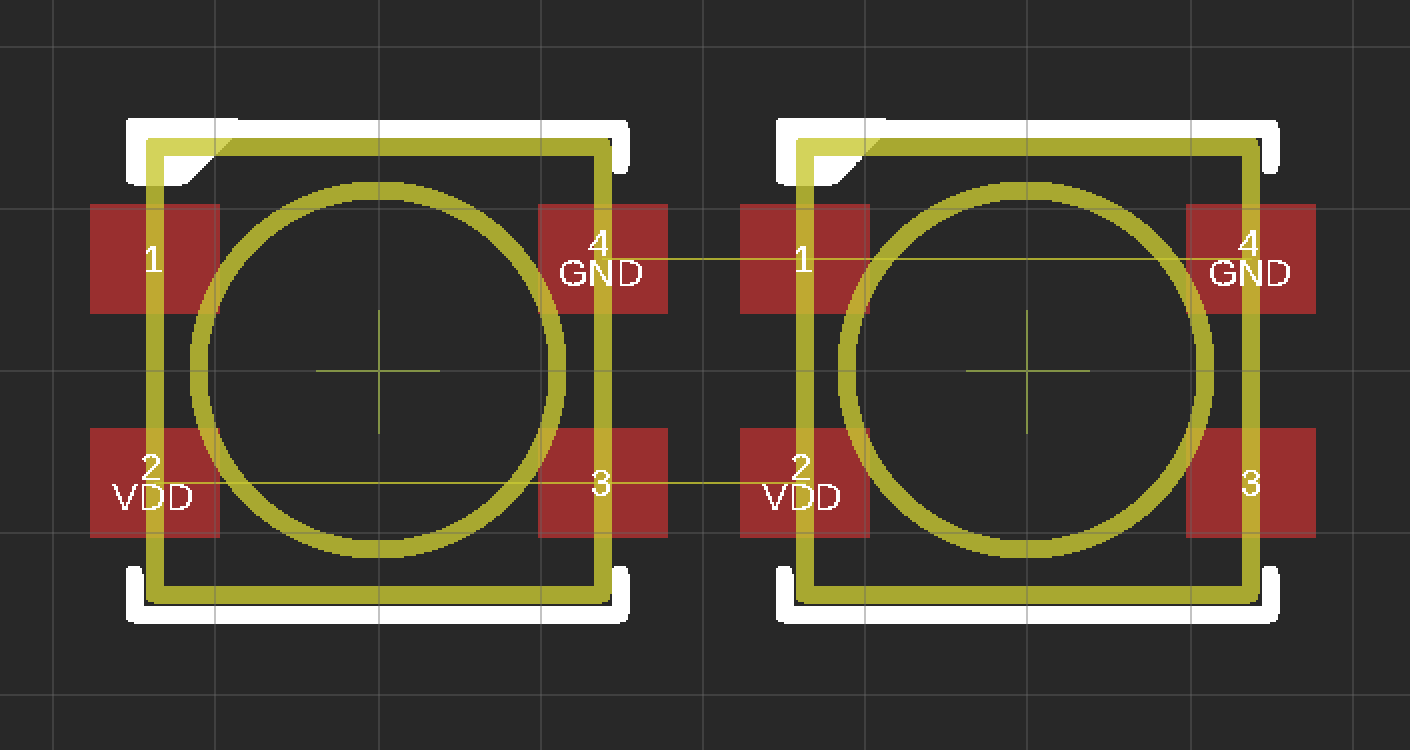
My brain arrived! FINALLY!

Paying $60 for expedited shipping from China really paid off, I got my boards in time. I ordered my brain boards from JLCPCB. The minimum order quantity is 5 boards and since I had the two brain boards, I have 10 brain PCBs now! I also ordered the stencils to help with building up the circuits.

Other things you will need for populating a PCB:

  • Solder paste

  • Flux

  • Painters tape

  • Spatula or putty knife

  • Tweezers

  • Surface mount components

  • Hot air gun

  • Paper towels (bonus points: microfiber cloth) and isopropyl alcohol

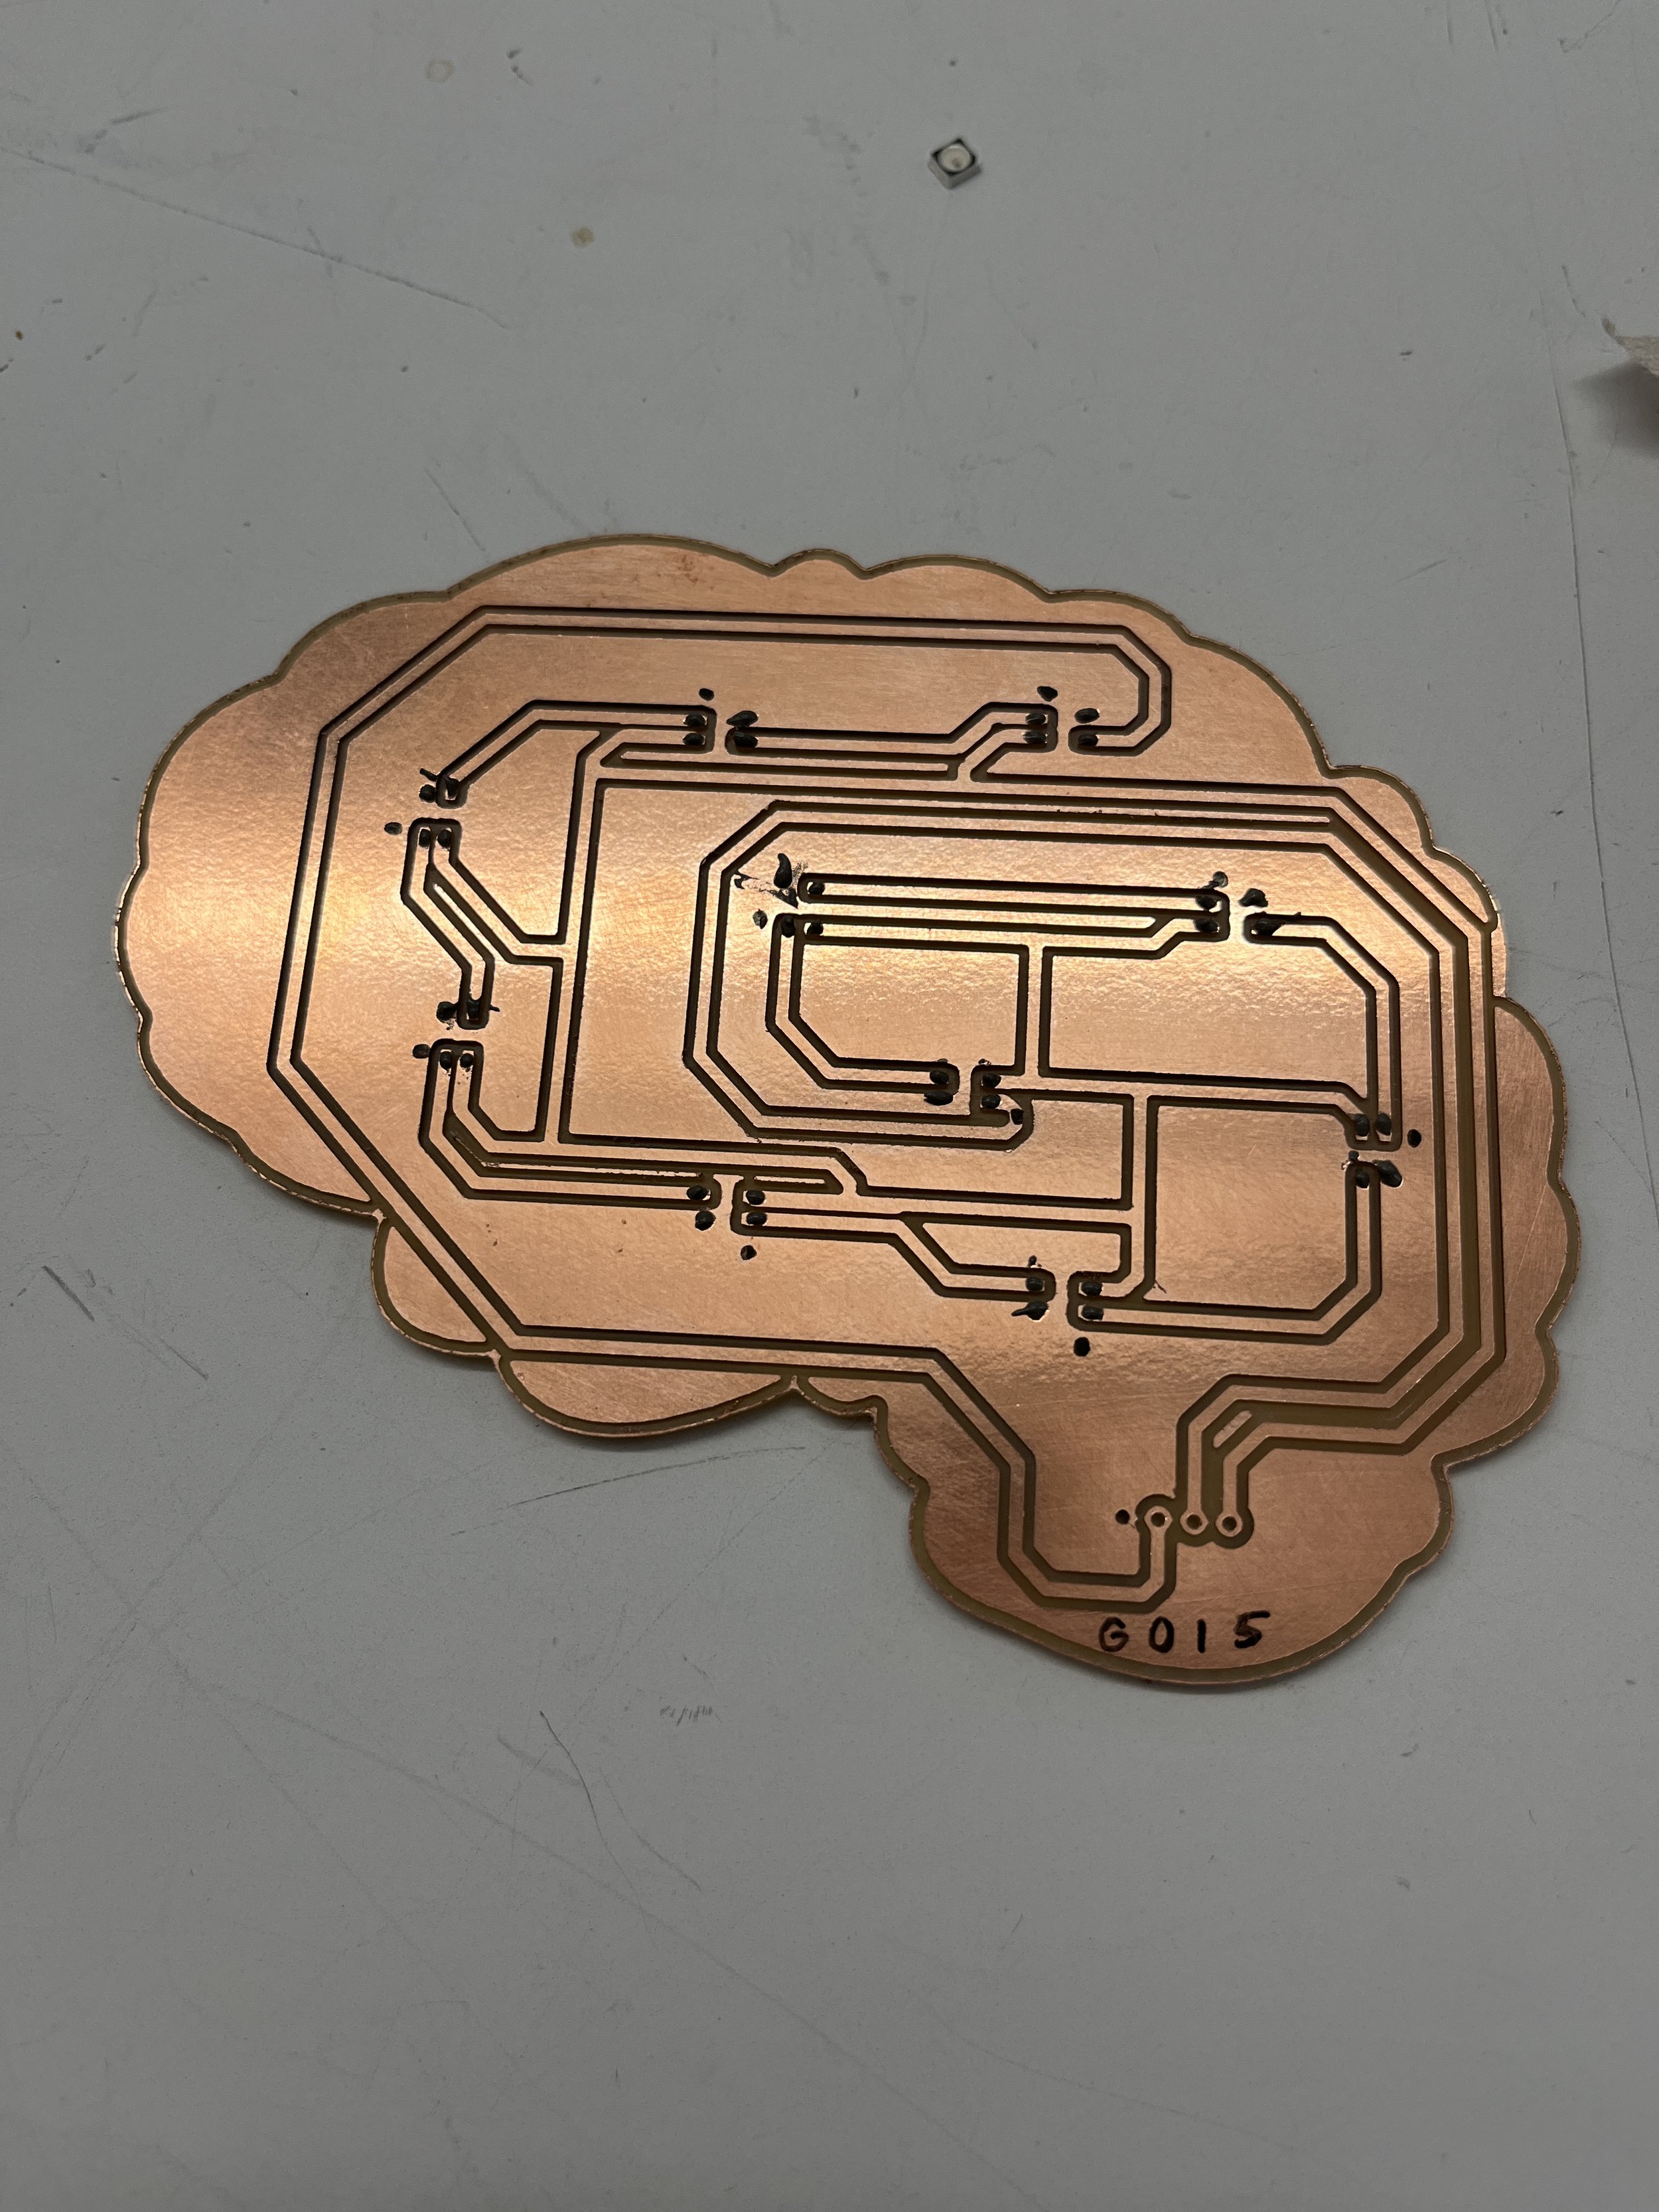
Here are the steps I followed to populate my brain PCB’s:

1. Create a jig to hold your PCB in place using extra boards and tape

2. Line up your stencil to the circuit board and tape it in place on one end

3. Load up your putty knife with some solder paste

4. In a slow, controlled motion, apply the solder paste by dragging the putty knife across the stencil. This can be tricky! Make sure not to bump the stencil and check that the paste made it onto all the pads.

5. Gently lift up the stencil and remove it from workspace. Double-check that solder paste is covering all the pads.

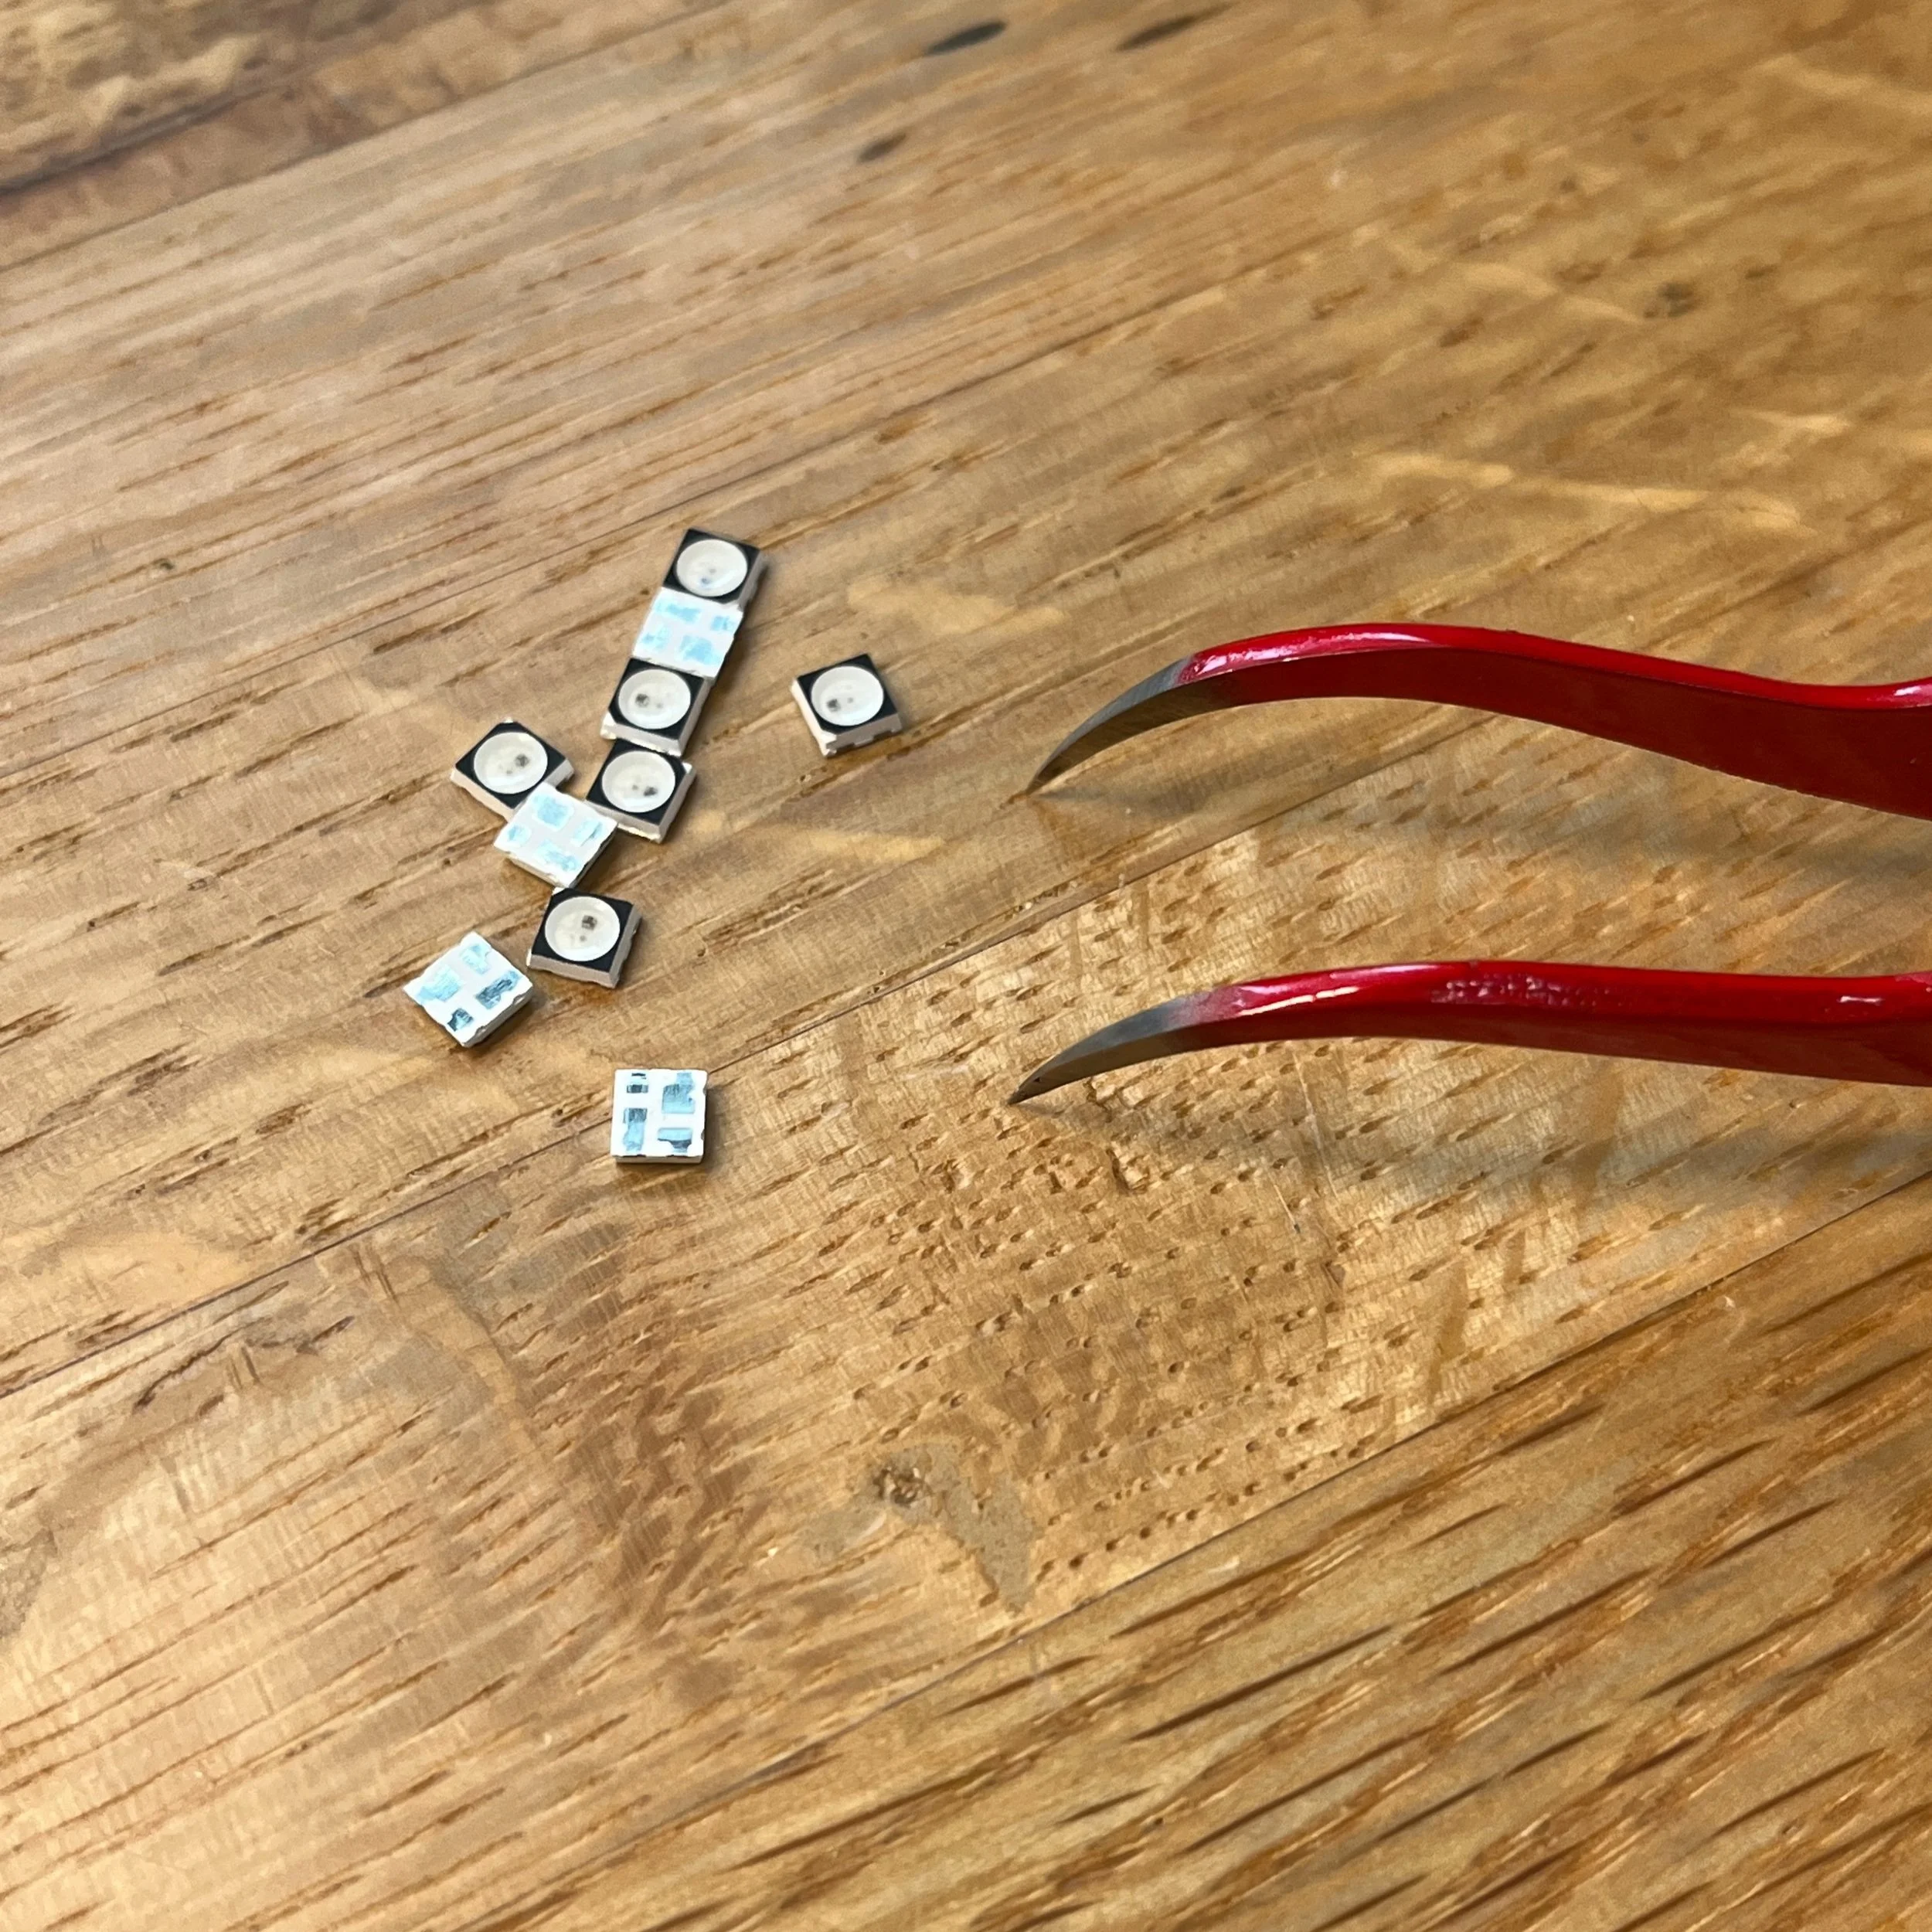
6. Remove components from packaging and place them on board using fine tweezers. Make sure components are placed in the correct orientation.

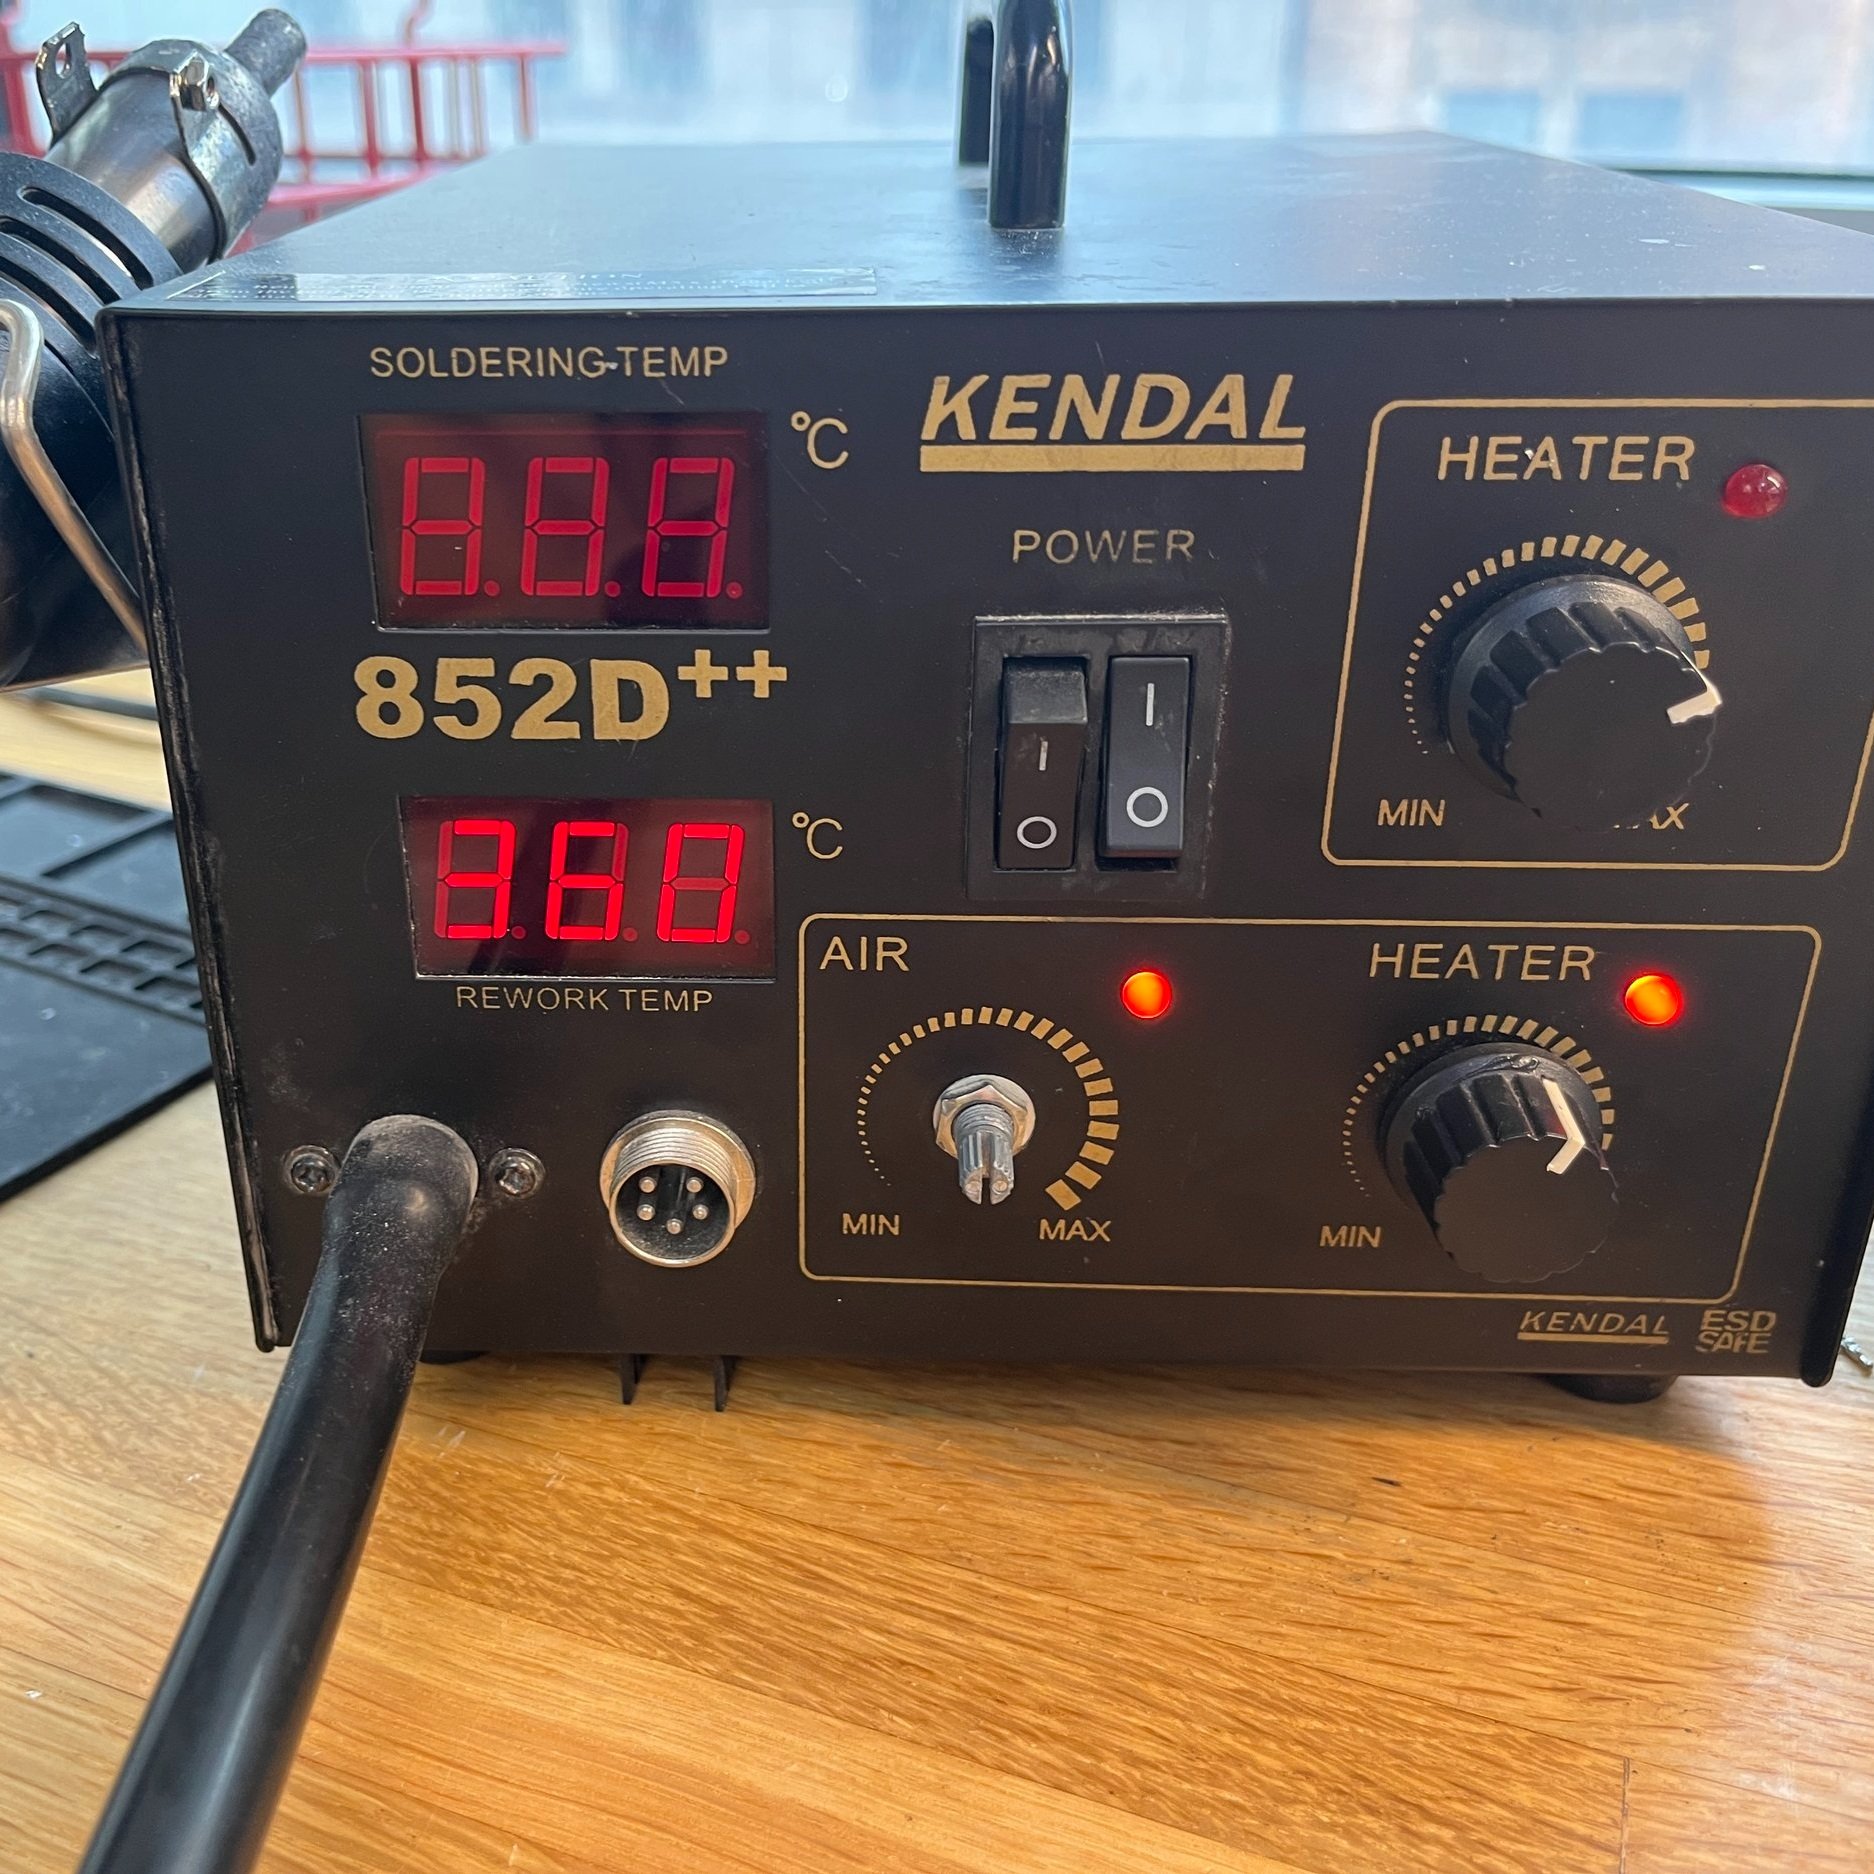
7. Once all the components are placed on the board, use the hot air gun to make the solder paste reflow. Point the hot air directly onto each component. You’ll want to find the sweet spot in the height where the hot air doesn’t melt the component but still melts the solder paste. You will be able to tell if the solder has melted once the component shimmies into it’s correct place, centered on the footprint, due to the surface tension of the solder paste.

8. Soldered board. Repeat the outlined steps three more times to populate all four sides of circuit board!

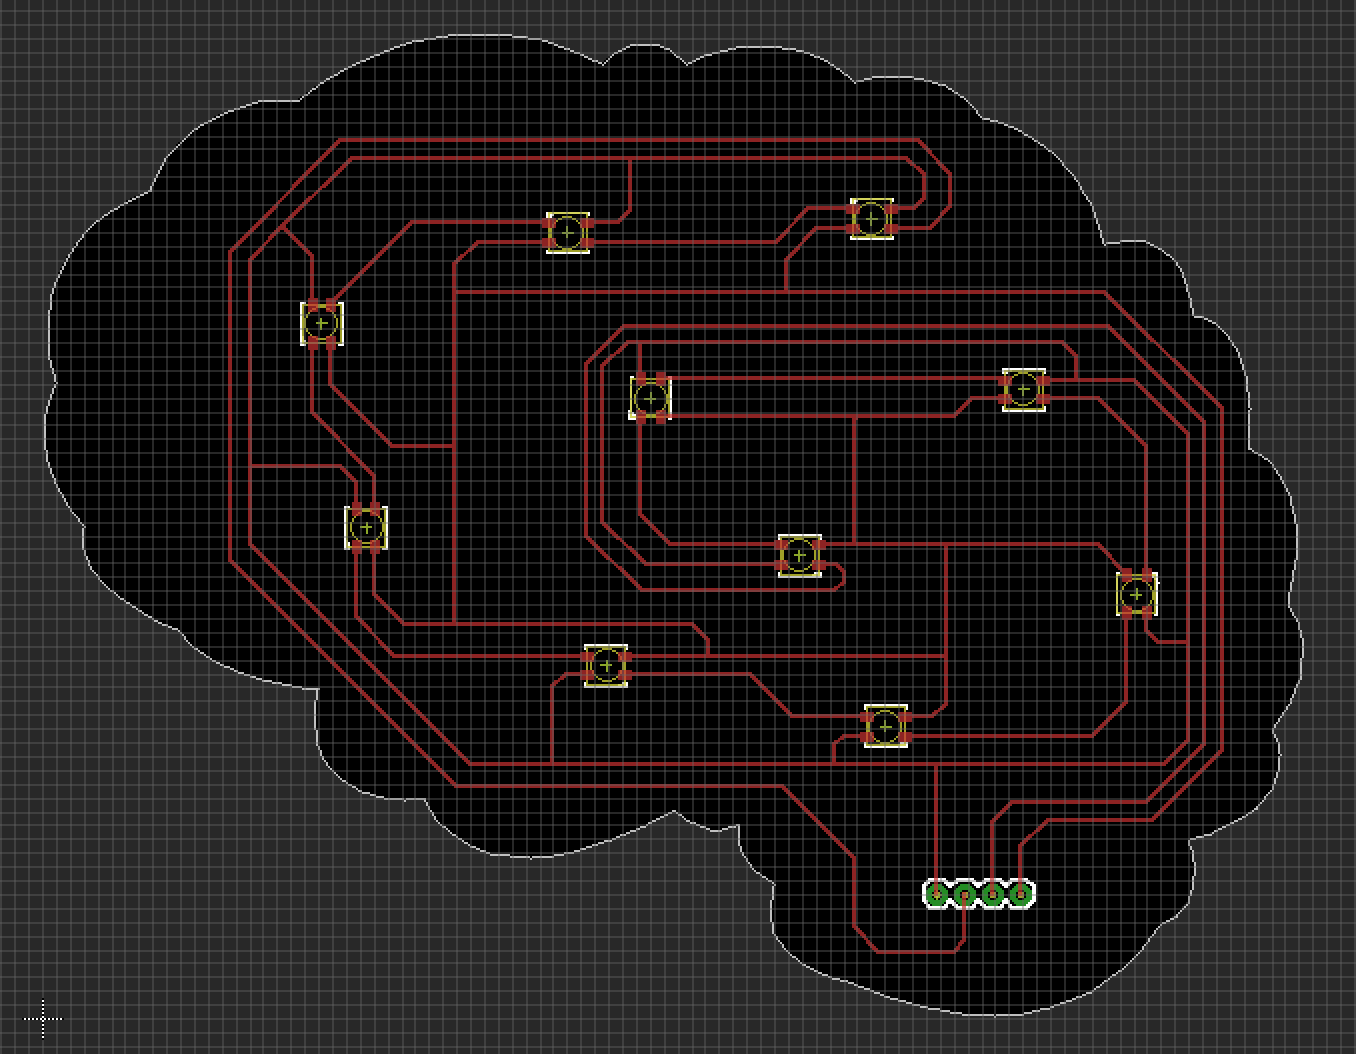
So yeah, you just have to repeat that process three more times to populate both sides of both brain boards. I made a lil time lapse of the process. It really wasn’t so bad once I had all the materials and equipment I needed and I’m honestly impressed that I could get this done in our ITP shop!

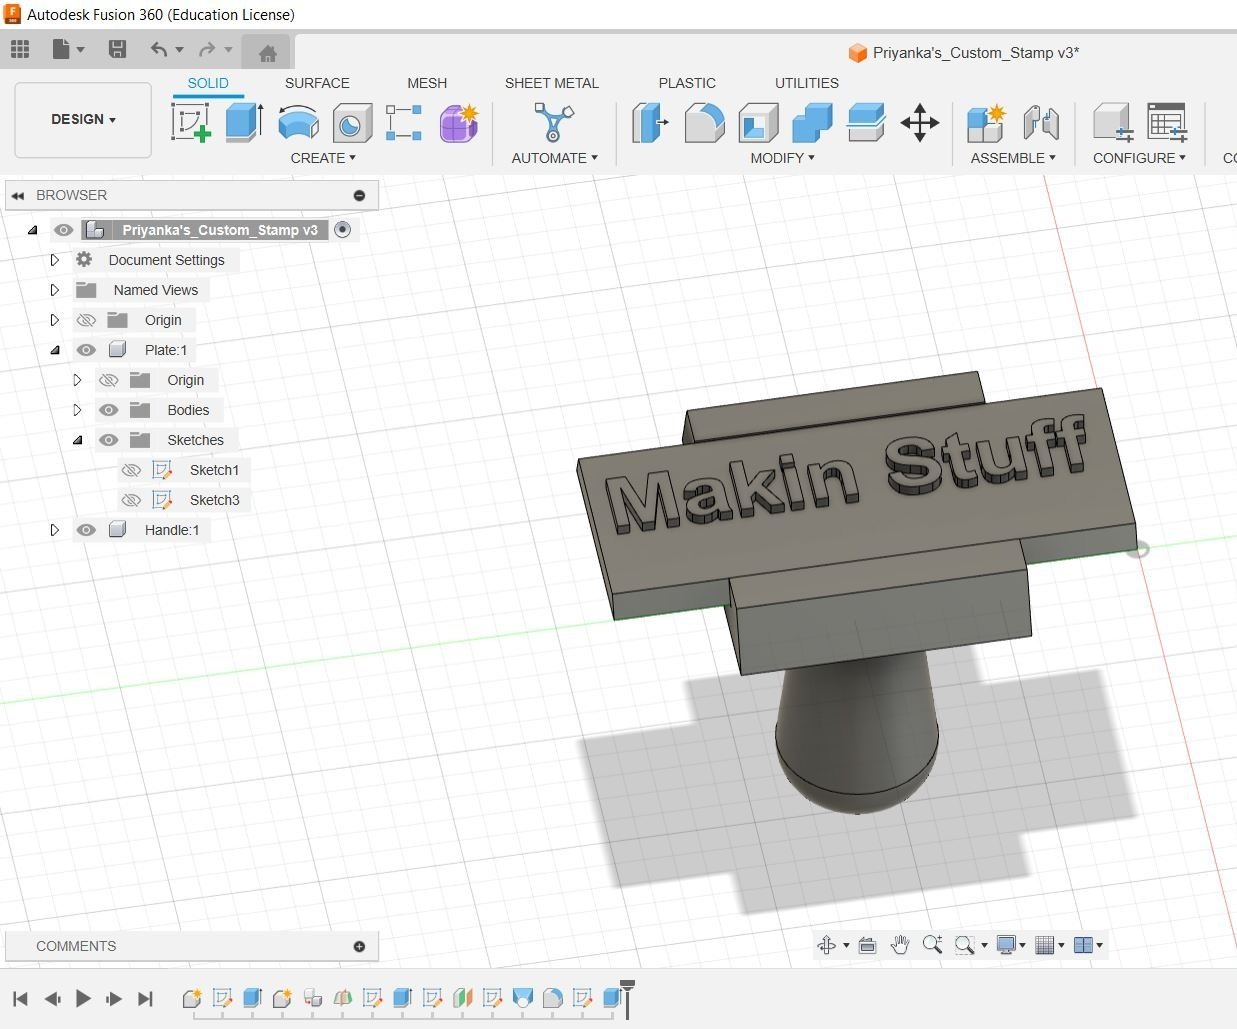
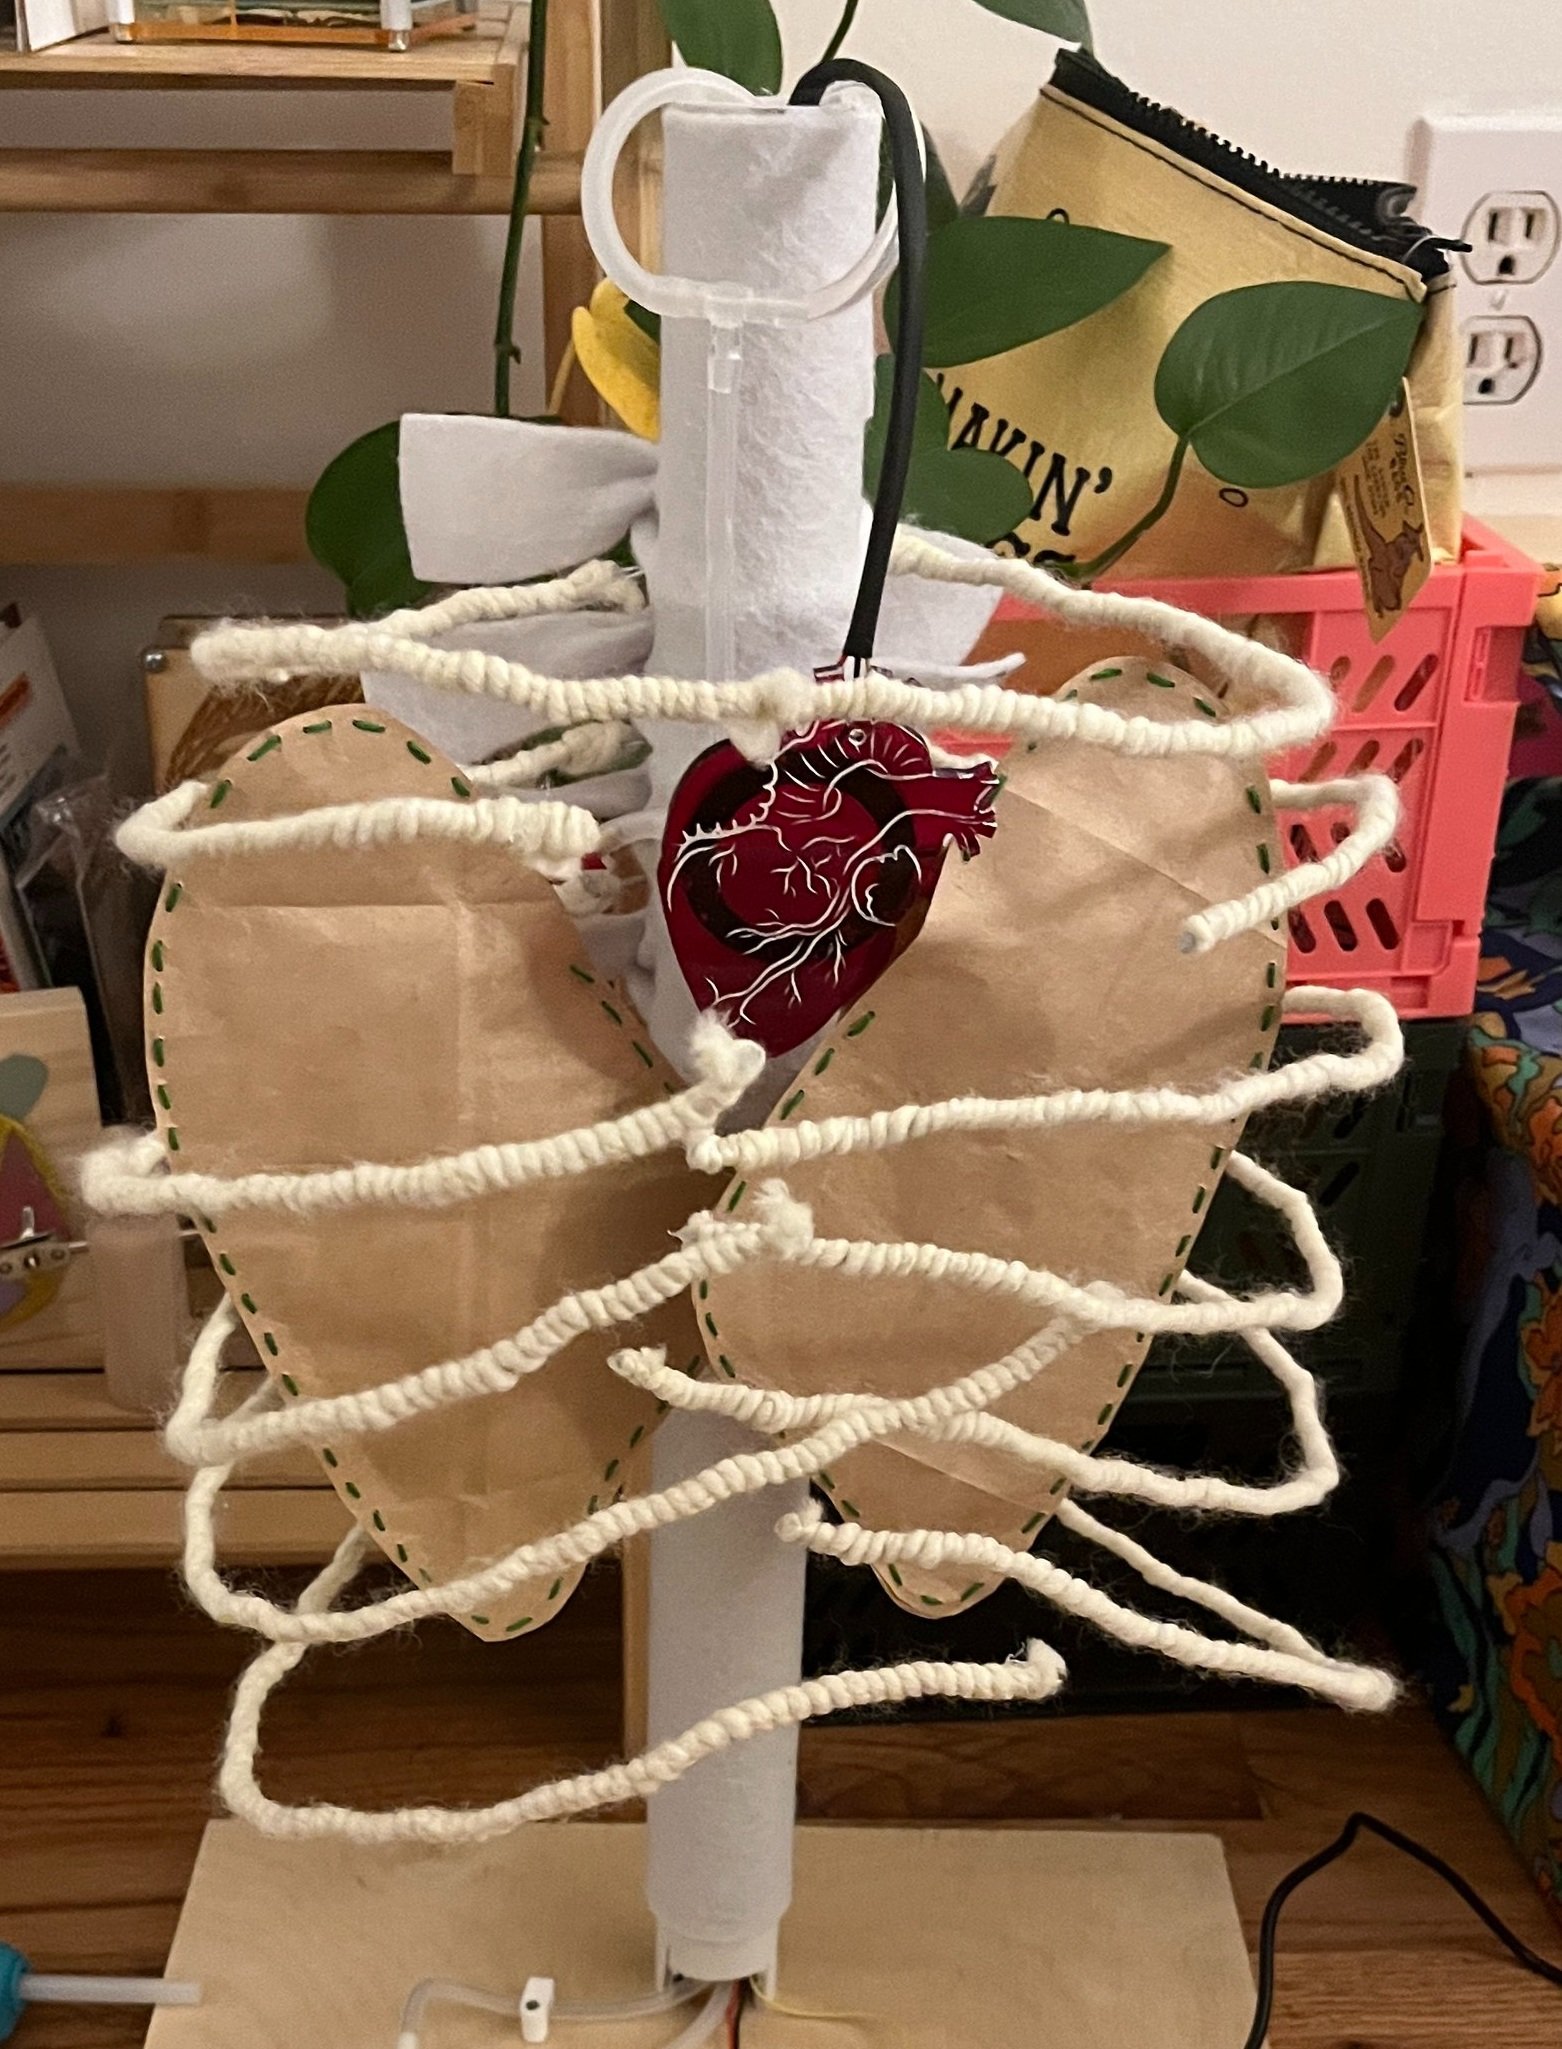
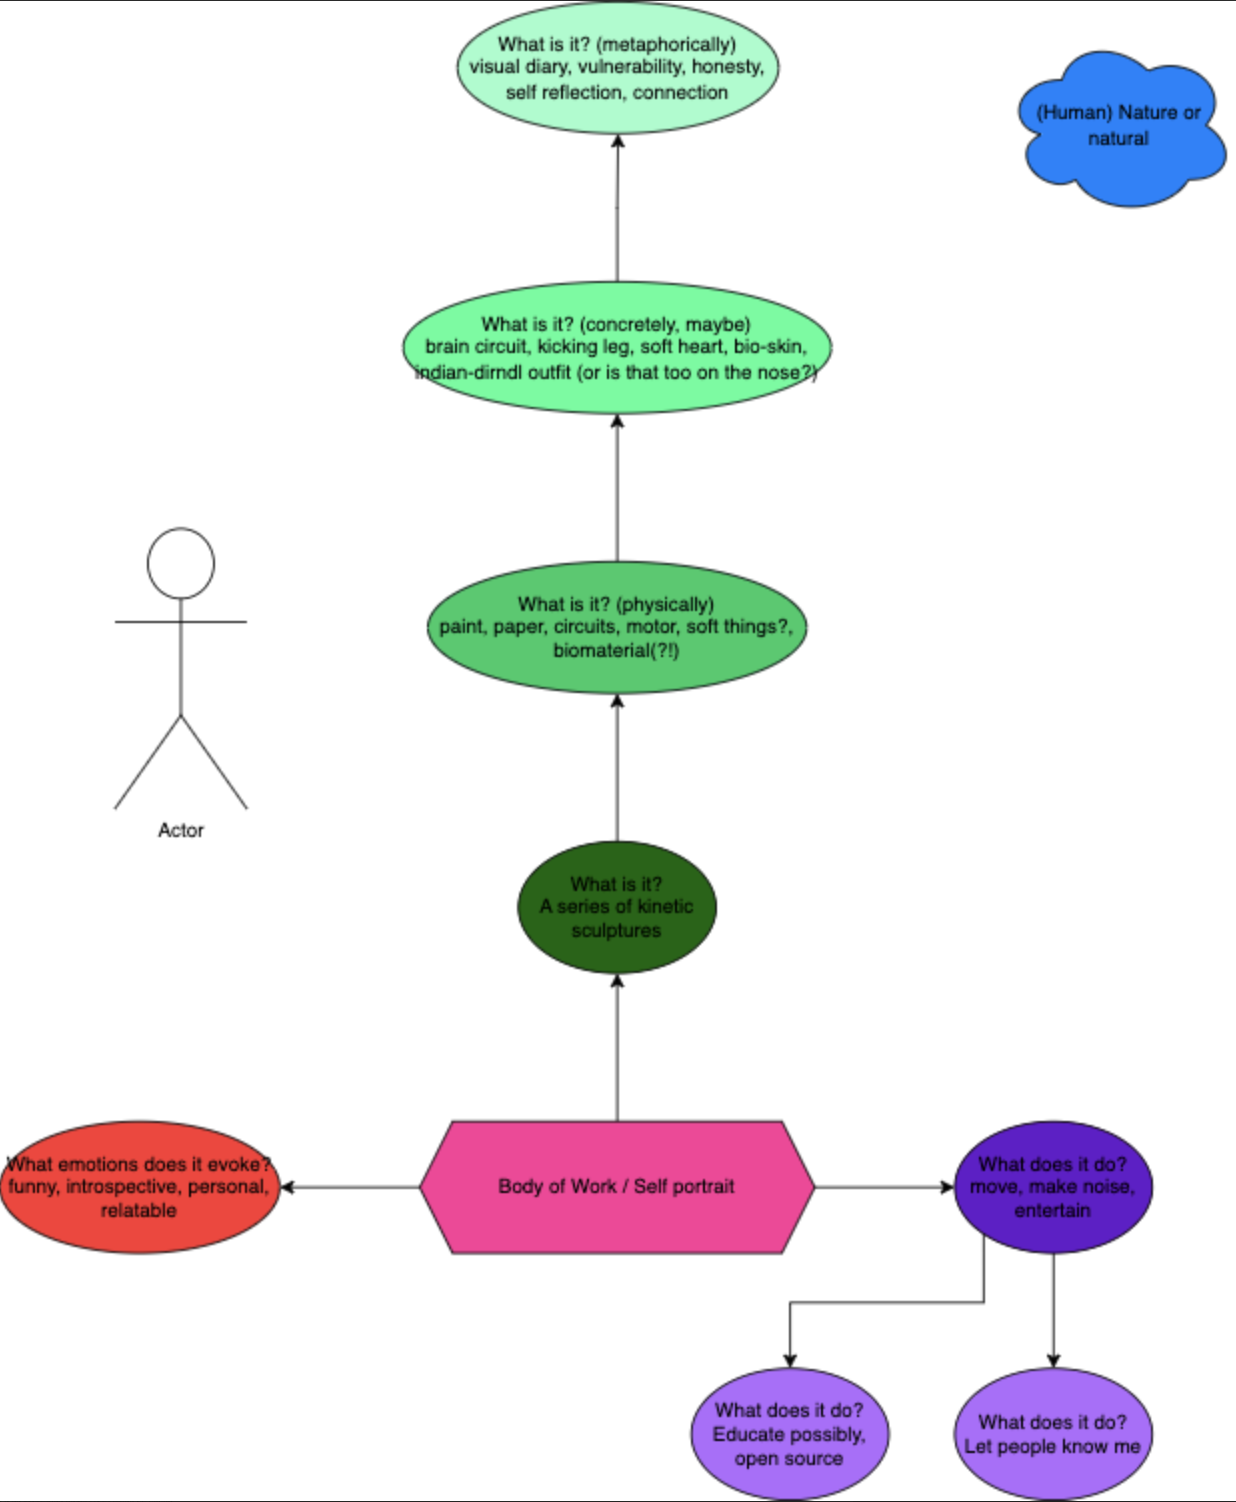
Here’s the assembled thing:

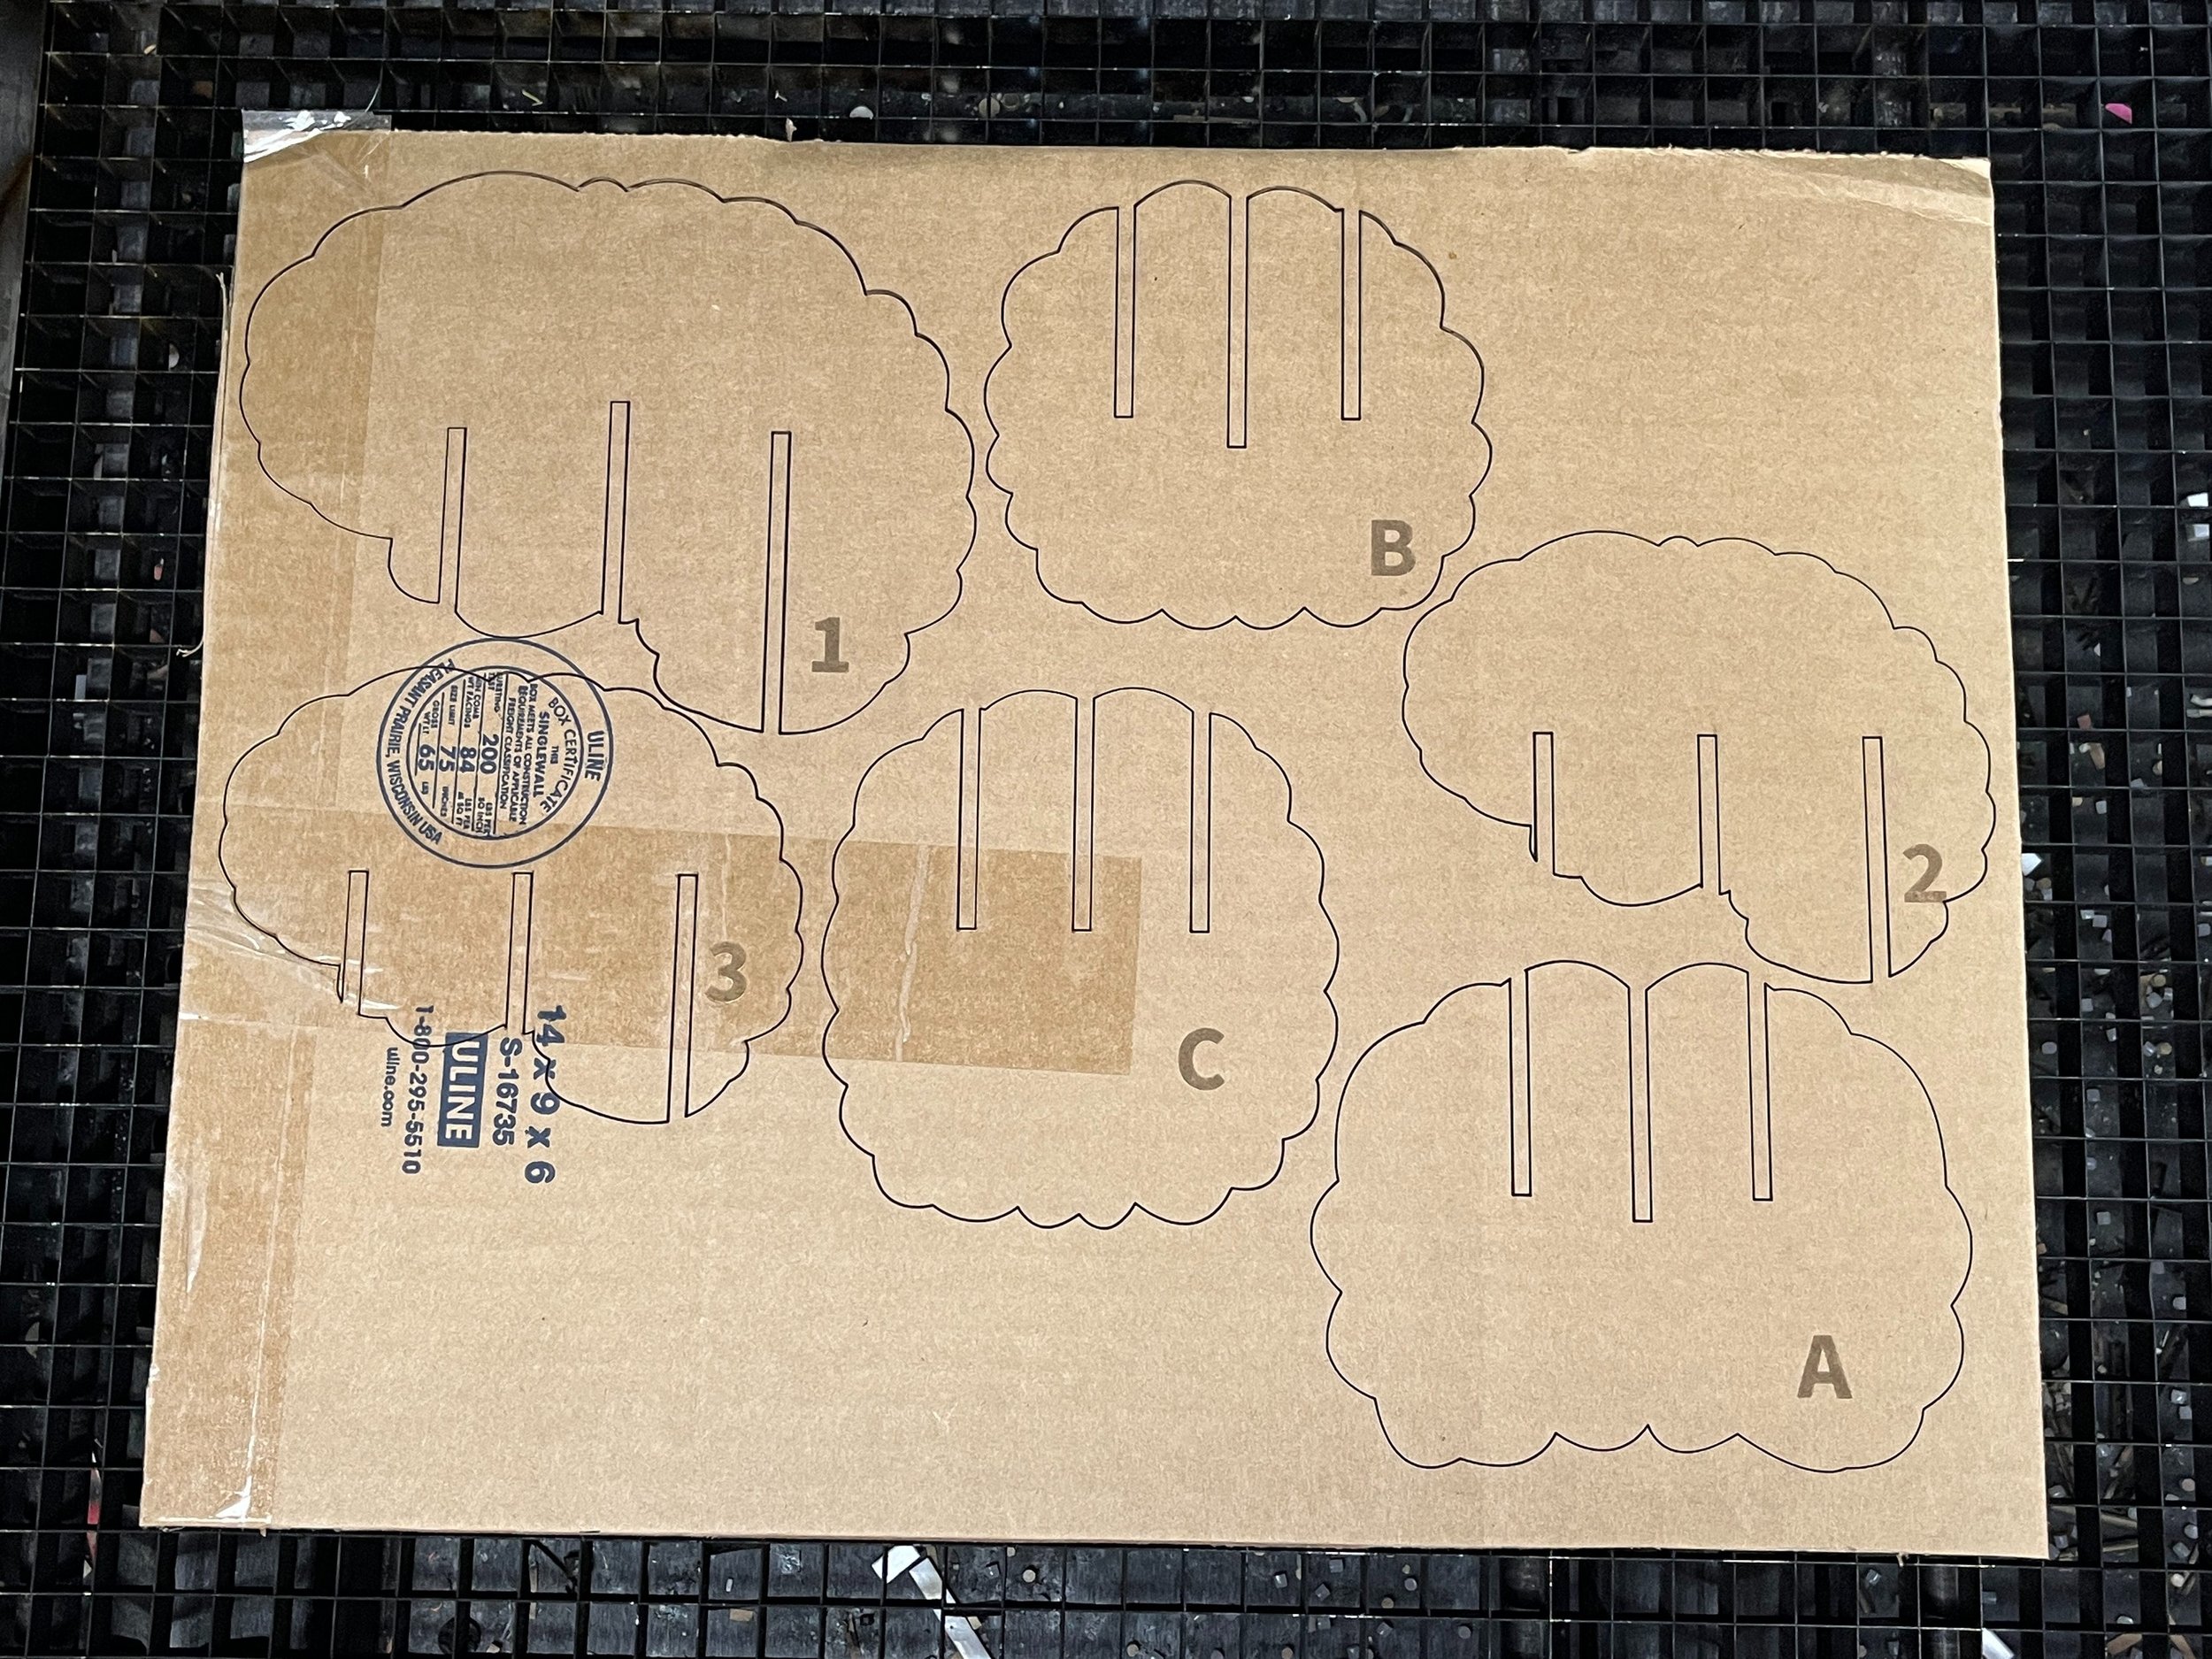
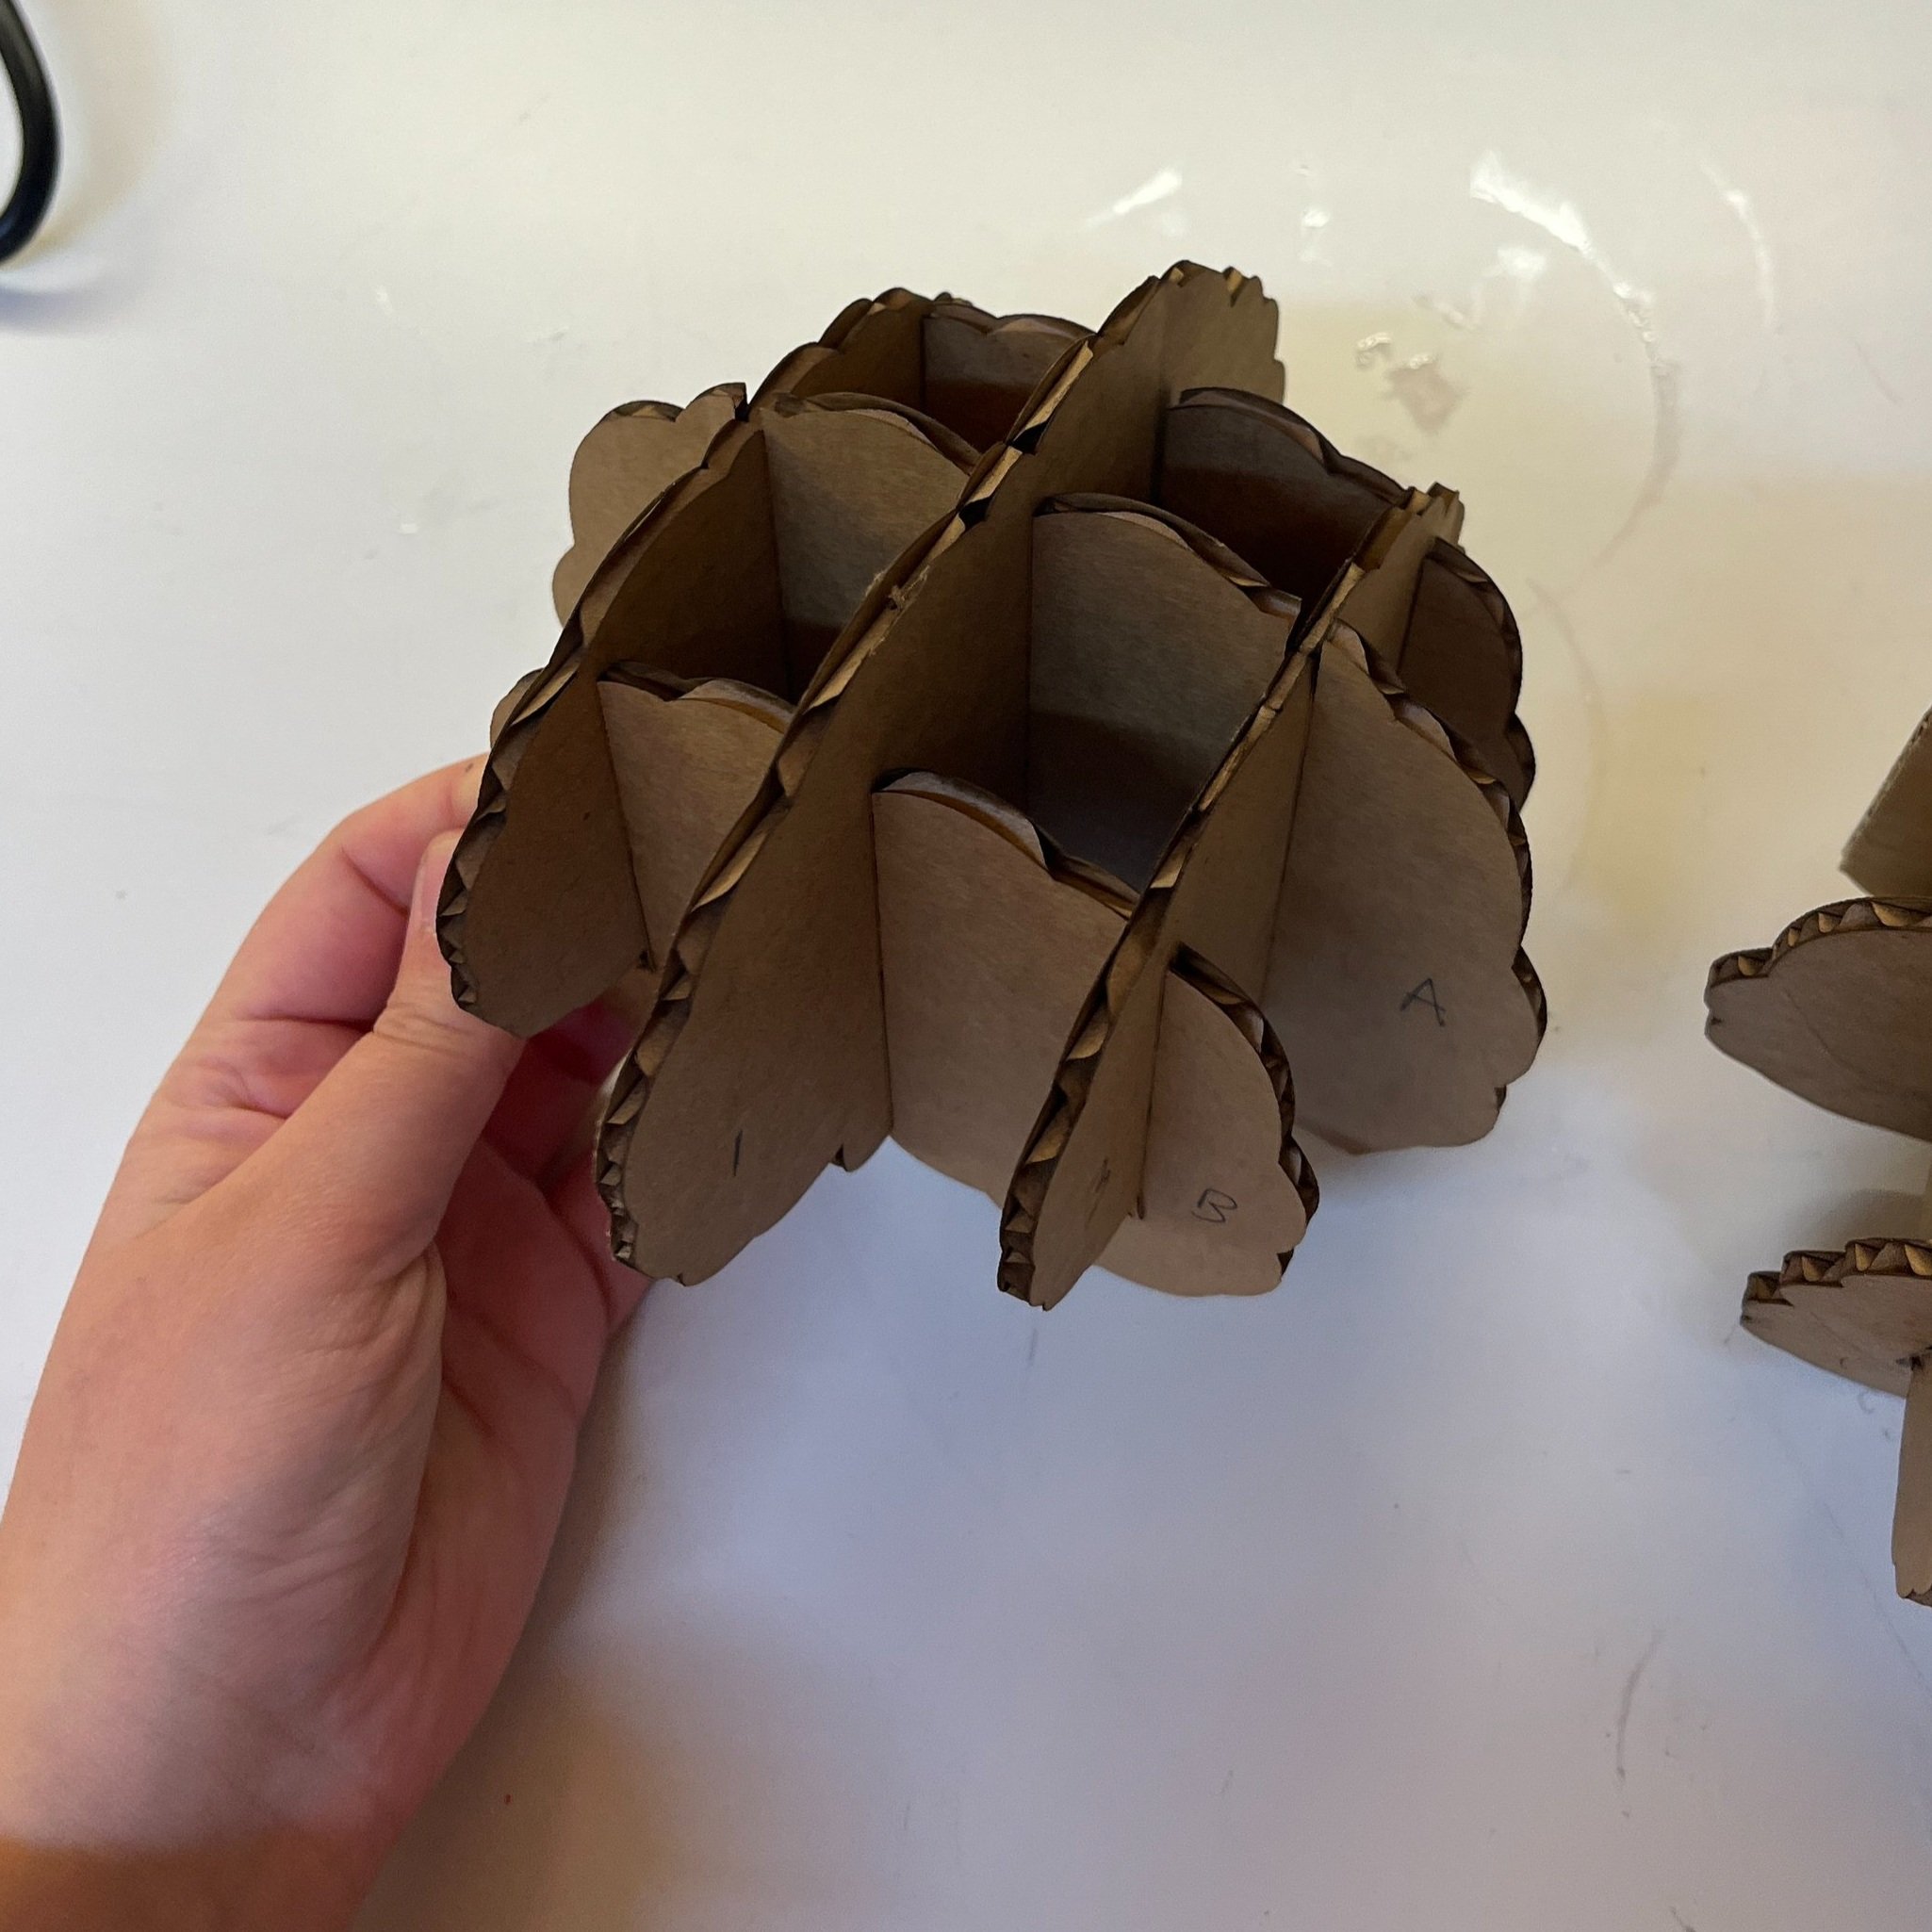
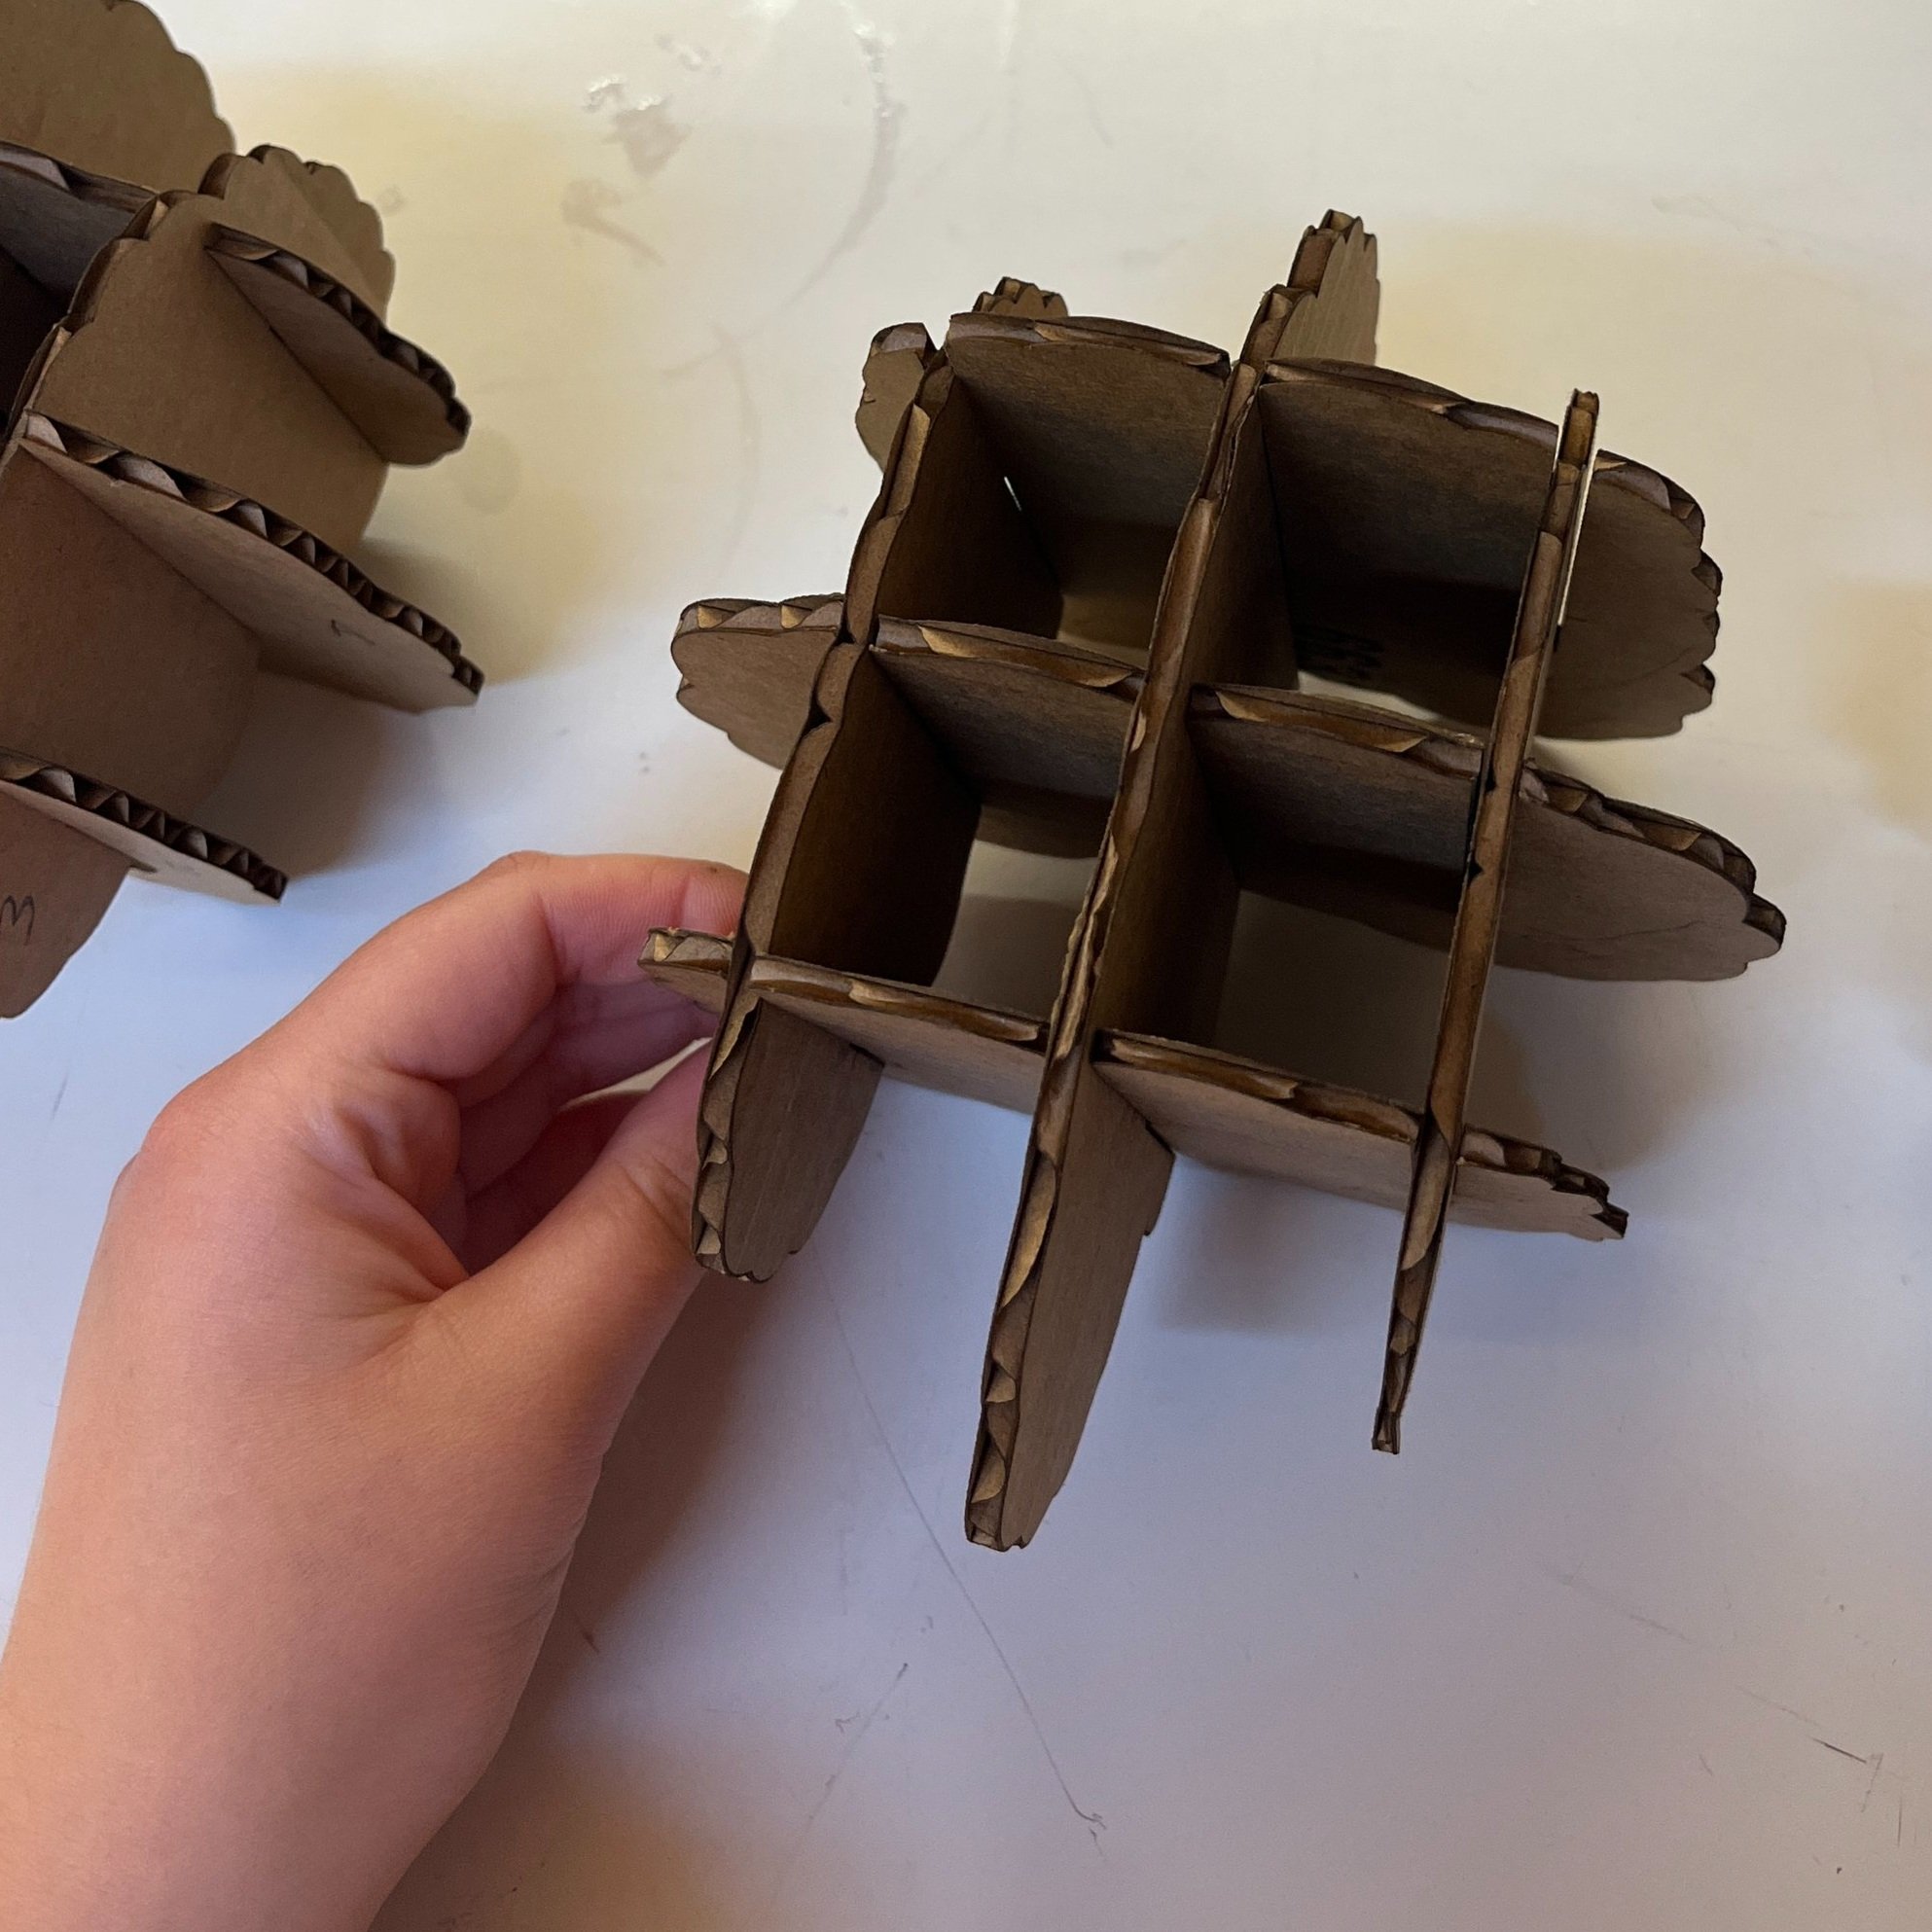
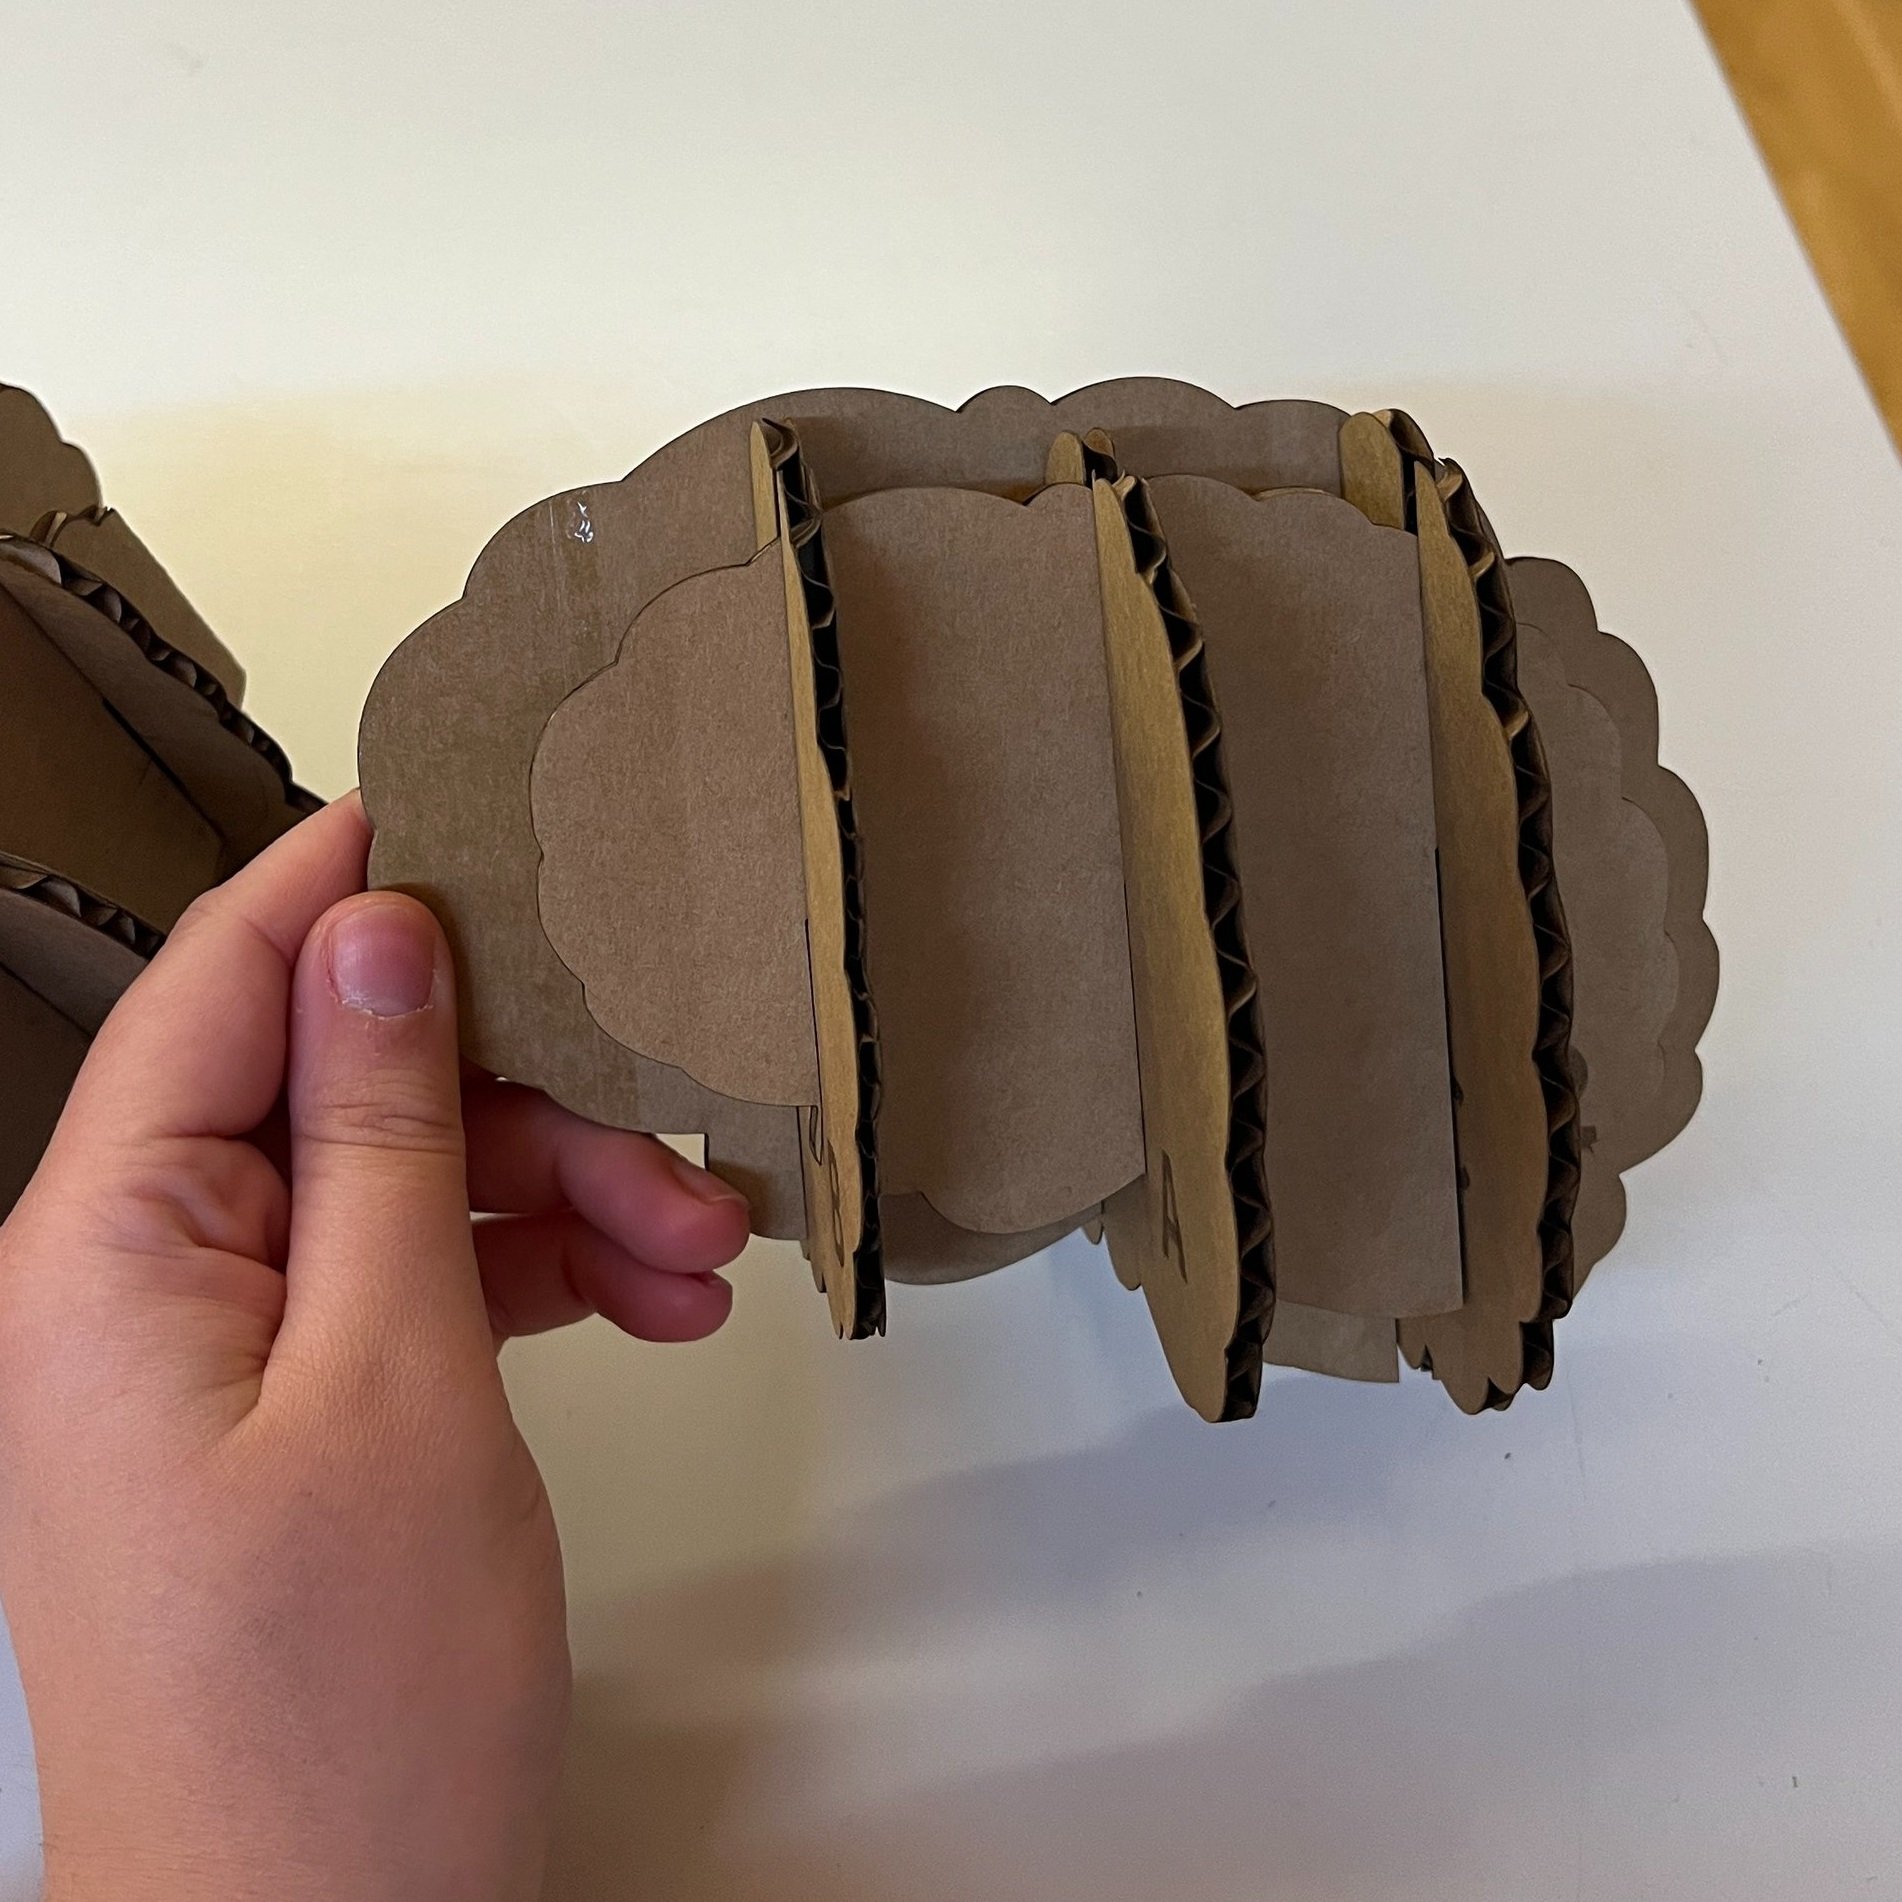
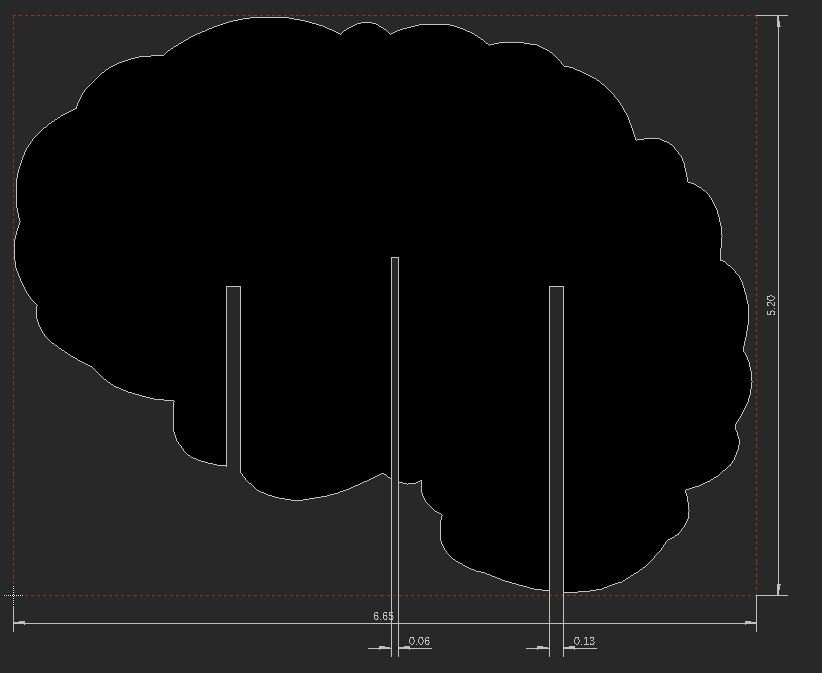
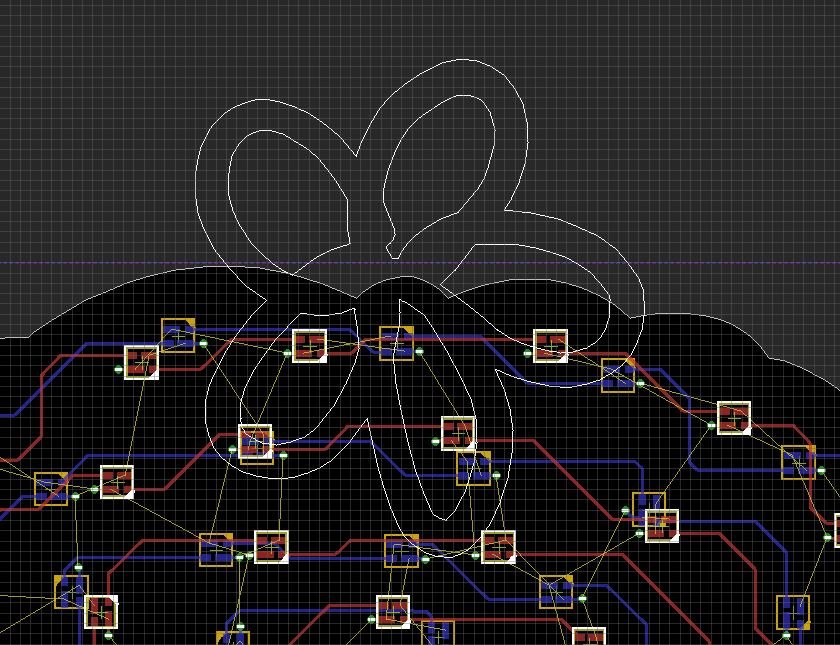
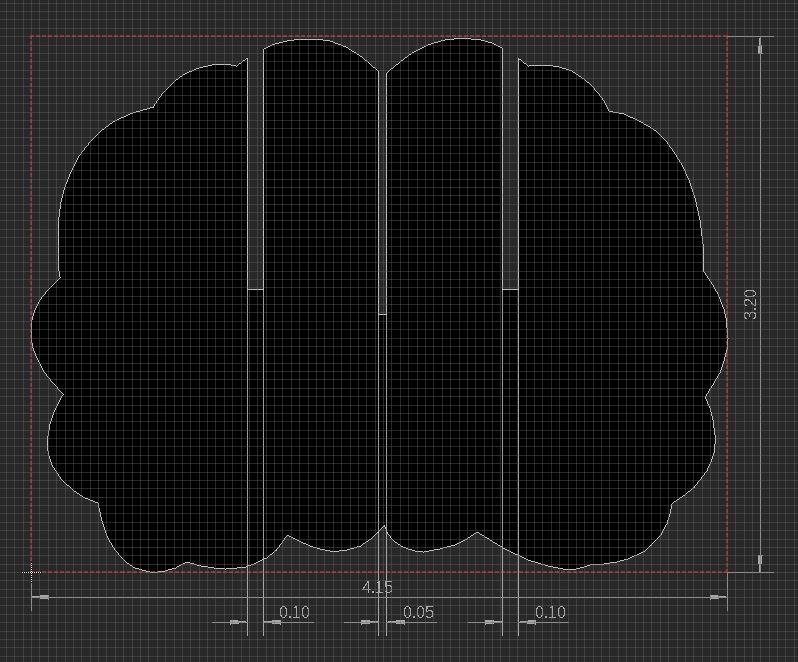
Next, I laser cut the other cross sections of my brain using some smokey gray acrylic (my laser files are on my Github repo). I also was curious about trying out two-way mirrored acrylic that I found at Canal Plastics. I was told that I needed to tape up the whole surface of the mirrored acrylic before laser cutting it because otherwise the laser beam would reflect right back into itself?! Not sure if that’s real, but I did tape up my acrylic anyway!

Now that I had the majority of the sculpture built I had to figure out how to display it. I had some really great help from Phil in the shop but I ended up going with my friend Bianca’s inspiration, the Third Brain from the Spy Kids movie. The way those pinchers hold the tiny brain reminded me of helping hands used for soldering. Works on many levels and I didn’t need to really build anything yay!

Pro tip: Put heat shrink on the ends of the alligator clips so that they don’t scratch up the circuit boards!

Here’s my vision for the final exhibit:

Software

Here’s where things get a lil hairy…. it’s always the software that gives me trouble. And idk how to design interaction either…

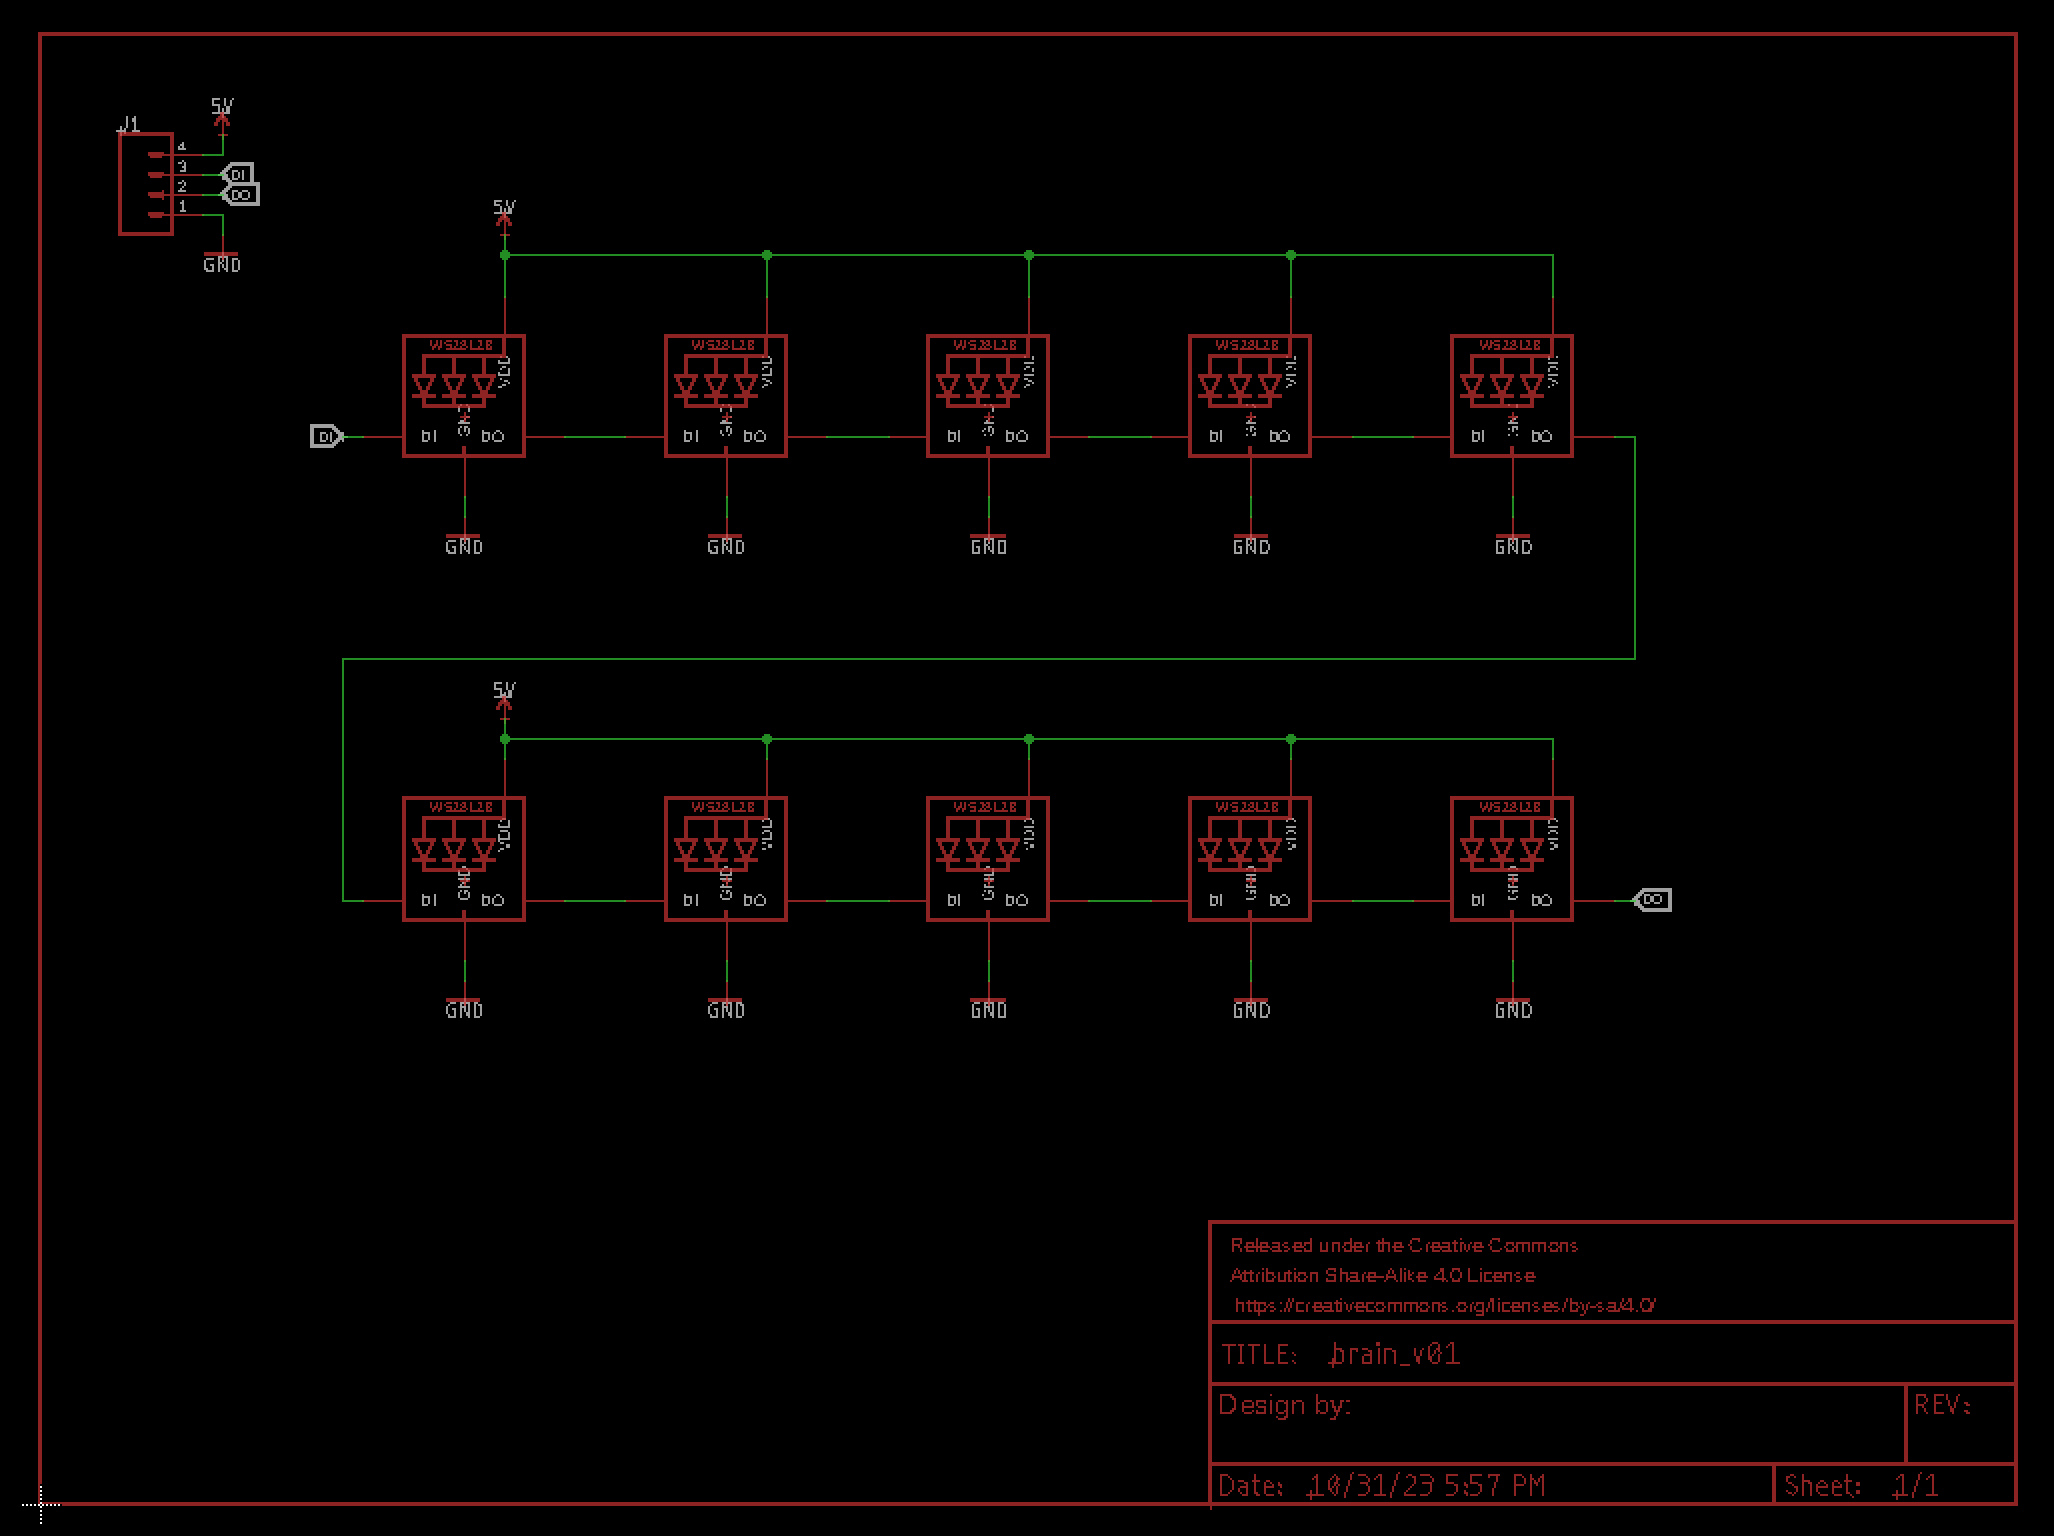
After some introspection, getting in touch with my body, I wanted to write an Arduino sketch so my brain would behave in the following way:

Nominal state: Neurons firing constantly, thought loop looping.

Someone detected in front of brain: uh oh, I’m nervous. Neurons firing quicker, thought loop LOOPING!

That person still there: I’m super nervous! Neurons don’t know how to fire anymore. Disco time!

Is this how it is to be in my brain?! Possibly.

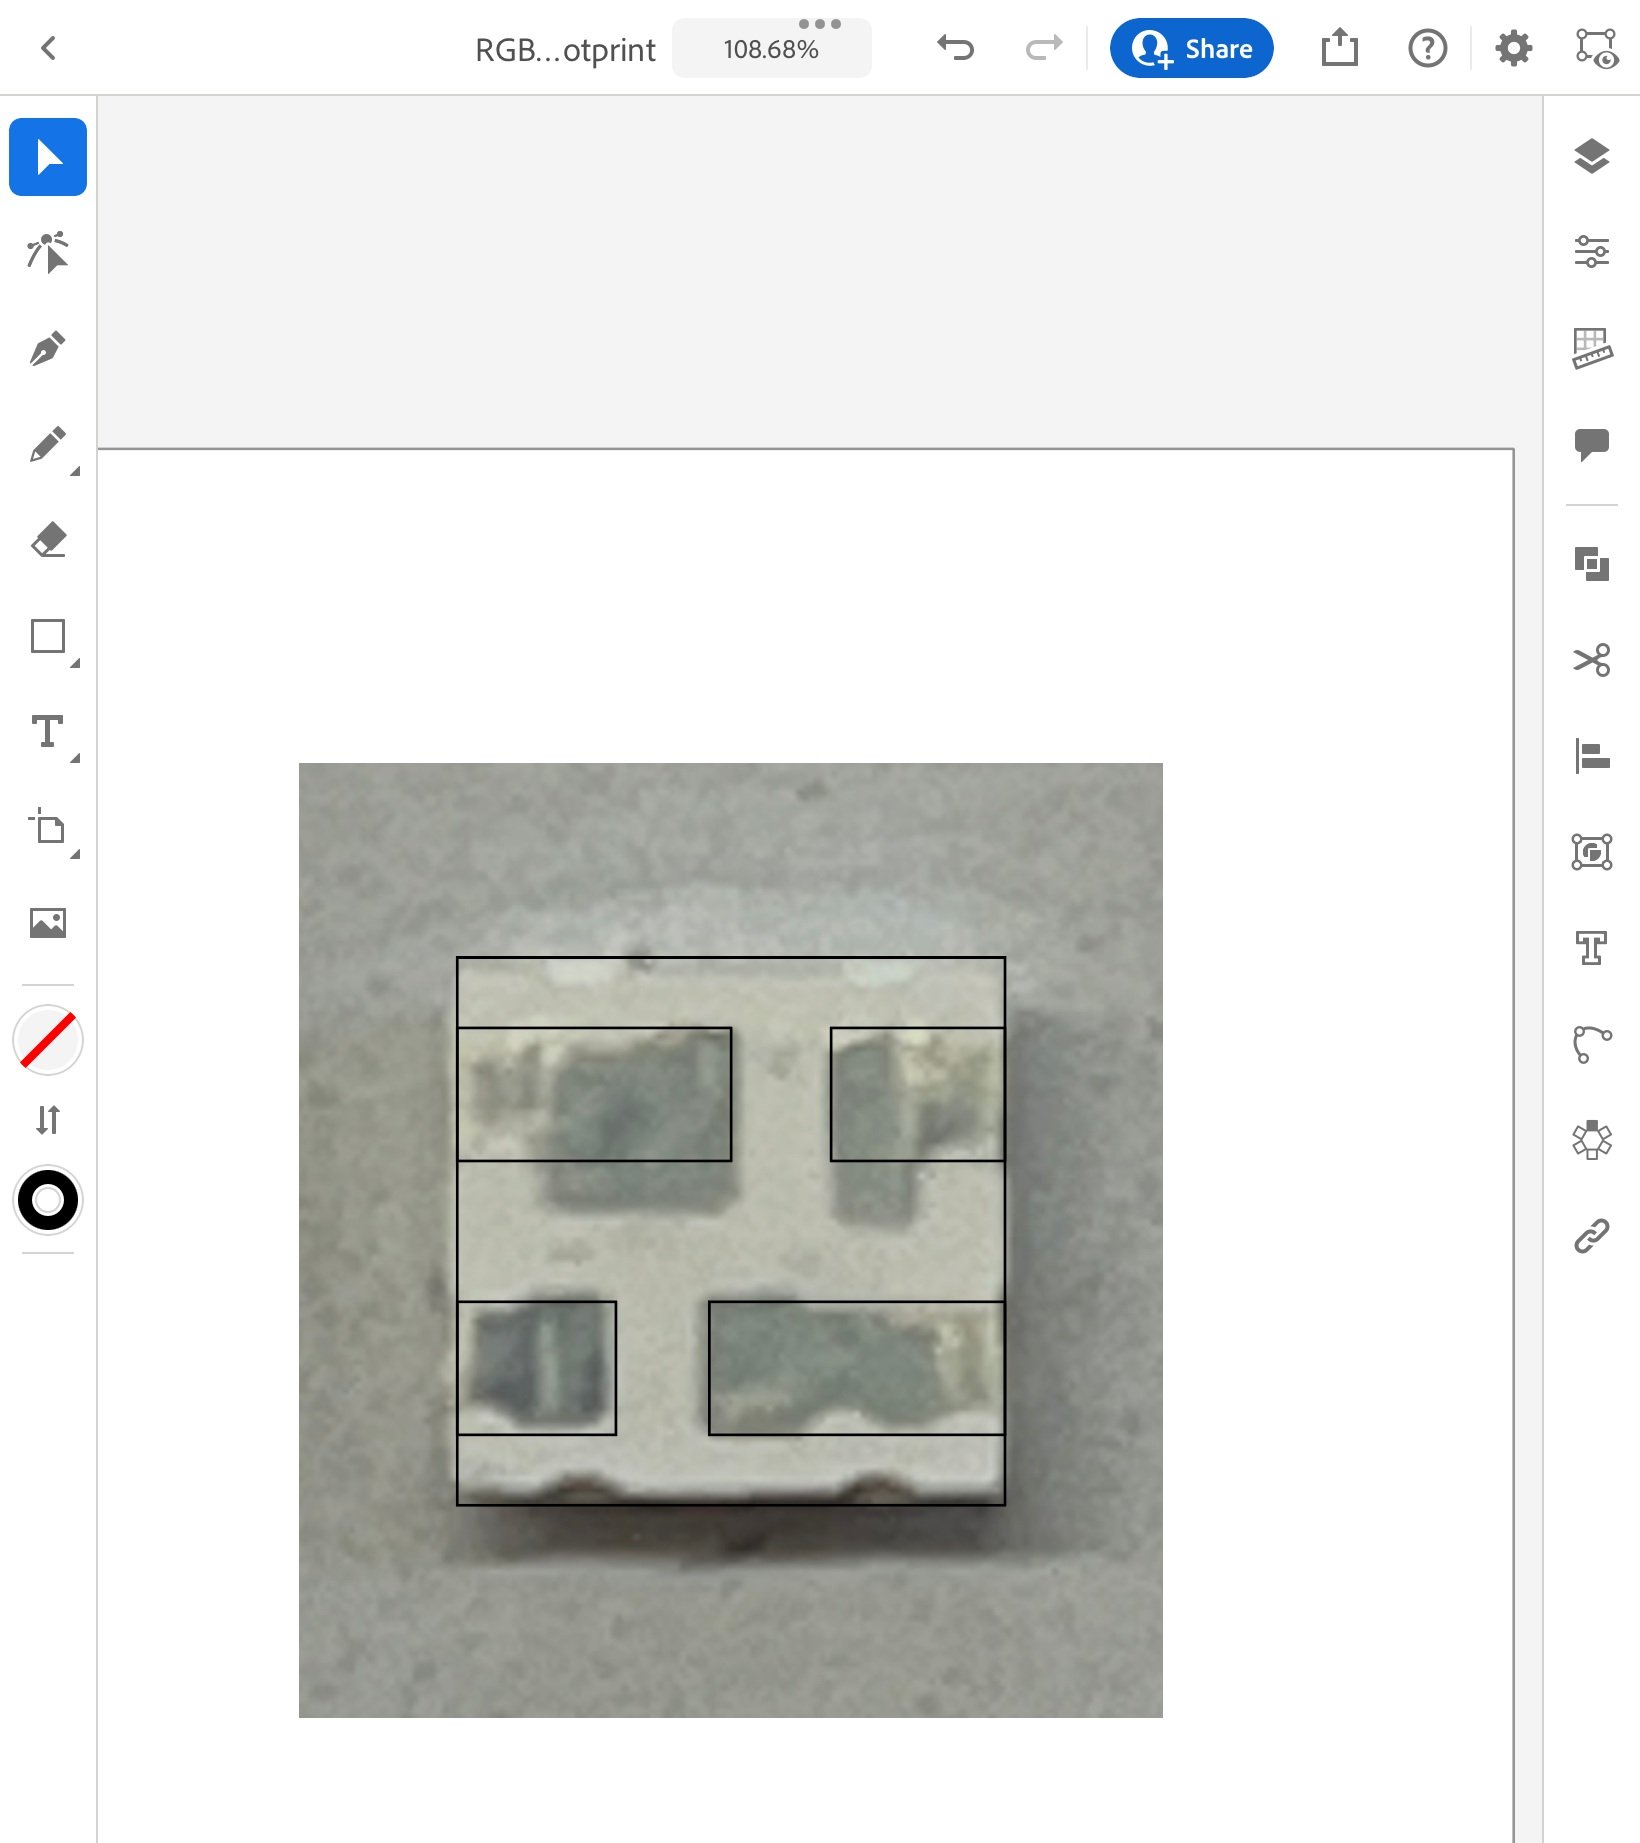
STHS34PF80 Qwiic board

I started with this brand new, spiffy sensor from SparkFun. The STHS34PF80 is a human presence and motion sensor that measures the precise black-body radiation as described by Planks’ law. It can discriminate between stationary and moving objects, has 80 degree field of view, 4m range, and monitors ambient temperature conditions. It’s a classic Qwiic board, 3.3V supply and logic voltage, I2C communication, and configurable SPI.

Though I was super excited about this shiny, new sensor, I had a lot of issues with it. Off the bat, there were compilation errors with running the examples from the library… so not a good start which made me skeptical of the software as a whole. I was getting temperature readings that didn’t make any sense to me. I also didn’t understand the presence readings and the interrupts example was inconsistent and didn’t trigger readings every time I waved something in front of the sensor. With time running out, I decided to change sensors to something that is tried and true.

Interlude: what is black body radiation?

  • A black body is a theoretical object that perfectly absorbs all incoming electromagnetic radiation, emits radiation like heat and light

  • Black body radiation used to understand temperature, size, and age of celestial objects

i2c_scanner sketch. Why does this sensor return so many I2C addresses? Default is 0x5A.

Example 1 from library. No idea why temperature is negative.

Example 2 interrupts

Regular old PIR

Luckily, attending a tech and art program and being surrounded by super awesome people has its perks, and was able to get my hands on a replacement sensor immediately. The Adafruit site has some really great documentation on getting to know your PIR sensor. I was able to hone in its parameters and get it to trigger reliably when someone is detected standing in front of it.

There’s probably no reason to get into the weeds too much here, but I had a lot of issues with using interrupts for the sensor and running light up sequences for my LEDs. I eventually ditched the interrupts and just do basic polling to check the status of the sensor. Not ideal, because the code is blocking, but it does the trick for now.

When it comes to lighting up the neopixels, I was originally inspired by this well done example that achieves a “comet” effect. This worked well for me before I incorporated the sensor and the animations would freeze when interrupts were triggered. I switched to the neopixel library and wrote some code that *kinda* works like I would like.

As always, you can find my final code at my Github repo here.

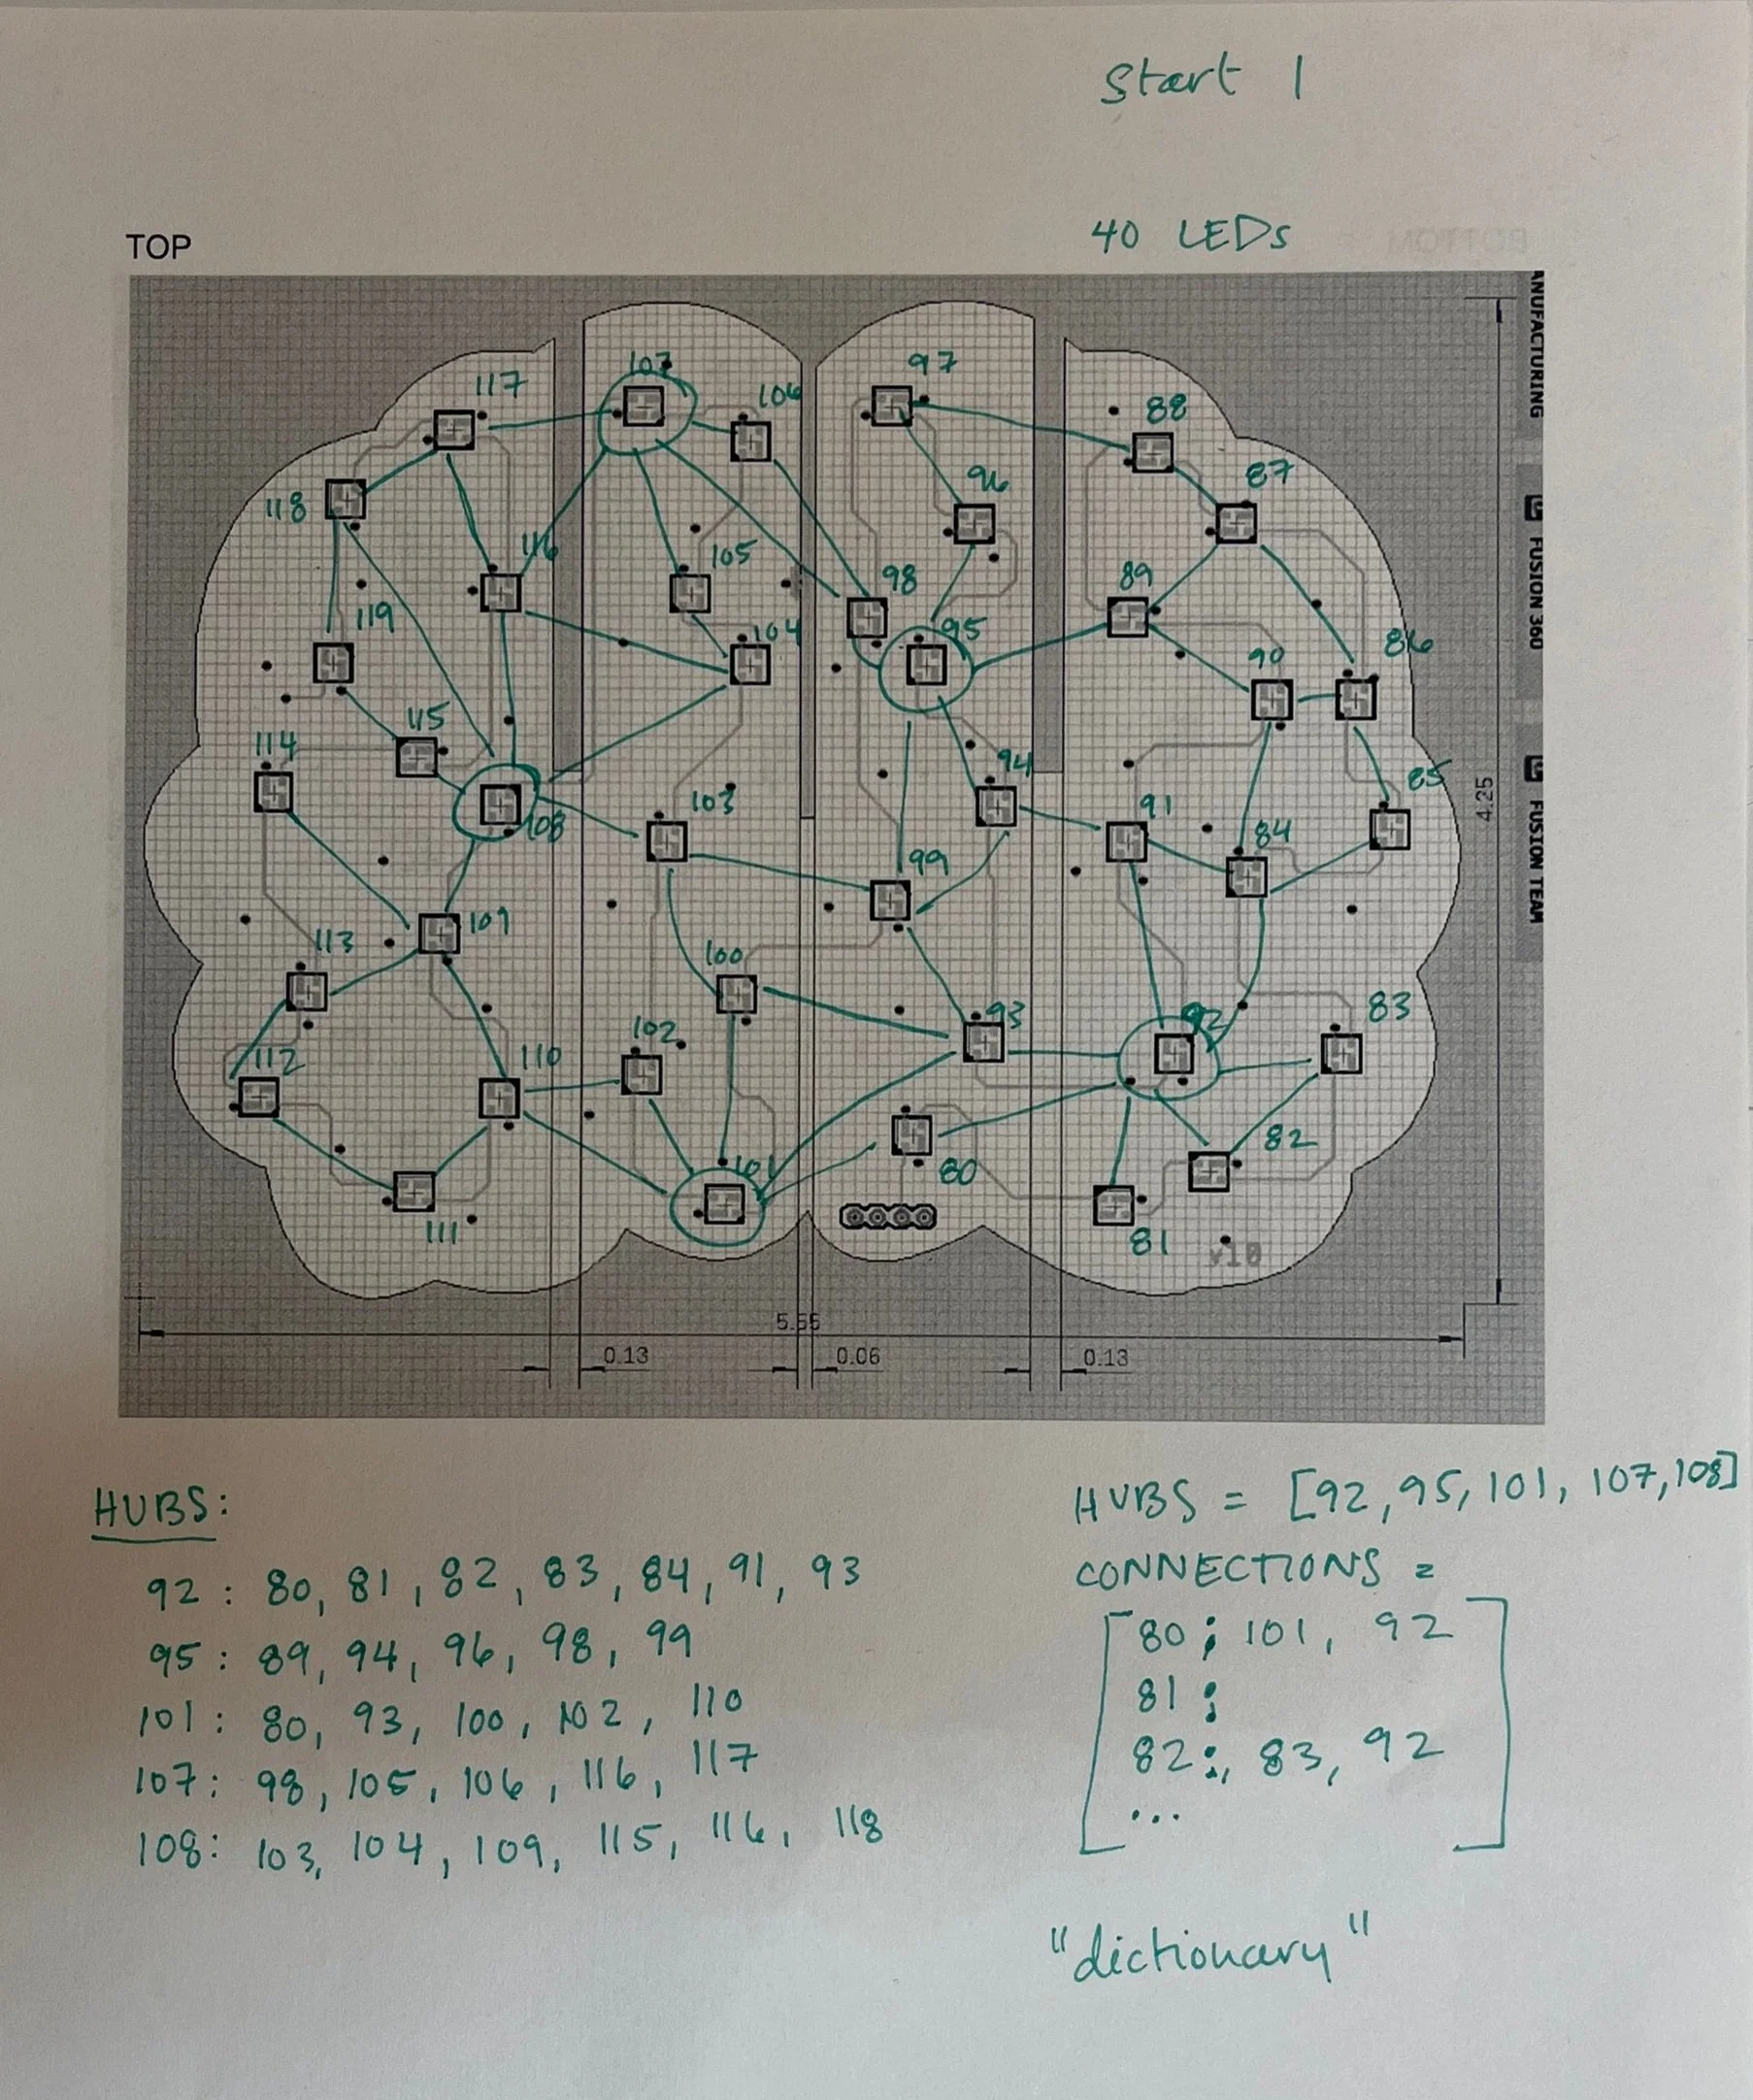
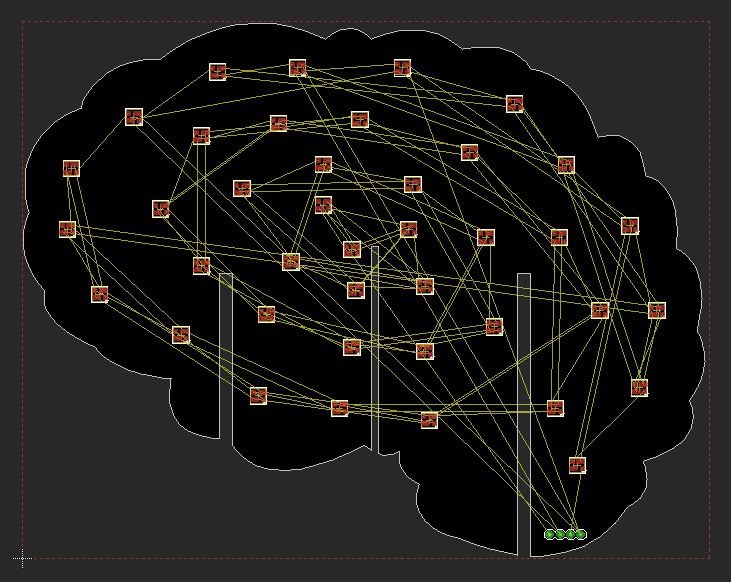
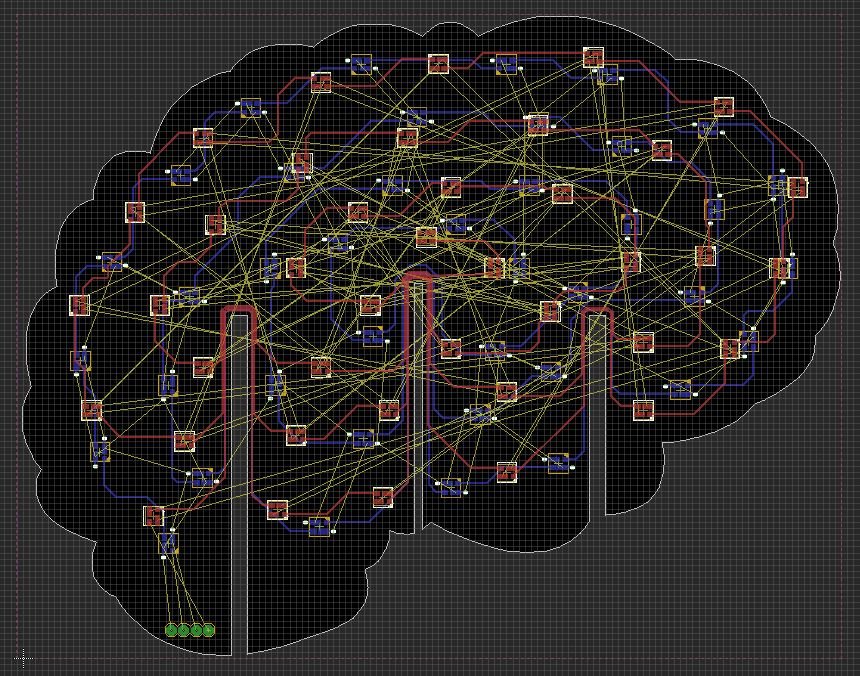
Graph theory and nearest neighbor bs

I also had high hopes that I could get the “neurons” to fire randomly, following neural pathways. I got a lot of help from my buddy Tres to come up with an algorithm to travel the “graph” of neurons/LEDs. We consulted chat-GPT and got some code that would compile but not a ton of luck running it. Might be something I revisit in the future.


More bioplastic weirdness

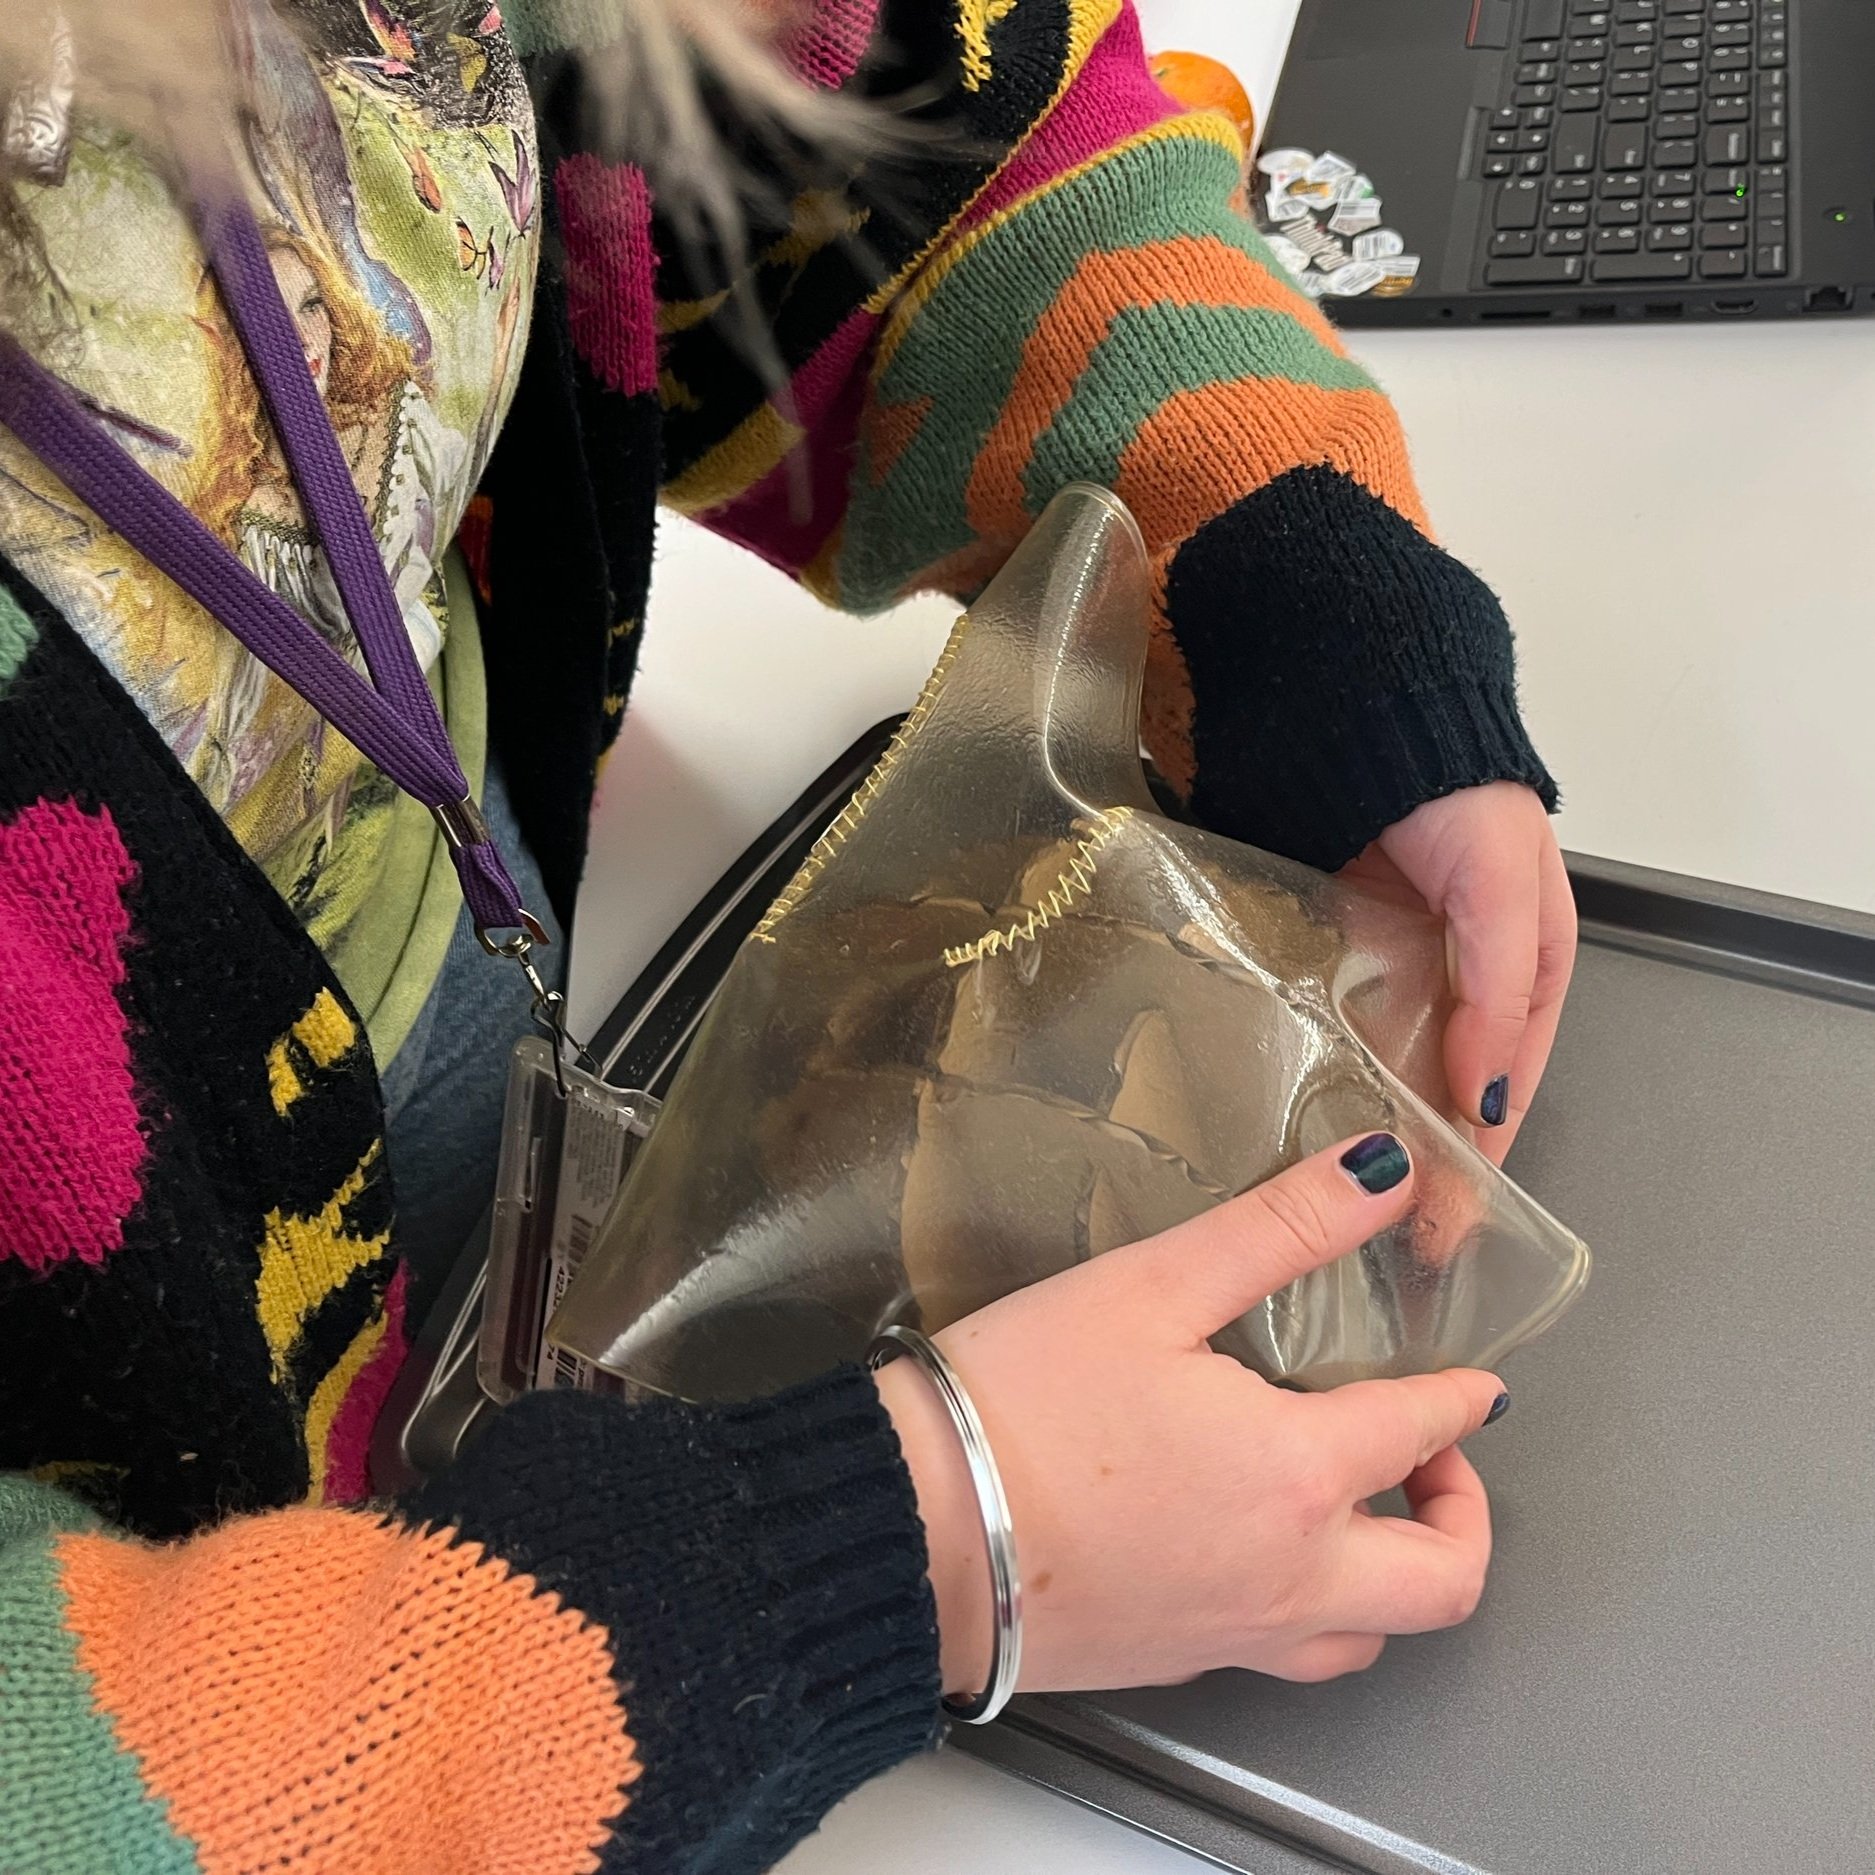
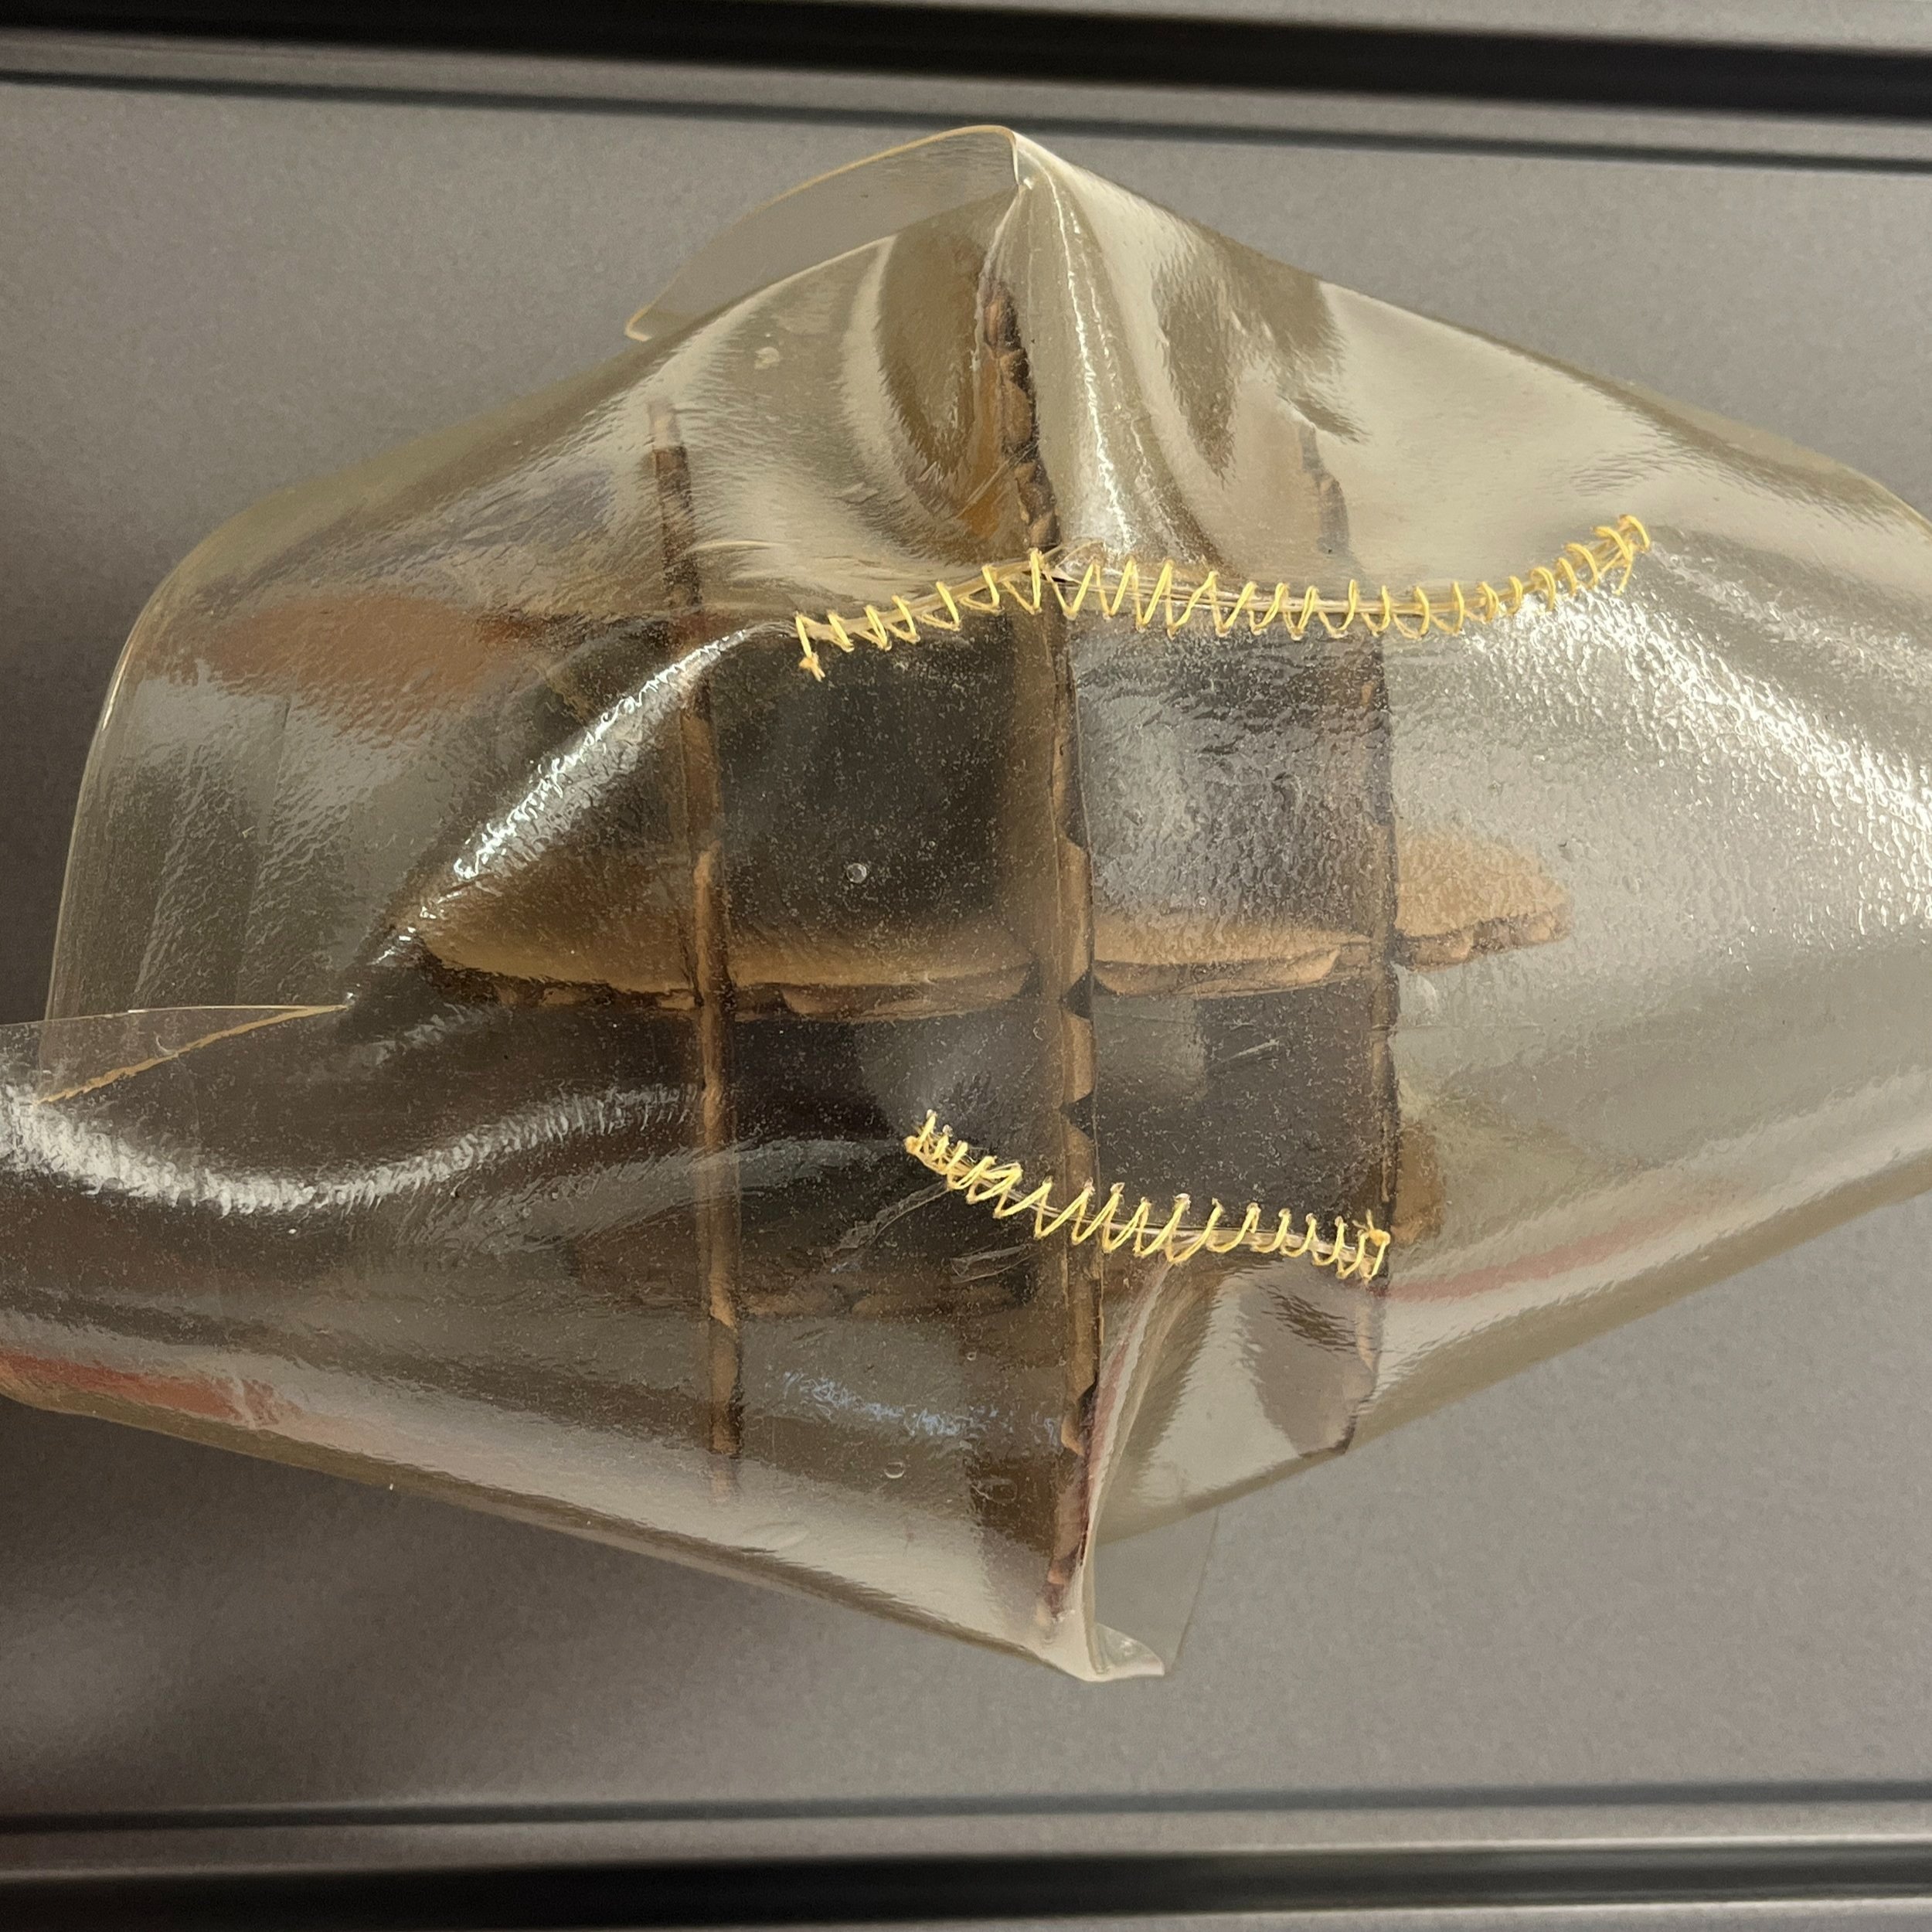
I was really motivated to figure out how I can incorporate some of my bioplastic research into my art practice. I decided to try to create a sort of “gray matter” for my brain by sewing together a cap for the sculpture. I found this pattern for sewing a ball and sent my sheets through the laser cutter. The laser didn’t cut all the way through (which I expected) and I used the line to cut out the pattern with a knife.

Kay, my most stylish friend, trying on the agar agar hat!

I also wanted to make a bioplastic glove to go along with my previous project. Through my research, I learned about this concept of “skin hunger”, the need for humans to have skin-to-skin contact. I had hopes that this glove would be conductive and would need to be pet, but the metal powder didn’t make the material conductive at all.
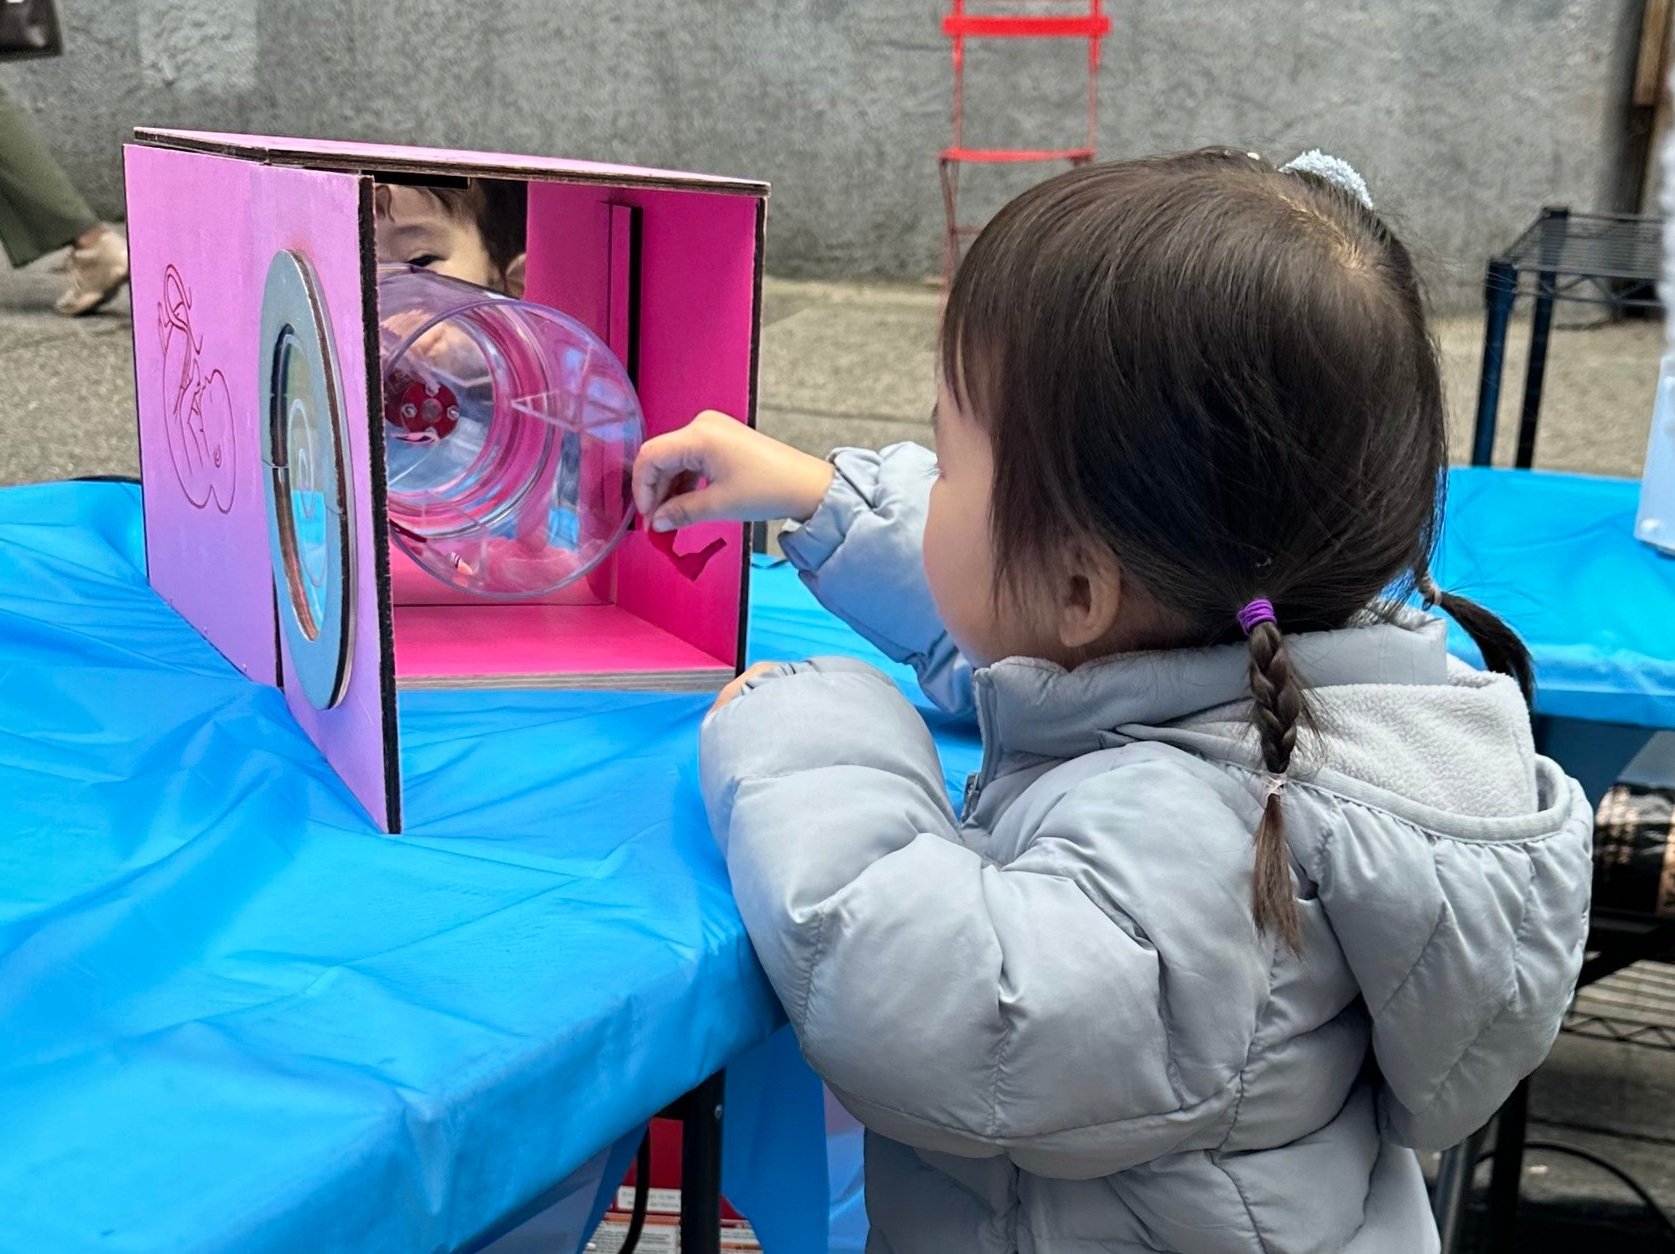
ITP Winter Show

Some feedback I got: people were really curious about how to calm down the brain. That’s something I should consider for future revisions.

Special Thanks to

It truly takes a village: Phil Caridi, Nick Poole, David Rios, Tres Pimentel, Jeff Feddersen, Erin Mamaril, Bianca Gan, Blair Simmons, Yeseul Song, Gabe Barcia-Colombo, Kay Wasil

Resources

My Brain Github Repo

SparkFun STHS34PF80 Qwiic Board

SparkFun STHS34PF80 Hookup Guide

SparkFun STHS34PF80 Arduino Library

Black body radiation video, and here’s another

Interrupt rabbit hole

Volatile variables - Arduino

PIR with interrupts

ISR Arduino forum issue

Neopixels

Neopixel Comet Tutorial

Ball and sphere sewing pattern

[ITP Thesis I] Brain Fabrication Update ... and stuff

Mood Board

Here’s how I’m feeling about brains this week.

Does Brain Size Matter?!

Carboard 3D Prototype

So if you’re following along with my brain journey you know that last week I was trying to slice up a 3D model of brain to make up my sculpture. You also know that I had a lot of Fusion confusion and couldn’t figure it out. So I gave up and decided to go free hand in Illustrator. Basically I copied the shapes I drew for my circuit prototypes and shrunk them down for the outer cross sections. I added in the slots so that the pieces could fit together.

Laser cutting!

Here’s my mess

I basically repeated this process, adjusting all the cross sections drawings, until I was happy with the overall shape. It took me three iterations of cardboard prototypes to get the shape just right. The one I landed on for my sculpture is the right side.

Proto 1

Proto 2

Proto 3 - Winner!

Bioplastic

I have been really curious about how I could add my bioplastic research to my art practice. Selfishly I also think adding a bioplastic component to my work would add a unique component to my sculpture and be a great contrast to the sterile/cold/technological feel of the circuit boards. Here’s the most beautiful preemptive agar agar bioplastic I cooked on 11/19/23 for unspecified future use.

RECIPE

Water = 800mL, glycerin = 60g, agar = 39g, 1/2 cap of vinegar

COOKING SEQUENCE

140 degrees for 5 minutes, 176 degrees for 7 minutes, 212 degrees for 7 minutes, 248 degrees for 7 minutes, 212 degrees for 7 minutes

I’m also trying to practice embodied making so I’m kind of going into this one without a plan. This is a picture from the next day (11/20) trying to drape the bioplastic around the brain prototype. I thought it might dry and conform to the shape of the cardboard but I should’ve known that the plastic was still to moist and heavy. It ended up ripping at the top.

This is the bioplastic ONE WEEK later. It is much thinner and dry to the touch but the rips are much more apparent. I was hoping to mold and bind the sheet around the 3D shape so I mended the sheet with a couple of stitches and tried wrapping the cardboard brain up like a gift. The ribbons are meant to hold the plastic in place and I’m kind of hoping that the bioplastic will just stay in that shape.

PCB v10

If you’ve been following along, you also know that at this point I have two WORKING milled PCB prototypes! Sweet! Now I am moving on to the more final version of the PCB. True to life brain size and many LEDs!

I started with updating my board outlines in Adobe Illustrator. I made sure the slot sizes would fit the PCB thickness and acrylic thickness. To get these outlines into EAGLE, I saved them as SVGs and converted them to DXF files online. However, when I did this, the scale was completely off from the original drawing. The scale is super important to keep accurate because I will have different parts slotting into each other. Turns out there’s a really weird scaling issue going from Illustrator to any other software because they use a different size for pixels than most other softwares. This was super frustrating!!!

A workaround I found to keep the scaling fixed was to open the original .ai (Adobe Illustrator) files in Inkscape by “File” > “Open” and then being sure to select “*.ai” as the file type. This will take care of properly converting the pixels to the correct size to keep the drawing to scale. I then saved the file as a DXF R12 while in Inkscape and could import the DXF into EAGLE as normal.

Another pro tip is if you place your drawing in the bottom left corner of art board in Illustrator or Inkscape it will align with the EAGLE origin in the board layout on import.

Something else I came across was that the free eagle license has restrictions on board area. I ended up having to switch from my personal login to my school login I created when experimenting with Fusion 360 so that I could access my educational license to create my big sexy brain!

Opening *.ai files in Inkscape

Yay! Here’s the imported PCB shape to correct scale!

This first view of the brain is meant to SPIRAL. I created a schematic with an LED chain 80 LEDs long, 40 LEDs on the top and 40 on the bottom. I first placed all the LEDs, reoriented them so that airwires were shortest, created a 5V plane on the top and a GND plane on the bottom, and then got to routing.

Here are some things I noted while refreshing my memory on using EAGLE:

  • Command “ripup @ ;” will rip up all polygons so it is easier to see components and airwires

  • I chose a trace width of 0.01 inch and via drill size of 0.02362205 inch

  • Ctrl + F flips the board over

I also attempted importing an Illustrator drawing as a DXF to be on the silkscreen layer and it didn’t quite work. I’d love to be able to draw a bunch of strokes for the fissures of the brain and put those on the white silkscreen layer. On the right is a quick test I did. The stroke I drew translated to an inside and outside outline which is not really what I want. If I could make this only one line, the pen path, then I could potentially draw some folds and bumps to scale, import it like normal, and select all silkscreen and bump up the thickness?

There’s also some nuance between fills and polygons. A fill would be composed of a bunch of lil lines which requires a whole bunch of data but polygons are more SVG-like. I was following tutorials like this but I couldn’t get anything to work. This was too hard for me so I’m abandoning the silkscreen for now.

I shifted gears to the second PCB and I was having the same scaling issues again.

Brain imports too small!

After opening *.ai in Inkscape and saving as DXF, the import is to scale!

I then went through the same layout and routing process. This brain should look more like normal neurons firing so I laid out the LEDs randomly and will treat it as a graph with neighbors, impulses coming from selected neuron hubs, in software I guess. Hope I can figure that out.

I don’t have any good images, but I also added some extra pads at the slots for the PCB. The idea is that when the two boards are slotted together, I can solder them into place for extra electro-mechanical connection. Not sure if they are the right size. I also grounded them… not sure if that’s right either.

Finished design

Generating gerbers

Here’s my Github repo with all my EAGLE files.

Design Review with Nick Poole

Time was quickly running out for me, so I had to go ahead and pull the trigger on ordering my v10 of the brain boards but I was able to get some eyes on my design after the fact. I used to work with my friend Nick at SparkFun some years ago now. Luckily, he’s the best person ever and responded to an email from a desperate graduate student and estranged co-worker. He was able to look over my design and give me pointers on creating 3D PCBs. In fact, he’s an expert on Boggling the Boardhouse and even gave a whole presentation at SuperCon some years ago. I’m really so lucky to know such smart and kind people and am excited to take Nick’s pointers and develop brain boards v11 soon!

References

Github Repo with Brain files

Morkana Nopales

Get DXF files into EAGLE

Adobe Illustrator scaling issue in Inkscape

Inkscape scaling issue with SVG files (this didn’t end up fixing my issue but is still relevant)

Importing custom images into EAGLE

How to add logos to PCB layouts

Nick Poole - Boggling the Boardhouse video and Github

[ITP: Thesis I] Project Proposal Draft and Fusion Confusion

First things first, here’s a link to my Thesis Project Proposal Draft. Remember, it’s just a draft…

Embodiment

I’m continuing to explore my own embodiment through different sketches of self portraits. I’ve been using some Inktober prompts as inspiration.

Inktober 20, bulb - sometimes ideas carry me away

Inktober 21, slingshot - why do I attack myself?!

Please Wash my Brain

What this project is

A life-size brain 3D PCB light sculpture with acrylic cross sections. The middle cross sections will be double-sided PCBs with RGB LED neurons. The neuron firing patterns will change as the brain detects people standing in front of it.

How I will be making it

PCB prototypes were milled on the Bantam and soldered by hand. The final version (100+? LEDs/PCB) will be manufactured by JLCPCB with a stencil for solder paste, hopefully. Then I will populate all the components.

Acrylic cross sections will be laser cut.

Materials left to buy

Schedule

  • 11/15 - 11/19: 3D model and cardboard prototype. I’ve been struggling with this this week, here are some options:

    • Try to model my own simple brain in Womp or Nomad Sculpt (for iPad) and then slice with Fusion Slicer

    • Draw my own brain cross-sections in Illustrator and just scale down and add slits

  • Order sensors - DONE!

  • 11/20 - 11/22: design v10 of brain PCBs (there’s two!), solder pads as mechanical connection? Do I need to order any more parts? LEDs, qwiic cables, solder paste, spatula?

  • 11/23: Order v10 PCBs

  • 11/23 - 11/28: Talk to some LED/PCB people — Aaron Parsekian, Brian Oakes, someone at SF? Nick?

  • 11/28: Assemble PCBs

  • Need v11 of PCBs?

  • On, and on, and on: write software, laser cut acrylic, assemble sculpture

Fusion Confusion

Tutorial

I downloaded Fusion 360 and secured a student license to use the software. I followed this tutorial to make a stamp in Fusion in hopes of learning the software. The results are below but I’m not really sure I’ve learned this software yet.

Fusion Slicer

My plan to get the cross sections needed for my sculpture is to slice up an existing 3D model of a brain. I downloaded this application called Fusion Slicer which will do just that thing. This Fusion extension is deprecated so it is really hard to find for download and there isn’t support for it anymore but I was able to find downloads and tutorials by the same guy who created the tutorial above, Product Design Online.

Once I got that all setup, I started looking for models of brains. I searched through sites like Turbosquid, GrabCad, and Thingiverse for models that weren’t overly complicated. A lot of them were really accurate and included all the parts of the brain but I really just needed the simple cloud shape.

Anyway, I tried out a lot of those models. Slicer works with .stl or .obj files so that’s what I downloaded from those sites. I tried opening the meshes directly in Slicer but the software would hang for a long time and eventually crash. I decided to open up the meshes in Fusion to see what was going on with them. Many of the models from the internet had warnings that the mesh was incomplete or open. Through some googling I found I could fix that by using “Mesh” > “Prepare” > “Repair”. Then I also learned that Slicer might be crashing because the brains were too complex! I used “Mesh” > “Modify” > “Reduce” in Fusion to simplify the mesh and reduce the number of vertices/faces. Kinda ironic!

Finally, the brain meshes were opening in the Slicer software! Below are some screenshots of that software. You can see it does a great job creating 2D slices from a 3D model. You can configure the number of slices, which direction, placement, almost everything! It’s starting to look like what I imagined for my sculpture. Except for everything in red has an error … so basically all slices. I went through this process with various models I found online but essentially the meshes were all too complex and accurate to the human brain, with all the extra giblets and stuff inside, that it wasn’t able slice without conflicting. I couldn’t figure out how to delete the meshes inside the cerebrum and make the brains dumber. Double ironic!

[ITP: Thesis I] Uhhhh

Research - Embodiment / Bodies everywhere!

The Wisdom of Your Body, Hillary L McBride, PhD

  • “The body is not a thing we have, but an experience we are” - Theresa Silow

  • How do I experience my body?

  • If you were in fact your hand, how would you reveal yourself as a hand? — not sure what this means any more in hindsight… wish I had a page number for this

  • We forget all about bodies until we face pain, aging, illness, trauma, incarceration, or impending death

  • People are reduced to body-objects not empowered as body-subjects

  • We have forgotten ourselves as bodies to survive the pain or to be compliant

    • Dissociation!

  • Embodiment helps us be fully present and connected with ourselves and with those around us

  • Trauma occurs when something negative and unexpected happens, and it leaves us feeling confused, overwhelmed, and powerless (59)

  • Depression is not a feeling but a nervous system state we move into after having been overwhelmed or mobilized for too long. Same thing for burnout (63)

  • We complete the stress cycle when we release our trauma response mechanisms by moving the stress-related energy out through our body (65)

  • Interoception = ability to sense what is happening in your body and to know yourself from the inside out

  • Culture has ideals about bodies and they are communicated through three primary sources of influence: parents, media, and peers (85)

  • Reinforced idea that our appearance is connected to our social belonging (87)

  • Objectification as the experience of being female in a patriarchal culture that sexually objectifies the female body.

  • Self-objectify = to internalize the observers perspective as a primary way to view themselves (90)

  • Body neutrality = appearance acceptance or appearance neutrality

  • How we value and honor our own bodies impacts how we value and honor the bodies of others (96)

  • There is goodness in our own body

  • Interoception is essential for creating the experience of balance and homeostasis, regulating emotion, having a sense of body ownership, and experiencing continuity as a person over time (98)

Media

  • Trauma schism = mentally remove yourself from your body - Big Mouth, season 7 episode 9

  • “The body can’t live without the mind” - Morpheus, the Matrix

My own thoughts

  • Want to reconnect and remember my body

  • Shut down connection to the body as a trauma response, it’s just easier

  • Physically practicing my physical art practice

  • Me: I don’t want to be perceived, I don’t want to attract any extra attention, be invisible, take up as little space as possible

What it feels like, or what I visualize, in a dissociative episode. These happen when I have heightened anxiety or stress

I also tried completing Inktober last month. I didn’t succeed with creating 31 drawings in 31 days but I did represent myself a few other ways. I’m planning on still completing the rest of the prompts for Inktober, on my own timeline, but it might be helpful to my thesis if I keep on approaching these prompts as self-portraits!

8 Dream

12 Nest

17 Blush

18 Snooze

Eyes always closed… why am I always sleeping?!

Office Hours

Blair Simmons

  • I want to know about your portraits

    • Devices are an extension of self

    • Release of data

  • Should look into the history of portraiture

    • Who are the people who historically could afford to get portraits made? Can we reclaim this process?

  • Exploring a self-portrait could be an opportunity to be known and held in memory. Is there a desire to share?

  • Lean in to your instincts

    • Do the work to decide why. What’s the justification for what you are doing, choices you make?

      • Why is this all about you? Why is this literal? Why feminine?

      • Note when things are frustrating and try to disentangle, note when things are joyful

      • This thesis is an exploration of embodied/instinctual making

  • Is this project a critique? Inserting the self (or the human) into logical, technical thinking/design

    • The self wasn’t meant to be rational, emotions were meant to be taken out of the scientific process

    • What do we lose when we attempt to take out the human bias when designing tech?

    • Personal connection to the work

Sharon de la Cruz

  • Find more examples of self-portraiture. Why would you make it?

  • Dabble in the range of literal to abstract

  • I’m in practice with my body, body is a vehicle to create, PHYSICAL art practice

    • I want to more consciously understand my body and its relationship to my making process

    • How are you making differently now?

    • “Don’t think, just do” has been my motto for the last few years, trying to put words to the gut feelings

  • Give yourself space to defend and be secure in what you made, reflection on the message

  • How will you make people (viewers) sit and be in the story?

Gabe Barcia-Colombo

  • Brain looks cool but doesn’t say much

  • I should be writing everyday… about anything

  • Brain storm a list of body interfaces, inputs and outputs

  • Some Jan Svankmajer reference…

Prototype

Ok, so if we can remember, I ended last week with two PCB designs and one milled PCB. I started by milling my second PCB, just a different view of the brain with different neuron configuration.

I got all my parts in from Adafruit so I was ready for assembly. I made some markings on the PCB to indicate the orientation of the LEDs. Then, glopped some solder paste on all the pads. This was kinda hard because it’s hard to control the paste in the tube. I had to use my favorite, super sharp tweezers to clean up and push around the paste. Then I placed all my LEDs and used the hot air gun and a coffee cup warmer to reflow the solder. Honestly, assembly worked a lot better that I thought it would!

Pin indicator markings

Solder paste

Completed prototype

So I plugged this thing into my Arduino, powered it with my computer, and I got this error: “Power surge on USB port”… FUCKING SHITTY LED footprint!!!!!! Turns out the footprint Adafruit provided for their NeoPixel is not drawn to match the physical footprint of the part, so the pads short to ground since this self-milled prototype has conductive copper all along the top surface. So I needed to redraw the LED footprint.

Here’s all the dimensional information on the part datasheet… not enough measurements to draw an accurate footprint as far as I can tell.

I took a picture of the pads on the bottom side of the LED and brought it into Illustrator. I tried keeping the image to scale with the part and measured the size of the pads. Then I followed this trusty SparkFun guide on how to make SMD parts in Eagle. It took me longer than I would like to admit but my improved footprint is below. I revved my Eagle files with the new footprint.

Here’s a comparison of my new footprint (above) vs. the Adafruit footprint (below)

This is v02 design of my brain proto

With the update board files, I was ready to start fabricating again. I followed the same steps of milling, marking, solder paste, placing LEDs, and reflowing to create my assembled prototype. I thoroughly checked this board to make sure it wasn’t shorting across power and ground before powering it this time.

And voila! It’s alive!

Honestly, I feels proud that I could revisit my PCB drawing skills seeing they weren’t all lost to time! Also, I think I’m a pro on the Bantam now, milling my own boards. Super bad-ass!

Next Steps

  • Redesign the other brain view in Eagle with new footprint

    • Mill, assemble, test that proto

    • Try out some other LED animations?

    • Need to order presence sensor

  • Do Fusion 360 Tutorial

    • Find (or model) a brain

    • Try out the slicer and make a cardboard prototype

  • Continue working on Washing Machine

    • Try out new motor driver

    • Do I need to order a stronger motor and power supply?

Resources

My GitHub repo with Eagle design files and code

https://learn.sparkfun.com/tutorials/designing-pcbs-smd-footprints

https://learn.sparkfun.com/tutorials/making-custom-footprints-in-eagle/all

[ITP: Thesis I] Research and Prototype Update

Research

I did a lot of research on the parts of the brain and neurons which you can find at this blog post.

I also finished ready Your Body is Not Your Body, edited by Alex Woodroe and Matt Blairstone. This is an anthology of horror stories written by trans and gender non-conforming authors. I really enjoyed reading this book, fun research for spooky season! After finishing, I went through story by story and did some word association. Here are some of my thoughts:

Some themes/concepts I identified were: mutilation, transfiguration, acceptance, gender presentation, gender roles, gendered bodies (society is stuck on classifying bodies this way), weaponizing bodies, bodies under attack, bodies in desperation, violence

What happens when the body doesn’t look or function the way we’re used to? How does this challenge our way of thinking?

Interview

Erin Mamaril, MS in Nursing, BS in Neuroscience & Cognitive Science, my smartest high school friend

General question: what does anxiety and depression do to the brain?

  • Check out: Greg Dunn, Neuro artist

  • There are circuits of specific interest —> prefrontal cortex

    • Connections break down and there’s noisy firing related to anxiety/depression

  • Default mode network is the part of the brain that is active when we’re not doing anything, like day dreaming and thinking about the future

    • This gets broken down too in depressed people

  • Anxiety and depression are really connected in the brain

    • Amygdala is overactive when we are fearful, less control

    • Physical responses: heart rate, breathing, etc.

    • Lizard brain (brain stem) takes over

  • Neurogenesis: it was largely believed that humans don’t generate more neurons, we get what we’re born with

    • Research has shown that new neurons can be produced in the hippocampus but this doesn’t really happen in the case of chronic anxiety and depression

  • Mindfulness is something you have to intentionally practice

    • Physical vs. cognitive parts of anxiety, there’s a connection but they’re also separate

    • Tune into what’s happening in your body to learn that it’s not necessary for this level of threat

Creative Experiments and Investigations

Bantam Desktop PCB Mill Test

Last week I learned how to use the Bantam mill to make PCBs for my Digital Fabrication class. Here’s the demo PCB I cut. I plan on using the Bantam to prototype my brain sculpture. And the shop stocks a whole bunch of sheets of copper circuit board.

For my own reference: single and double sided PCB blanks, 4x5 inches.

Circuit Design

I ordered some preliminary parts:

I chose these LEDs because of their affordability and built-in library and EAGLE support.

Another thing I learned while prepping to design this prototype is that the EAGLE PCB design software is EOL (end of life) in 2026. Autodesk will no longer be supporting it but EAGLE designs and libraries will be fully compatible with Fusion 360 electronics workspace.

That being said, I used EAGLE a lot at my last job, so I’m pretty familiar with it, and I’m going to use it for this project. It’s been a long time since I started it up on my computer and I needed to create a new personal Autodesk account and get my workspace set up with the SparkFun Eagle libraries and settings. In EAGLE, I went to “Options” and “Directories…” and made sure my paths were setup like this:

This way I will be able to use all the parts and design rules developed by SparkFun over the years. I might need to import some Adafruit libraries so that I don’t have to draw the symbol and footprint for the LEDs. Phil also told me that there might be design rules floating around for working with the Bantam mill (…can someone say: Homemade Hardware??).

Might as well install the Adafruit libraries as well…

Ok, cool! I got my EAGLE environment all setup, and look how cool this is! Here is the schematic drawing and PCB footprint for the LEDs I’ve ordered, they’re already part of the Adafruit libraries.

I wired up this schematic. It’s really just an addressable LED strip with some holes to attach headers and wires (spinal cord?!).

Getting a custom PCB shape took some trial and error. You can import DXF files to any board layer. I made some DXF outlines of brain shapes in Illustrator, but the shapes didn’t show up when I imported them into Eagle. For whatever reason, generating the DXF files in Inkscape was the only way I could get them imported properly. I followed this tutorial. Here are my first round of prototypes! Next step: the Bantam!!

I updated some parameters to mill on the Bantam. Generally, I followed some recommendations from the Homemade Hardware curriculum. Here’s what I changed:

  • Increase the trace width to 1 mm or 0.04 in

  • Add a GND polygon

Phil helped me get setup with the Bantam again. Next time I’ll be able to work the machine myself for sure! One thing he reminded me was that generally the machine mill as deep as the tool diameter (or even less) so the mill will make multiple passes on paths, especially if it is cutting all the way through.

Milled brain proto! :)

LED animations to write in code

  • Neurons firing, normal

  • Neurons firing, FAST

  • Spiraling — does this mean that LEDs need to be laid out in a circular pattern?!

  • Fuzzy, random, noisy neuron firing

Dude, get that Fusion 360 out of my face!

As much as I’ve been avoiding the propaganda, I think I might have to finally look into Fusion 360. I got some impromptu office hours with Phil while I was checking out the Bantam today and, surprise surprise, he was preaching the gospel of Fusion 360 again. If I want to make a 3D sculpture, I can draw (or find) a 3D model of a brain and slice it in Fusion 360. Adnan already gave me the slicer software which makes 2D slices of 3D drawings, guess I need to start watching some tutorials…

[ITP: Thesis I] Research Update

Body-ody-ody

I might not have any physical proof that I’ve been working on my thesis but I’ve been thinking about my project a lot, believe me! I recently re-started going to therapy. For someone who exclusively lives in her head and in the future, I think it is really funny that out of the three projects I made last year they are all kinetic sculptures that depict body parts. Is my subconscious trying to tell me something?!

I’ve never had a great relationship with my body. My body image has always been crap.

I don’t really take care of it either. I’m not one for long skin care routines or workouts. I don’t put much time into take care of my hair or cooking for myself. I’m so busy or worried about the future or my never-ending to do list that I don’t prioritize the physical here and now. It’s never really been that important to me. I am realizing that some of these rituals are an expression of self-love and I want to learn to practice them more often.

Outside looking in. When my anxiety is really bad I cannot get out of my head, with all my spiraling thoughts. It makes it really hard for me to be in the present moment and feel myself in physical reality.

Thots, Questions, Keywords

technology as portraits, body as mechanism, priyanka as mechanisms, self-portrait

Why do I want to make myself known through these mechanisms?

Cyborg, post-human

Woman/female bodies, bodies under attack

Embodiment, anxiety, depression - how does my anxiety manifest itself in my body?

bio something?! human being in nature, human being is nature

Reading List

On hand

So missed the presentation from the librarian about how to do research at our library. I do plan on reaching out to her soon, but I honestly just googled books on the body and I decided to start with these for my research. As I’ve been thinking about my project, I feel these three books are a good starting point and offer a broad array of POV.

Also, I am a firm believer in judging books by their covers…

Book on embodiment

Anthology of horror stories written by trans or non-binary authors

Reading for “Multispecies Theory” class in IDM. Bodies, environment, nature, the works!

Future Reading

Beyond the Periphery of the Skin: Rethinking, Remaking, and Reclaiming the Body in Contemporary Capitalism, Silvia Federici

The Body Keeps the Score: Brain, Mind, and Body in the Healing of Trauma, Bessel van der Kolk - this is kind of a long one, might be good for winter break

A Cyborg Manifesto, Donna J Haraway - tried reading the first two chapters of this last week and it is … dense. Need to try again

Recommendations from Friends

The Mindbody Perscription: Healing the Body, Healing the Pain, John E. Sarno M.D.

The Wounded Story Teller: Body, Illness, Ethics, Arthur W Frank

Her Body and Other Parties, Carmen Maria Machado

Further Research

Wow! I’ve gathered a lot of resources dealing with the human body in such a short time, also without consulting any “experts” yet. I do think I want to know more about the history of portraiture. Who are the people who got portraits made of themselves? What about self portraits? Why were they made? What cultural or historical significance do portraits serve? Etc etc etc

Experts for Interview

Blair Simmons - IMA Professor, artist, curator, story teller, and everything! She teaches many classes in her department among which is a class called Useless Machines. She also has a sculptural series called Archive of Digital Portraits in which she casts technological items in concrete and exposes them by chipping away with hammers and chisels.

Elizabeth Hénaff - computational biologist, artist, and assistant professor at IDM. She teaches a course called “Multispecies Theory: Design for the More-Than-Human”. Still need to do a bit more research on her work and her class but this seems really relevant to my project!

Would Danny Rozin also be a good person to interview?! Or Gabe BC? Lots of work on reflection, right?!

Path Forward

Next Two Weeks

  • Start reading my books, look at library presentation you missed

  • Think up questions for Blair and schedule an interview for next week

  • Revisit Womb/Washing Machine

    • Bring into school, get it working right, finish putting it together

    • Finish writing up documentation and book an appointment with the Doc Lab

  • Start designing a prototype for brain circuit for Digi Fab class. This could potentially be a part of my thesis

And Beyond

  • Think up questions for Dr. Hénaff and reach out to her

  • Continue working on brain circuit

  • Body part brain storm, how do I relate to my own body?

  • Revisit Lungs sculpture

  • Ideas: lil wooden guy, nipples (3D modeling), eyes (video?)

[ITP: Thesis I] Inquiry Space

Initial Idea

Brainstorming

Mind map

Inquiry space

Inspiration List

[Kinetic sculpture, self portrait] Tim Hawkinson, Emoter

[Creative Tech, PCB sculpture] Kelly Heaton

[Creative Tech, Wearable] Sarah Petkus, She Bon

[Creative Tech, Open Source, Education] Twirling Tech Goddess

[Creative Tech, Education] Alice Stewart

[Creative Tech, Coding, Education] Sailor Hg, Fruit computers

[Creative Tech, Textile, Cultural] Electric Aruma, Sandra Deberduccy

[Electronics, Studio] Smooth Technology

[Electronics, Open Source, Company] SparkFun Electronics

[Electronics, Open Source] Open Source Hardware Association

[Coding, Education] Bubble Sort Zines

[Mechanics] 507 Mechanical Movements

[Illustration] Laura Callaghan

[Art, Illustration] Evan Lorenzen, @artandsuchevan

[Illustration, Sexuality] @kliuwong

[Illustration, Cultural] Lauren YS, @squid.licker

[Soft material, Cultural] @shishi.san

[Soft material, Sculpture] Audrey Montoya

[Soft material, Textile] Tessa Perlow

[Soft material, Studio] Pneuhaus

[Biodesign] Neri Oxman

She Bon, Sarah Petkus

Laura Callaghan illustration

Casulo by Sandra DeBedruccy

Grove by Pneuhaus